If you like the plants or flowers and you want to enhance the look of the patio, you should consider building a beautiful wooden planter. Nevertheless, having so many options makes the choice of the right wooden planter plans very hard. There are a lot of designs and materials you could choose from, so make sure you study the alternatives, before taking a decision.
If you will place the planter outdoor, you should buy quality and durable materials, such as redwood, pine or cedar. When choosing the wooden slats and posts, we recommend you to take a look on their condition. As a general rule, don’t buy lumber that isn’t straight or has lots of knots, twists, chips or splits. In addition, use a pocket hole system to join the components together, as it will hide the head of the screws.
Plans for wooden planters

Building a wooden planter
Materials
- 1 – 4 pieces of 4×4 lumber – 25” long LEGS
- 2 – 8 piece of 1×4 plywood – 16 1/2″ long BRACES
- 3 – 12 pieces of 1×6 lumber – 18 1/2” long WALLS
- 4 – 4 pieces of 1×4 lumber – 20 1/2” long, 2 pieces of 1×4 lumber – 16 1/2” long FLOORING
- 1 piece of 4×4 lumber – 10 ft
- 2 pieces of 1×4 lumber – 10 ft
- 2 pieces of 1×6 lumber – 10 ft
- 50 pieces of 2 1/2″ screws
- 100 pieces of 1 1/4″ screws
- glue, stain
Tools
- Hammer, Tape measure, Carpentry square
- Miter saw, Drill machinery, Screwdriver, Sander, Router
- Safety Gloves, Safety Glasses, Respiratory Mask
Time
- One day
Made from this plan
Wooden Planter Plans

Building the sides of the planter
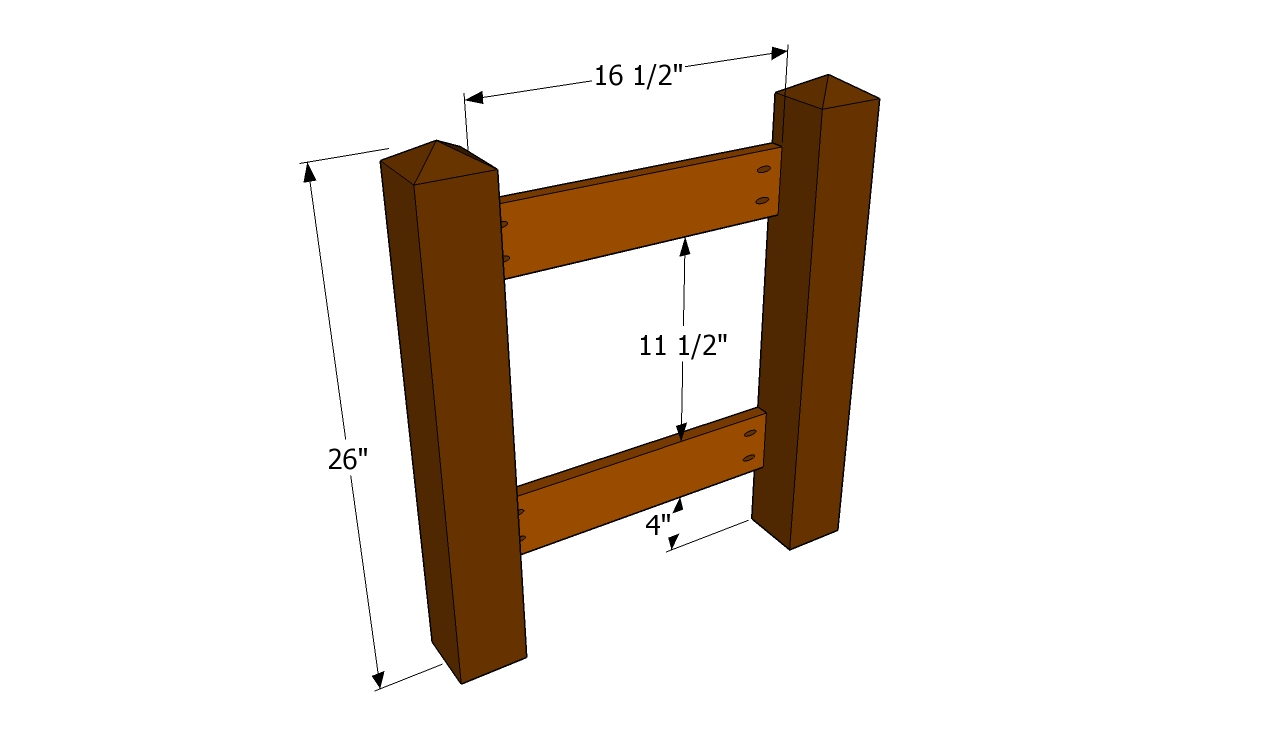
The first step of the project is to build the faces of the wooden planter. In order to get an accurate result, we recommend you to build the posts from 4×4 lumber and to glue a decorative cap to their top. Use 1×4 lumber to build the braces and attach them to the posts with 1 1/4” pocket screws.
PRO TIP: Work on a level surface and check the corners for squareness, before going to the next step.

Building the planter’s frame
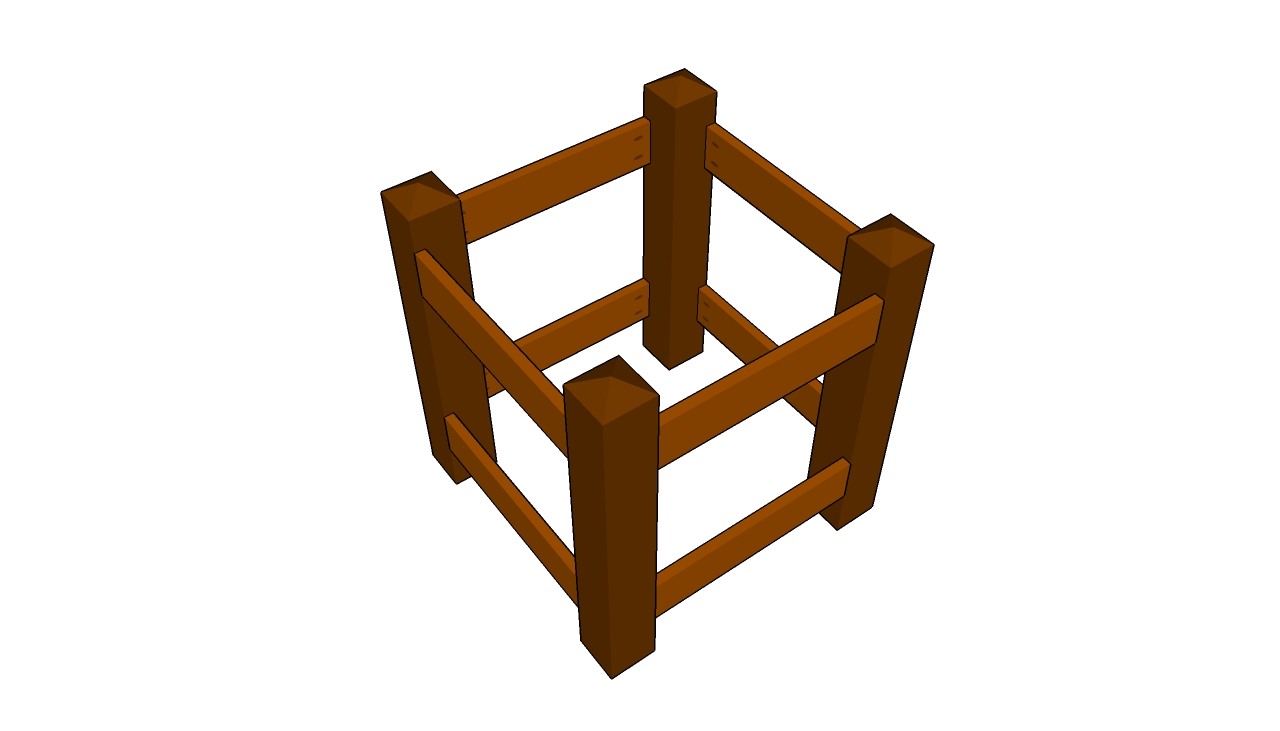
After building the two sides of the planter, you should join them together with 1×4 braces. In order to obtain a rigid structure, we recommend you to drill pocket holes and to drive in 1 1/4” wood screws. Use a spirit level to plumb the sides, before attaching the braces.

Attaching the side slats
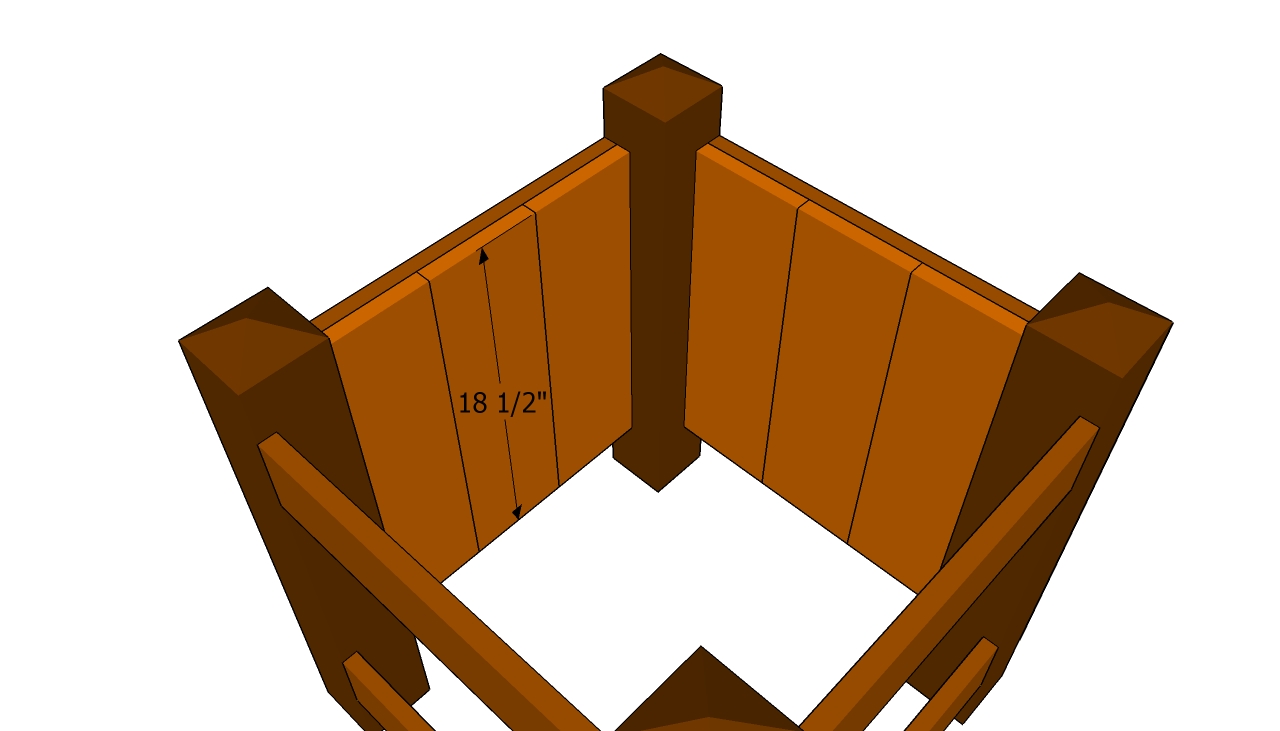
The next step of the project is build the walls of the large garden planter. As you can easily notice in the image, you should place the slats on the inside of the planter, as to get a rustic appearance. Drill pilot holes at both ends of the slats and drive in 1 1/4” screws.
PRO TIP: Add glue to enhance the rigidity of the joints and countersink the head of the screws.

Building the floor
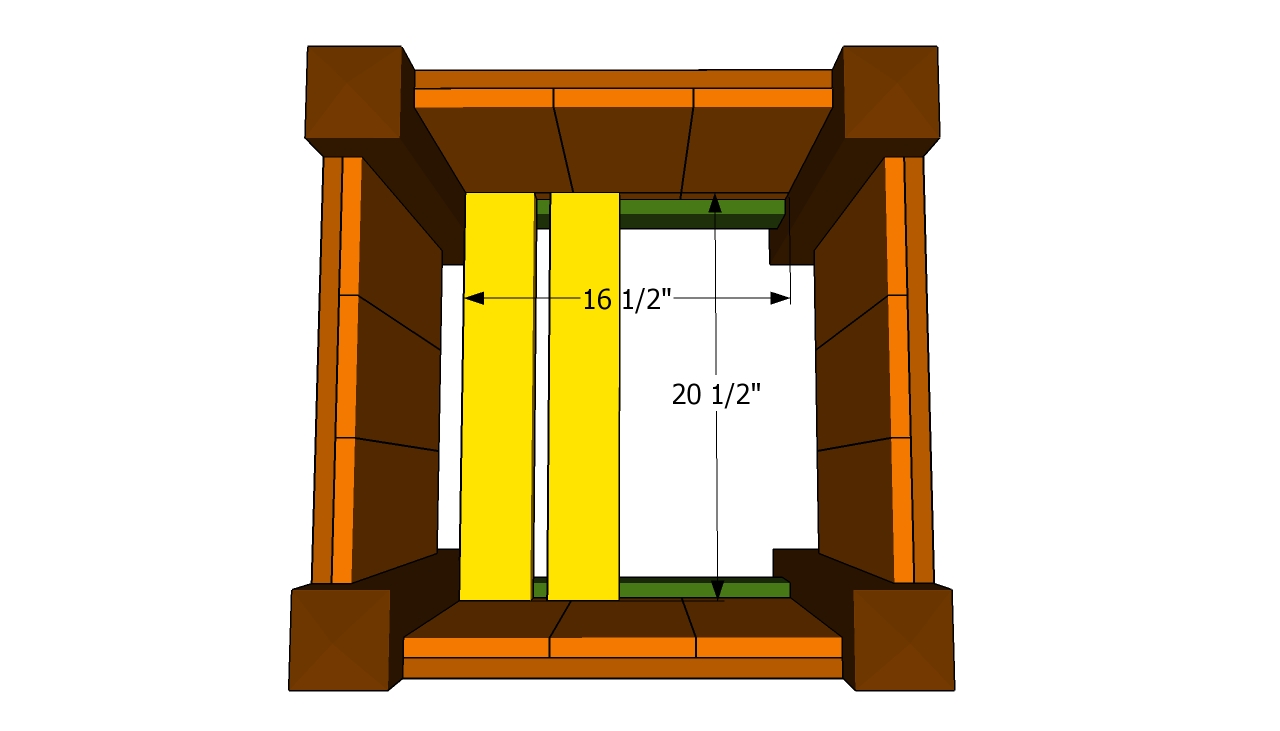
Attach two 1×4 cleats at the bottom of the planter and secure them to the walls with 1 1/4” wood screws. Use a spirit level to make sure the cleats are horizontal. Next, fit several 1×4 slats on top of the cleats, leaving about 1” between them. Pre-drill both ends of the slats and insert 1 1/4” screws.

Wood Planter Plans
Last but not least, there are a few finishing touches you should take care of. On one hand, you should check if the heads of the screws are level with the surface of the planter and make adjustments, if necessary. On the other hand, fill the holes with a good wood filler and let it dry out properly. Smooth the wooden surface with 120-grit sandpaper and vacuum the residues.
PRO TIP: Apply several coats of stain or paint to protect the wooden surface against wood decay. Make sure you choose a color that matches the rest of the constructions on your property.
This diy project was about wooden planter plans. If you have enjoyed the free project, we recommend you to share it with your friends, by using the social media widgets.
