If you want to learn more about wooden patio cover plans, you have to take a close look over the free plans in the article. I had many requests to design a lean to roof that will be attached to the patio. Therefore, this wooden structure is sturdy and it can be built with common tools. In addition, I have these plans in an easy printable format for you, so you can download them. Remember to read the local codes before starting the project and to comply with the local regulations. The codes differ from one area to another, so it is safer to read them thoroughly.
If you want to get the job done in a professional manner, we recommend you to plan everything with attention, as to prevent costly mistakes and to build a professional garden project. Invest in high quality materials, such as cedar, pine or redwood, as the bench will be exposed to all kinds of weather. Apply a few coats of paint over the components, to enhance their appearance and to protect them from bad weather.
Made from this plan
Patio Cover Plans – PDF Download
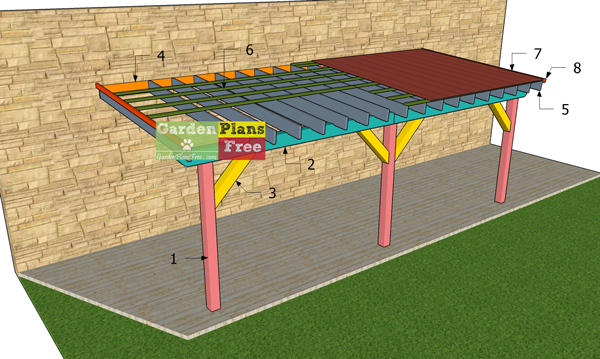
Building-a-patio-cover
Materials
- 1 – 3 pieces of 6×6 lumber – 84″ long POSTS
- 2 – 2 pieces of 6×8 lumber – 144″ long TOP BEAMS
- 3 – 4 pieces of 6×6 lumber – 36″ long BRACES
- 4 – 2 pieces of 2×8 lumber – 144″ long LEDGER
- 5 – 19 pieces of 2×6 lumber – 118 1/2″ long RAFTERS
- 6 – 18 pieces of 1×4 lumber – 144″ long PURLINS
- 7 – 8 pieces of 3×10 metal sheets ROOFING
- 8 – 2 pieces of 1×4 lumber – 121 1/2″ long TRIMS
- 3 pieces of 6×6 lumber – 8 ft
- 1 piece of 6×6 lumber – 12 ft
- 2 pieces of 6×8 lumber – 12 ft
- 2 pieces of 2×8 lumber – 12 ft
- 19 pieces of 2×6 lumber – 10 ft
- 20 pieces of 1×4 lumber – 12 ft
- 8 pieces of 3×10 metal sheets
- 3 post anchors
- 100 pieces of 2 1/2″ screws
- 100 pieces of 5 1/2″ screws
- wood glue, stain/paint
- 19 pieces of rafter ties
- 3 post to beam connectors
- 19 pieces of rafter hangers
- 1 box of 1 1/2″ structural screws
Tools
- Hammer, Tape measure, Carpentry square
- Miter saw, Drill machinery, Screwdriver, Sander, Router
- Safety Gloves, Safety Glasses, Respiratory Mask
Time
- One week
STEP 1: Laying out the posts
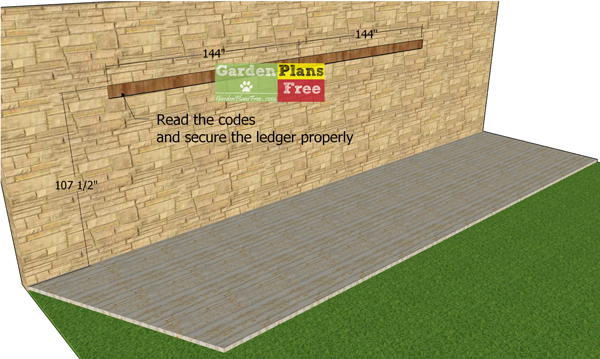
Fitting-the-ledger-boards—covered-patio
The first step of the project is to attach the ledger boards to the house / wall. I recommend you to read the local codes, for the best techniques and products. Usually, you need to insert lag screws every 12″ and secure the boards to the house structure. But again, this will differ according to support surface.
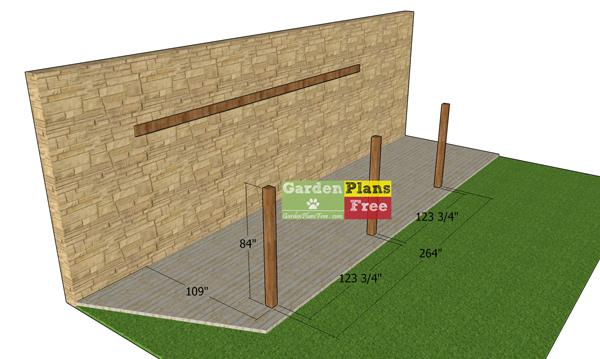
Laying-out-the-posts
Next, you need 6×6 lumber for the posts. As you can see, you need to mark the location for the posts and dig the holes for the footings.
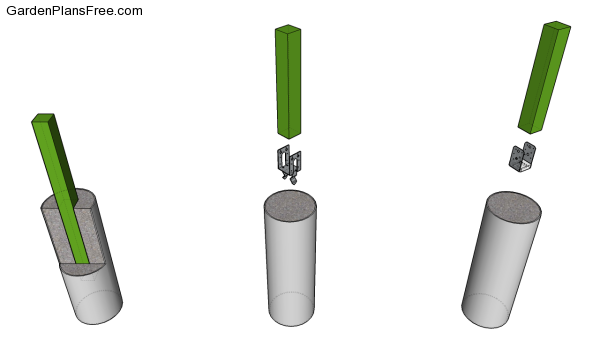
Fitting the posts into concrete
You can set the posts into place with several methods. First of all, you can attach the posts to an already existing concrete slats using metal anchors. Alternatively, you can dig 2-3′ deep holes and pour concrete footing in which you set post anchors. Last but not least, you can dig the holes and set the posts directly into concrete.
For this project, we will assume you will use metal anchors. Use a spirit level to plumb the posts vertically and use temporarily braces to lock them, until you build the roof for the pergola.
Step 2: Building the base of the pergola
Fitting-the-to-plates—patio-cover
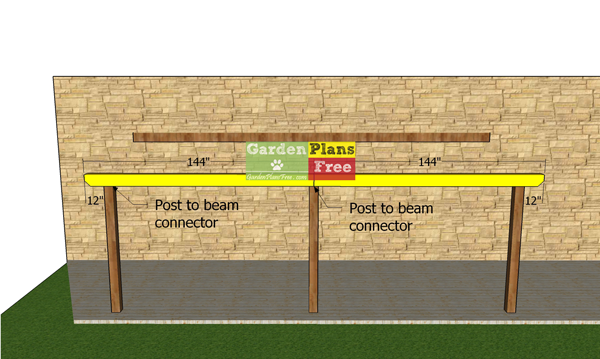
Use 6×8 lumber for the top plates. Use temporarily braces to lock the posts into place tightly, while you assemble the frame for the patio cover. Set the beams into place and use post to beam connectors to lock everything tightly.
Fitting-the-braces—covered-patio
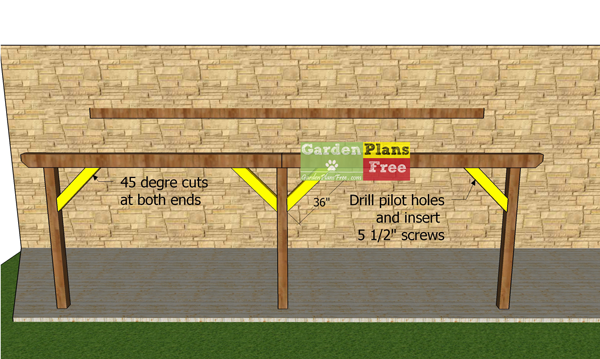
We need to add 6×6 braces to the frame of the patio cover. These braces will also help you against lateral movements. Make 45 degree cuts to both ends of the braces and then secure them into place tightly. Drill pilot holes through the braces and insert 5 1/2″ screws to lock them into place tightly. Use at least 2 screws for each joint.
STEP 3: Building the roof for the patio cover
Rafters—patio-cover
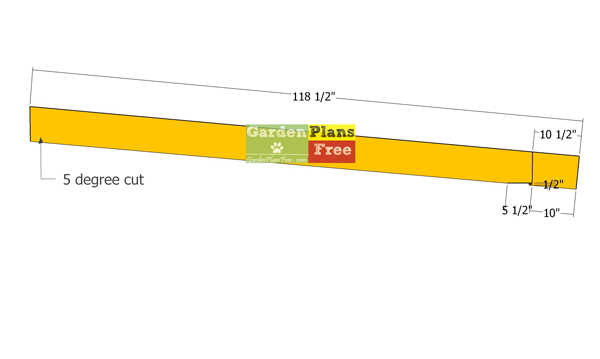
Use 2×8 lumber for the rafters. Make the 5 degree cut to one end of the rafters. In addition, mark the cut lines over the boards and make the birdsmouth cuts.
Fitting-the-rafters
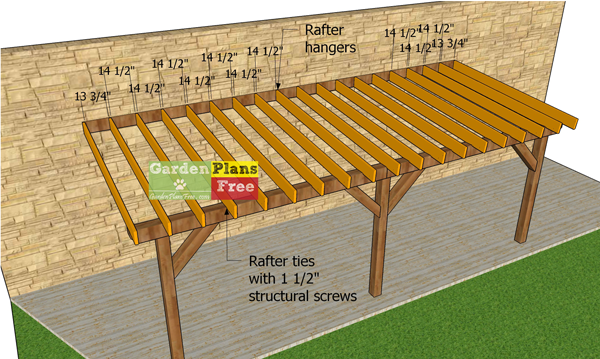
Fit the rafters to the top of the patio cover structure. Place the rafters every 16″ on center. Use rafter hangers to lock the rafters to the ledger boards and rafter ties to secure it to the to plates. Insert 1 1/2″ structural screws to secure the rafters into place tightly.
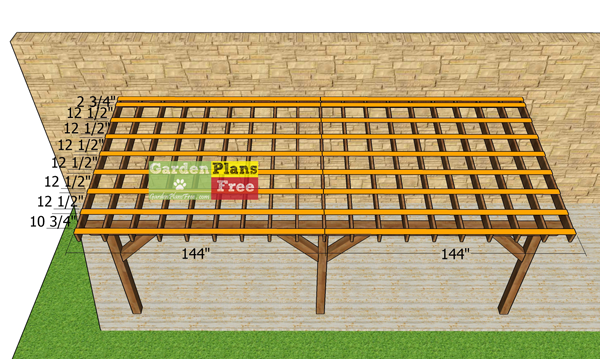
Fitting-the-purlins—lean-to-patio-cover
Use 1×4 lumber for the roof purlins. Lay the purlins to the top of the roof, staring from the bottom to the top. Align the edges flush and place the purlins every 16″ on center. /insert 2 1/2″ screws to lock the purlins into place tightly.
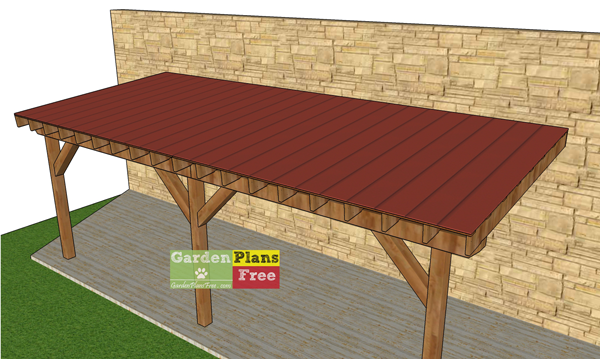
10×24-patio-cover-plans
Fit the metal roof sheets to the top of the patio cover. Align the edges and then insert screws to lock the sheets to the purlins.
STEP 4: Finishing touches
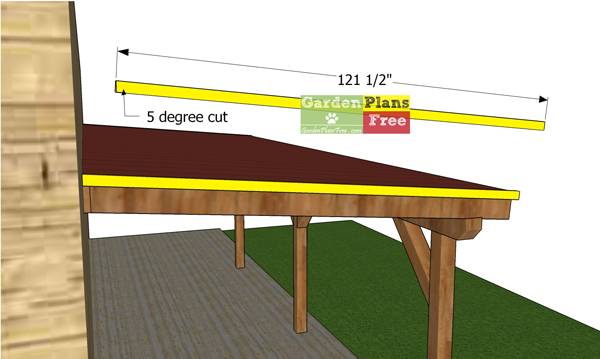
Side-roof-trims
Use 1×4 lumber for the side trims. Make a 5 degree cut to one end of the trims. Attach the trims to the sides of the roof and lock it into place with 2 1/2″ screws. See plans for a 12×16 pergola on my blog, as well.
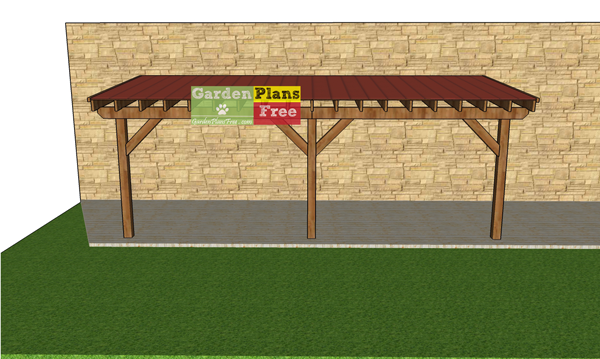
Lean-to-patio-cover-plans—diy
This wooden attached patio pergola is easy to build and I can assure you this will dramatically upgrade your property.
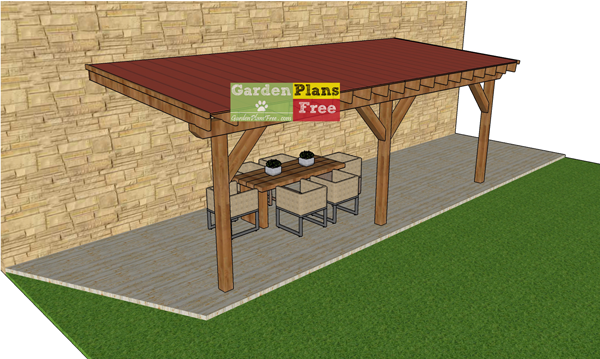
How-to-build-a-patio-cover-with-lean-to-roof
You can easily transform this into an attached pergola, if you don’t fit the purlins and the metal roof panels. You might also want to see plans for a 12×16 attached pergola.
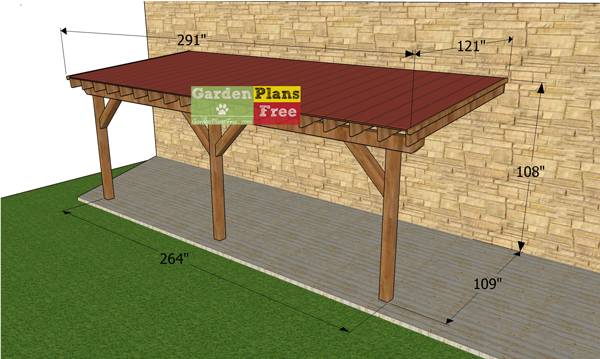
Patio-cover—dimensions
This patio cover features a metal sheet roof, so you can make it water proof while enjoying your time in the garden. If you are like me, the patio will become your new favorite place because you have fresh air and a cute roof over you head. Make sure you take a look over all my pergola plans HERE.
This diy project was about 10×24 patio cover made from wood plans. If you have enjoyed the free project, I recommend you to share it with your friends, by using the social media widgets.


8 comments
Do you have plans for 16 x 36 cover patio
Have a 16 x 39 and I’m thinking about using three pillars attached to the house can you give me some ideas and how much would it cost on material and your plans to build something like this I don’t know if I want to use flat aura pyramid style anything you can help me with that be nice and then you can let me know what would it cost for the plans and maybe material that I can build it
I just purchased your plans for this.
When can I expect to receive them?
All plans are sent automatically to your email. Just check all folders, including spam, there’s a download link inside the email.
Can you draw me a plan for 16’ by 24’?
I have a question I have like plastic feeling siding and dont feel confident installing the flat piece against it would it be possible to modify this plan to make it free standing?
thank you
Back 95 h 14 w 32 l 93 h front
14 x 32 close patio