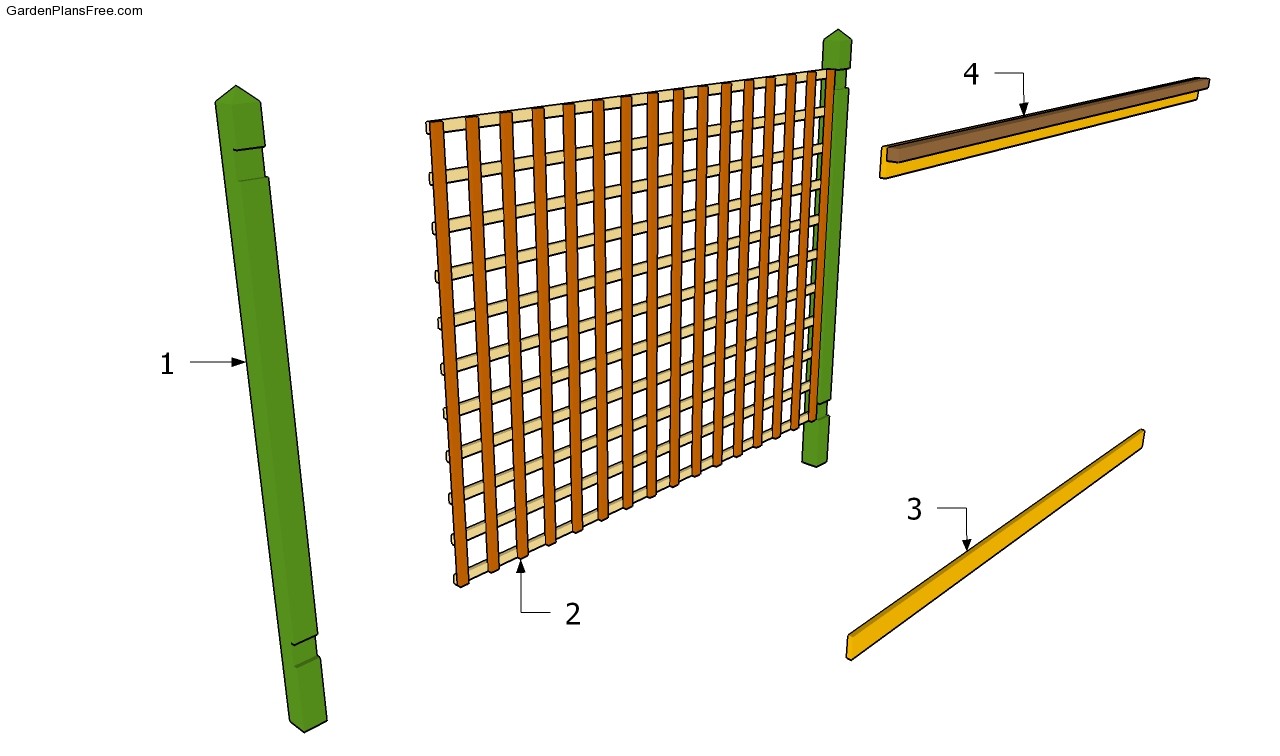
If you like climbing plans or you just want to make a privacy screen in your yard, you should consider building trellis. Nevertheless, there are many designs, shapes and sizes you could choose from. Selecting the right garden trellis plans is a difficult task, but if you make a proper choice it will most definitely add character to your backyard. Any person with basic woodworking techniques can get the job done, as it doesn’t require complex steps.
You should use weather-resistant lumber to get the job done, such as pressure-treated lumber, pine, cedar or redwood. In addition, make sure the components are straight and in a good condition, before using them for your woodworking project. Always drill pilot holes before inserting the wood screws, to prevent the wood from splitting. Use a spirit level to check if the components are plumb.
Building garden trellis
Materials
- 1 – 2 pieces of 4×4 lumber – 108″ long POSTS
- 2 – 16 pieces of 1×2 lumber – 60″, 11 piece of 1×2 lumber – 89” long TRELLIS
- 3 – 11 pieces of 1×3 lumber – 96″ long SUPPORTS
- 4 – 1 piece of 2×2 lumber – 96″ long TRIM
Tools
- Hammer, Tape measure, Carpentry Square
- Miter saw, Drill machinery, Screwdriver, Sander
- Safety Gloves, Safety Glasses, Respiratory Mask
Time
- One Weekend
Garden Trellis Plans
Posts plans
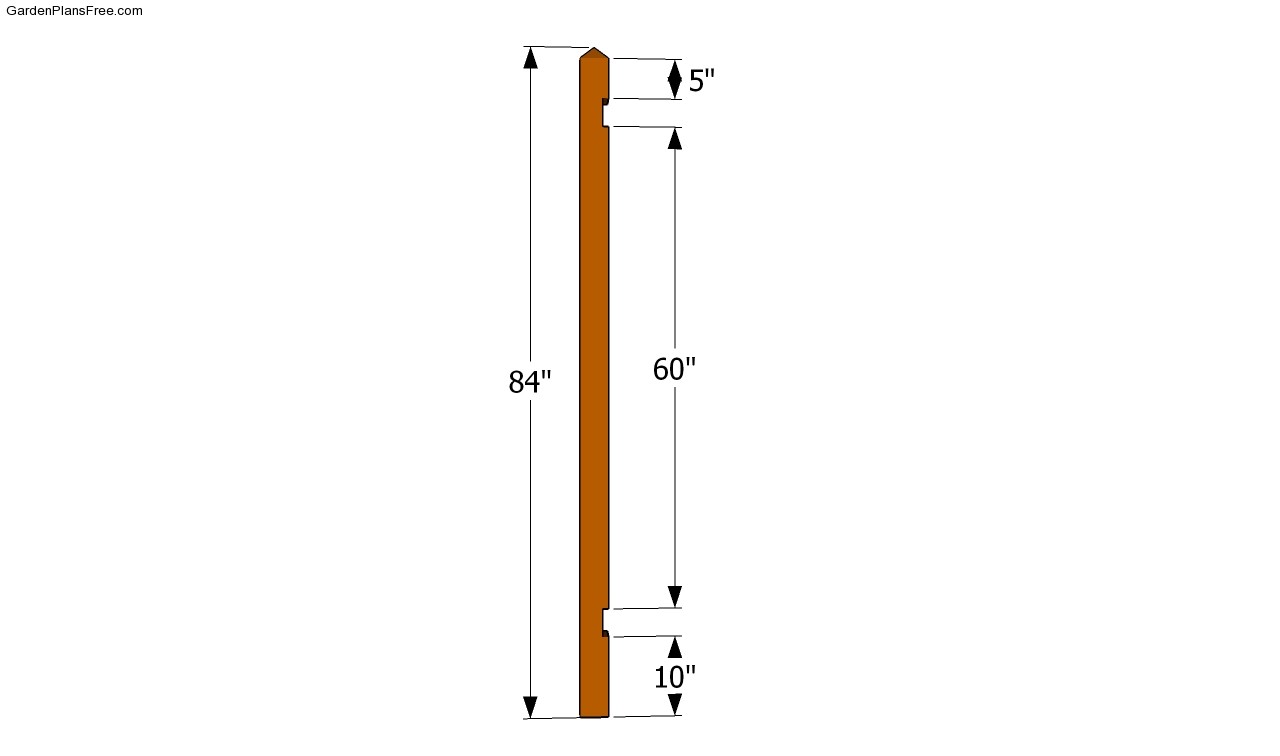
The first step of the project is to make the posts of the trellis. Taking into account the size of the garden trellis, you need to set the posts into concrete at least 2-3′. As you can see in the image, you need to cut out notches in the posts, as to fit the supports to which you will secure the trellis.
PRO TIP: The posts that can be see in the plans represents the top part, placed above ground. Therefore, don’t forget that you need to use 4×4 lumber at least 108″ long.
Installing the posts
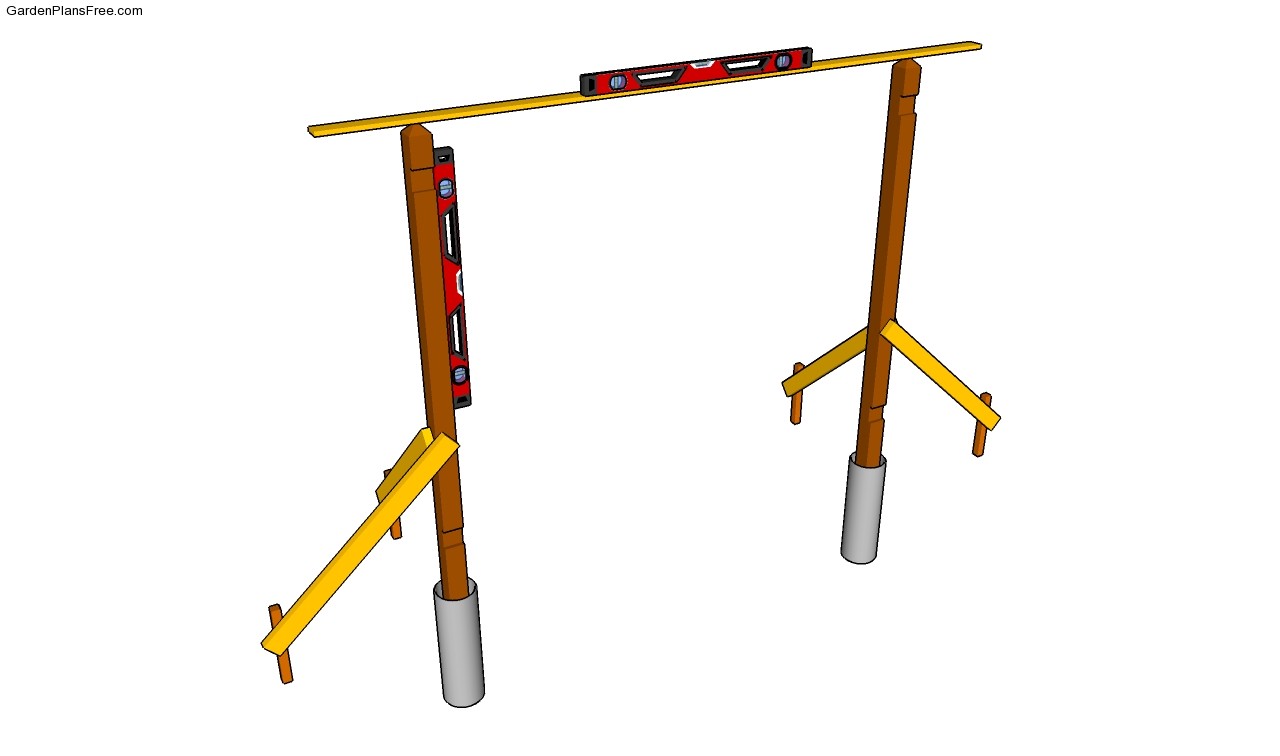
In order to lock the posts into place, you need to dig 2-3′ deep holes and fit tube forms. Pour a 2” thick layer of gravel and compact it thoroughly. Set the posts into the forms and level them properly, before setting them temporarily with 2×4 braces. In addition, place a straight-edge on top of the posts to check if they are at the same level.
PRO TIP: Pour concrete inside the tubes and level the surface with a trowel. Let the concrete to dry out for several days before installing the trellis to the posts.
Building the trellis
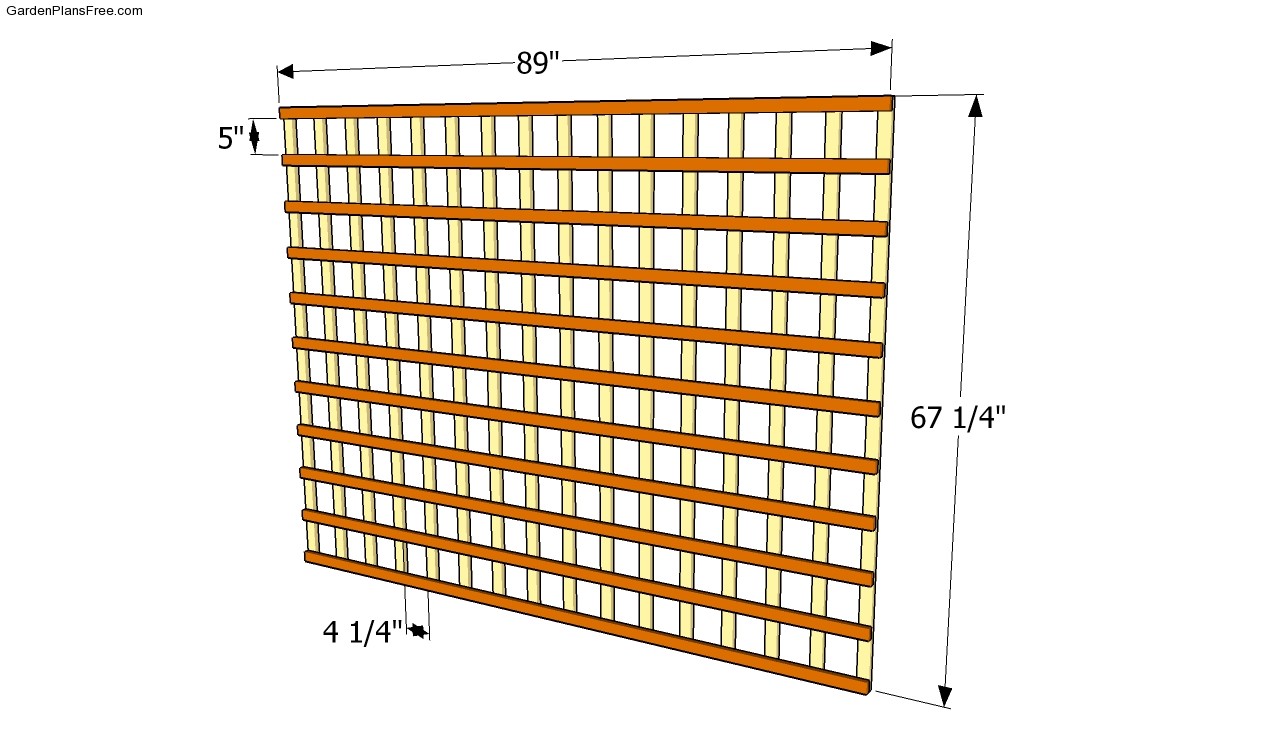
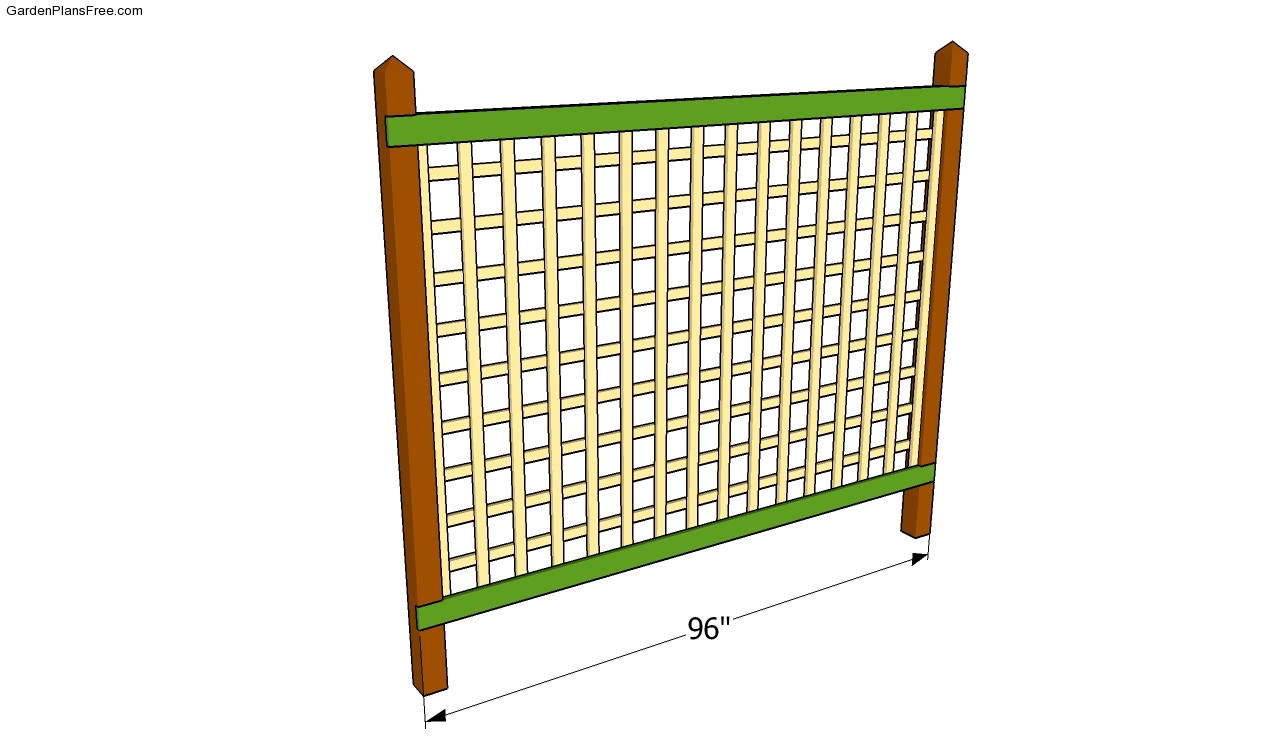
Building the wooden trellis is a straight forward job, as you just need to use 1×2 lumber and 1 1/4” screws. Place the slats on a level surface, making sure they are equally spaced. Drill pilot holes trough the components before driving in the screws from the back side of the trellis.
Fitting the trellis to the posts
Next, attach 1×4 slats to the bottom and top of the trellis and secure them to the 1×2 pieces with 1 1/4” screws. In order to get a neat appearance, we recommend you to drill pilot holes trough the supports before inserting the wood screws. Fit the supports into the notches and lock thme into place with 2 1/2” galvanized screws.
PRO TIP: Don’t forget to countersink the head of the screws, In this manner, you can fill the holes with filler and get a beat and even surface.

Garden trellis plans
Last but not least, you should take care of the final touches. Fill the holes with a good wood filler and let it dry out for several hours, before smoothing the surface with medium-grit sandpaper.
PRO TIP: Protect the wooden components of the trellis from decay by applying several coats of paint. In addition, if you choose the right color and finish, the trellis will enhance the look of your garden.
This diy project was about garden gate plans. If you have enjoyed the free project, we recommend you to LIKE and SHARE it with your friends, by using the social media widgets.

