If you have a large garden and want to create a cozy relaxation area, there are many options to choose from: decks, gazebos or pergolas. Nevertheless, maybe the most important part of the project as a whole is to build garden chairs and a nice wooden table. Choosing proper garden chair plans is challenging, as there are endless possibilities to choose from, either we speak of designs, materials or size.
Always pay attention to the preliminary stages, if you want to prevent potential issues and to get the job done quickly. From our experience, we recommend you to buy quality materials, such as cedar, pine or redwood and professional tools. Check the wooden components with great attention, as you need to use components in a very good condition. Moreover, align them at both ends, before inserting the screws or nails.
RELATED PLANS:
Building a garden chair
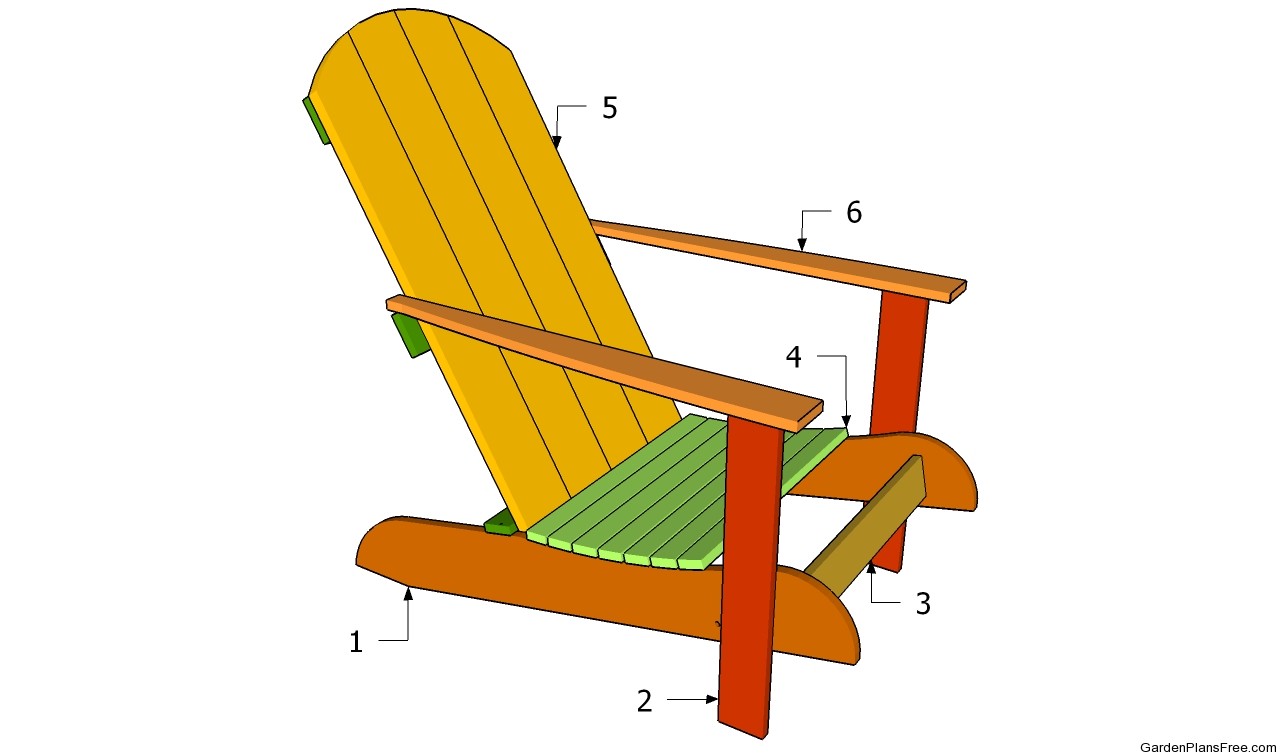
Building a garden chair
Materials
- 1 – 2 pieces of 1×6 lumber – 46 1/4″ long SEAT SUPPORT
- 2 – 2 pieces of 1×4 lumber – 25″ long LEGS
- 3 – 1 piece of 1×4 – 22 1/2″ long SUPPORTS
- 4 – 14 pieces of 1×2 lumber – 24″ long SLATS
- 5 – 4 pieces of 1×6 lumber – 46″ long, 2 pieces of 1×4 – 22 1/2″, 1 piece – 25 1/4″ long BACK SUPPORT
- 6 – 2 pieces of 1×4 lumber – 34 1/2″ long ARM RESTS
- 3 pieces of 1×6 lumber – 8 ft
- 3 pieces of 1×4 lumber – 8 ft
- 4 pieces of 1×2 lumber – 8 ft
- 4 pieces of 2″ carriage bolt
- 50 pieces of 1 1/4″ screws
- 100 pieces of 1 5/8″ screws
- wood glue, stain/paint
Tools
- Hammer, Tape measure, Carpentry Square
- Miter saw, Drill machinery, Screwdriver, Sander
- Safety Gloves, Safety Glasses, Respiratory Mask
Time
- One Day
Garden Chair Plans
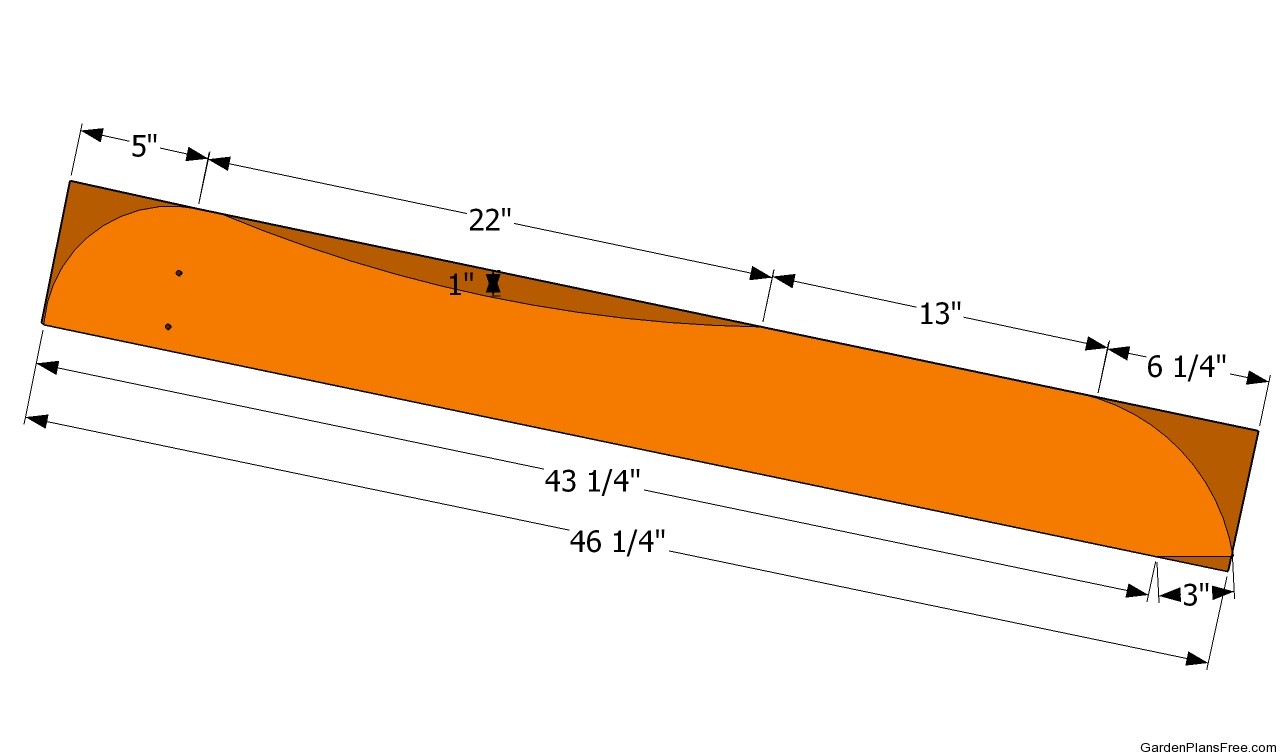
Building seat supports
The first step of the woodworking project is to build the seat support. Therefore, build the components from 1×6 lumber using the above diagram. Mark the cut lines on the wooden board and make the cuts with a circular saw. In addition, make the curved lines with a jig saw. Smooth the cut edges with a sand belt or round the edges with a router and a 3/4″ bit.
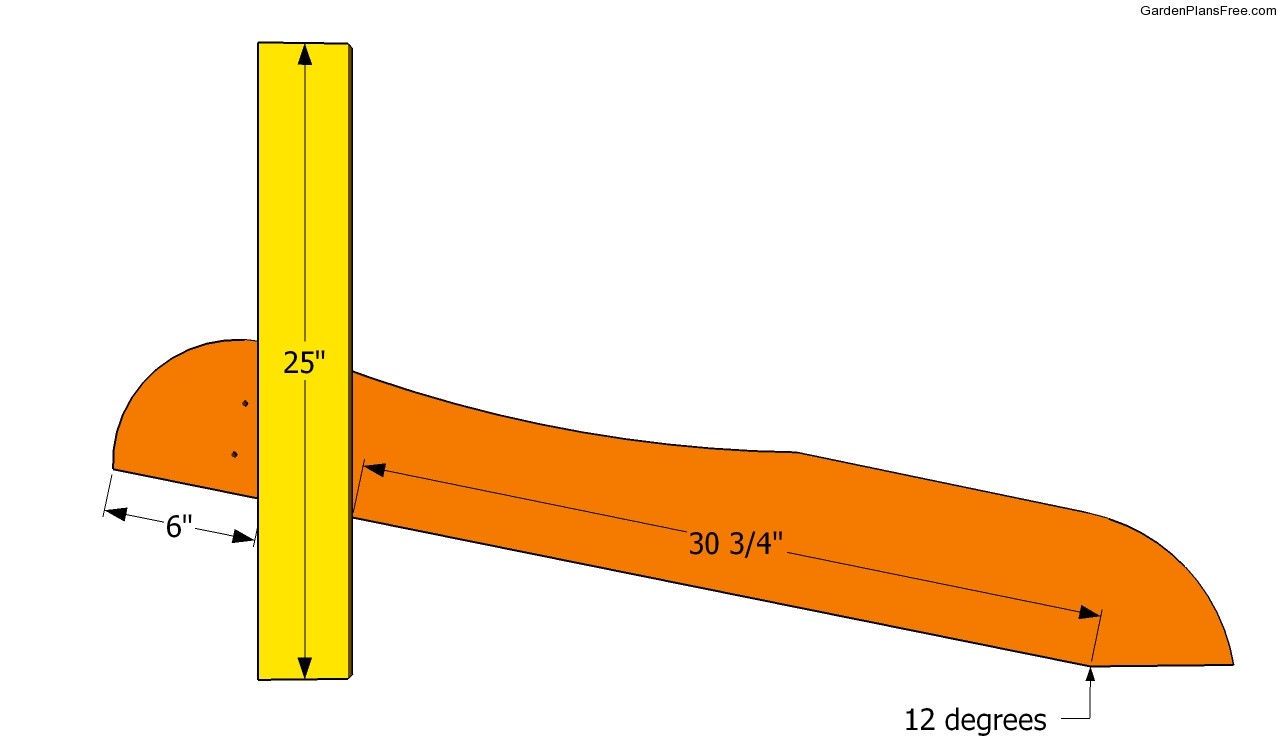
Installing the front legs
Build the front legs from 1×4 lumber and lock them into place with carriage bolts. Place the components on a level surface, align them at both ends and drive 2″ carriage bolts, after drilling pilot holes. Repeat the process for the opposite side of the garden chair.
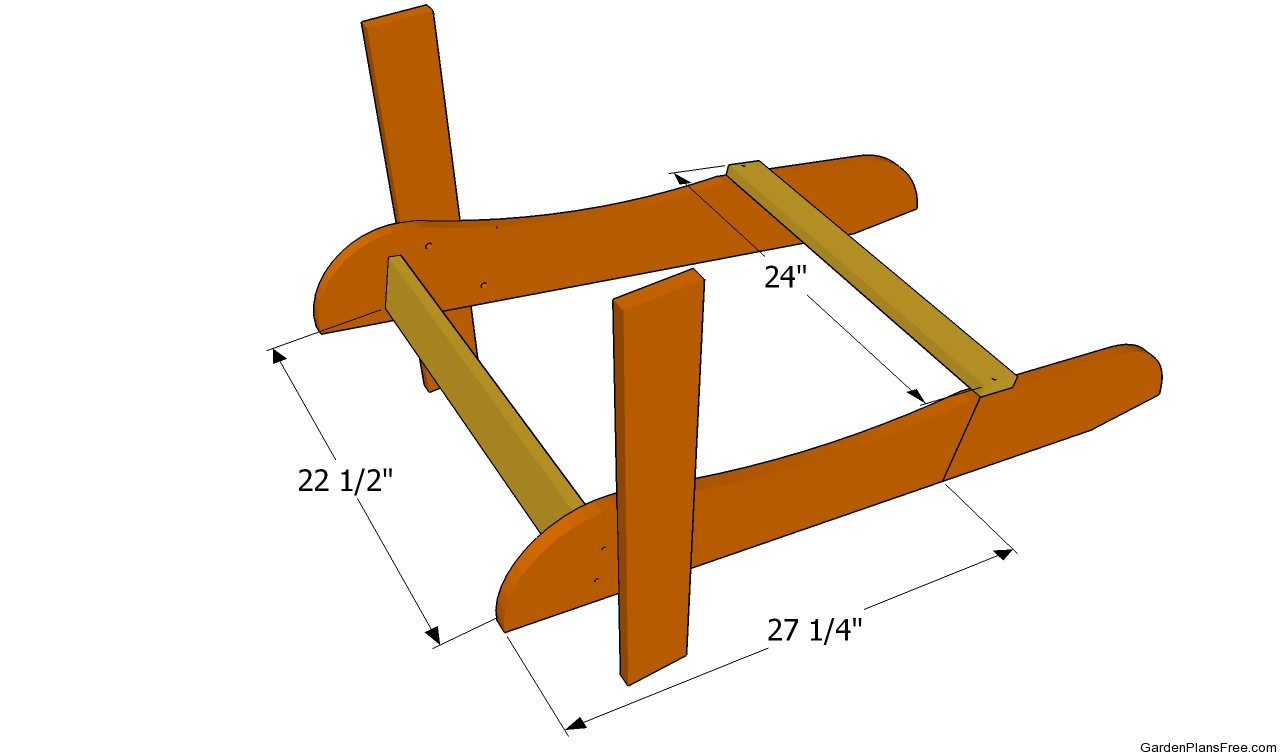
Fitting the supports
Continue the woodworking project by locking the sides of the chair together with the wooden supports. In order to get tight joints, we recommend you to drill pilot holes trough the seat legs and to insert 1 5/8″ galvanized screws into the supports. Alternatively, you could drill pocket holes at both ends of the support and insert 1 1/4″ screws.
PRO TIP: Attach the back support to the legs and drive in 1 5/8″ galvanized screws. Make sure you place the support properly, as you have to install the back support to it. In addition, the supports have to keep the sides of the chair equally spaced.
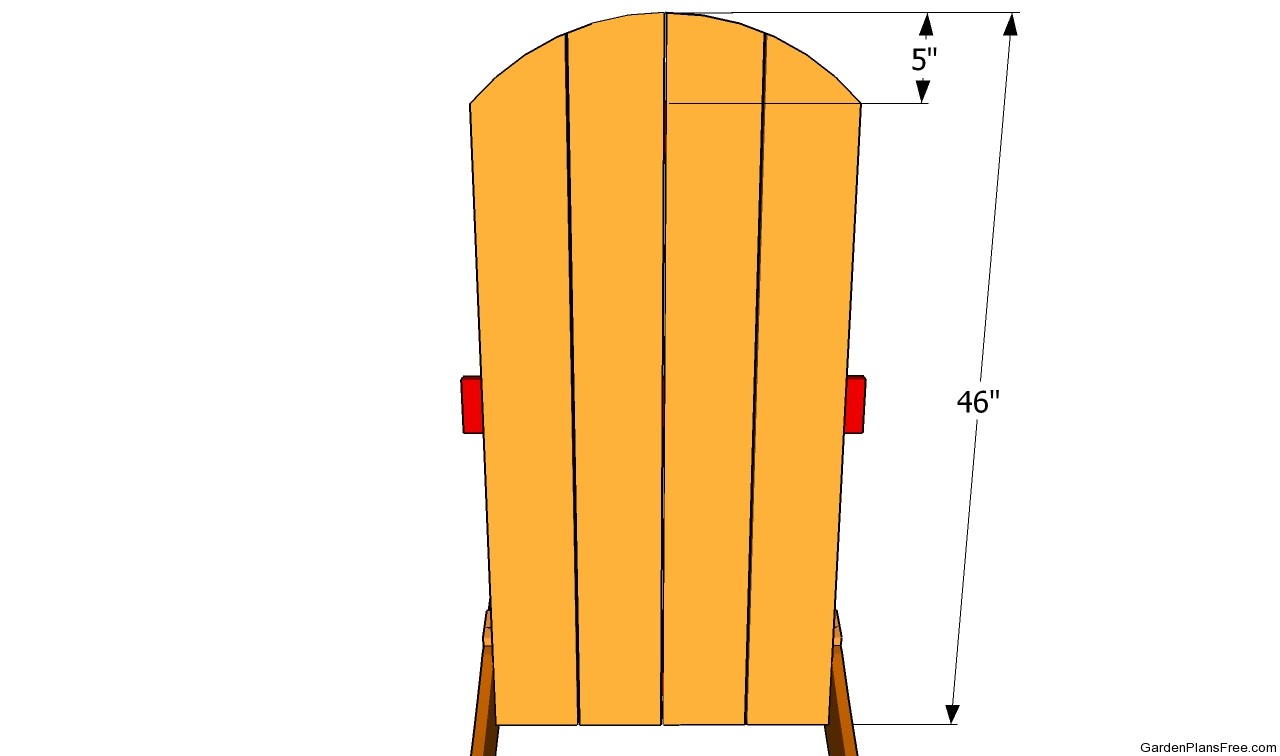
Back support plans
Building the back support can be done is several ways. From our experience, the easiest way to get the job done is to secure 1×6 slats to several supports. If you want to enhance the look of the chair, you could cut the top end of the slats in a decorative way, using a jigsaw. Drill pocket holes trough the supports and insert 1 1/4″ screws into the slats.
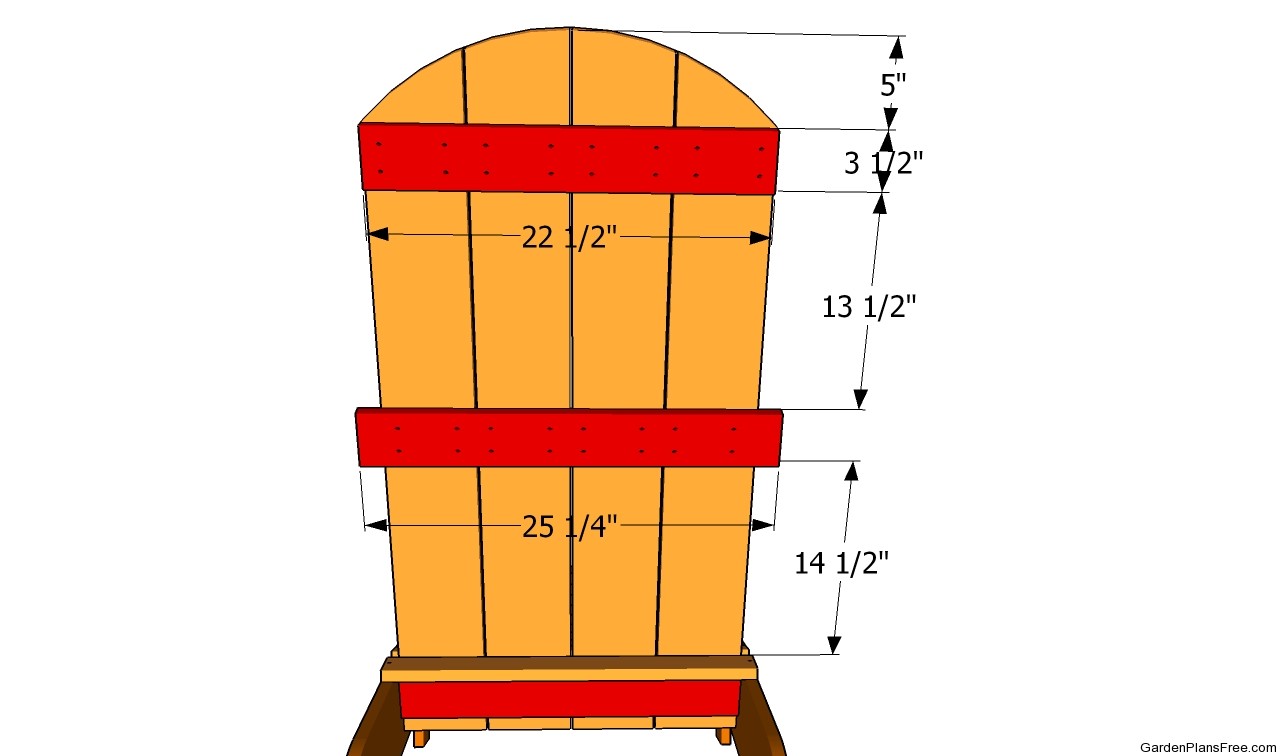
Installing the back support
After building the back supports you should lock it into place as in the image. As you can notice in the plans, you should drive 1 5/8” screws trough the frame of the chair into the bottom support of the back rest. You can get the job done by yourself, but you need another person to hold the components into place, before inserting the 1 1/4″screws.
PRO TIP: You can adjust the angle o of the back support according to your needs. Don’t forget that the lower the angle the longer the armrests.
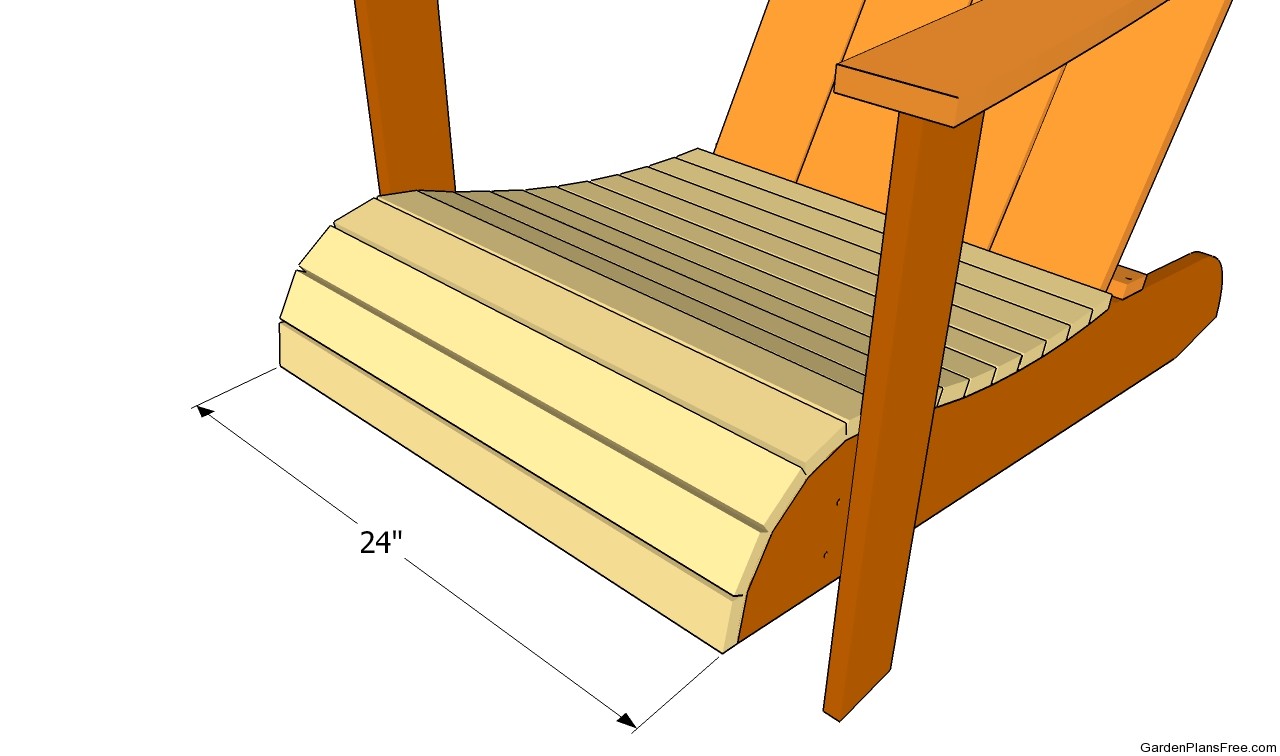
Installing the slats
One of the last steps of the woodworking project is to make the seat support. As you can notice in the plans, you should use 1×2 slats. Cut the wooden boards at 24″ and secure them to the frame of the chair with 1 5/8″ galvanized screws, after drilling pilot holes. In addition, we recommend you to countersink the head of the screws if you want to build a garden chair with a neat appearance.
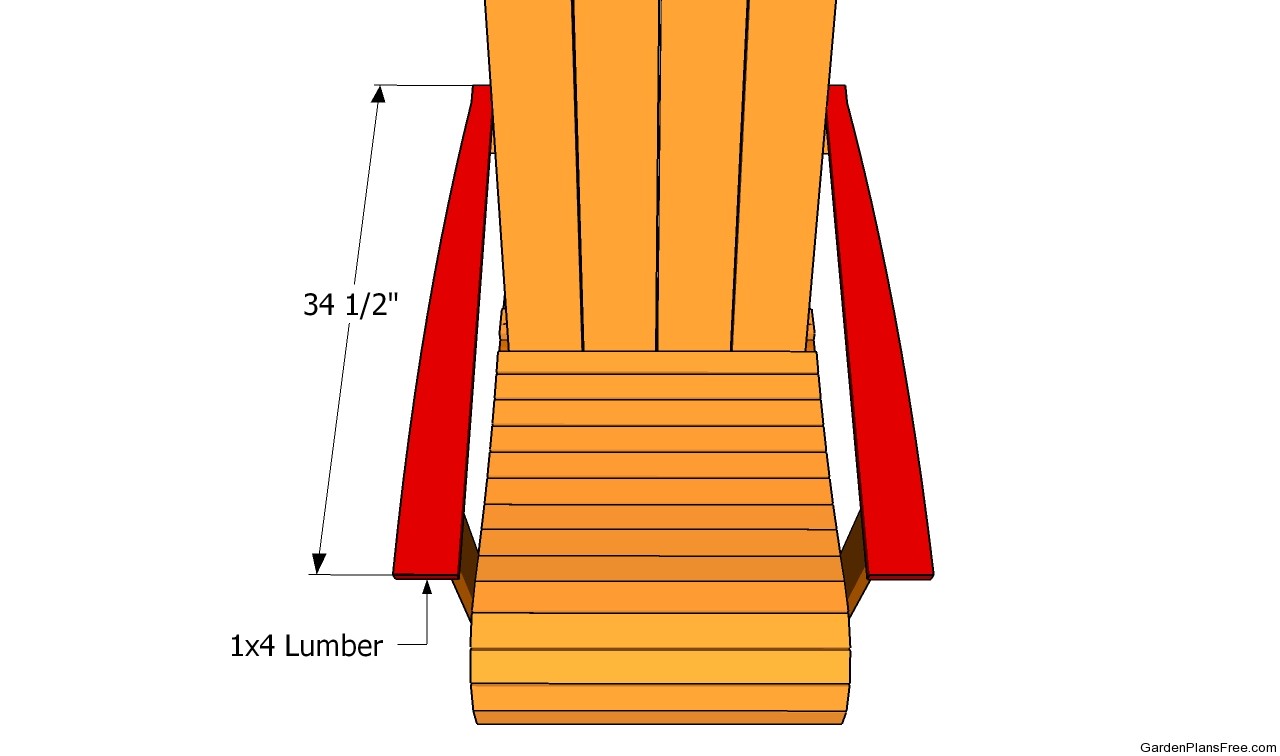
Installing the armrests
Build the armrests from 1×4 slats and secure them to the front legs and to the back rest supports with 1 1/4′ galvanized screws. We strongly recommend you to curve the exterior of the slats with a jigsaw. In addition, round the exposed edges with a router and a 3/4″ bit.
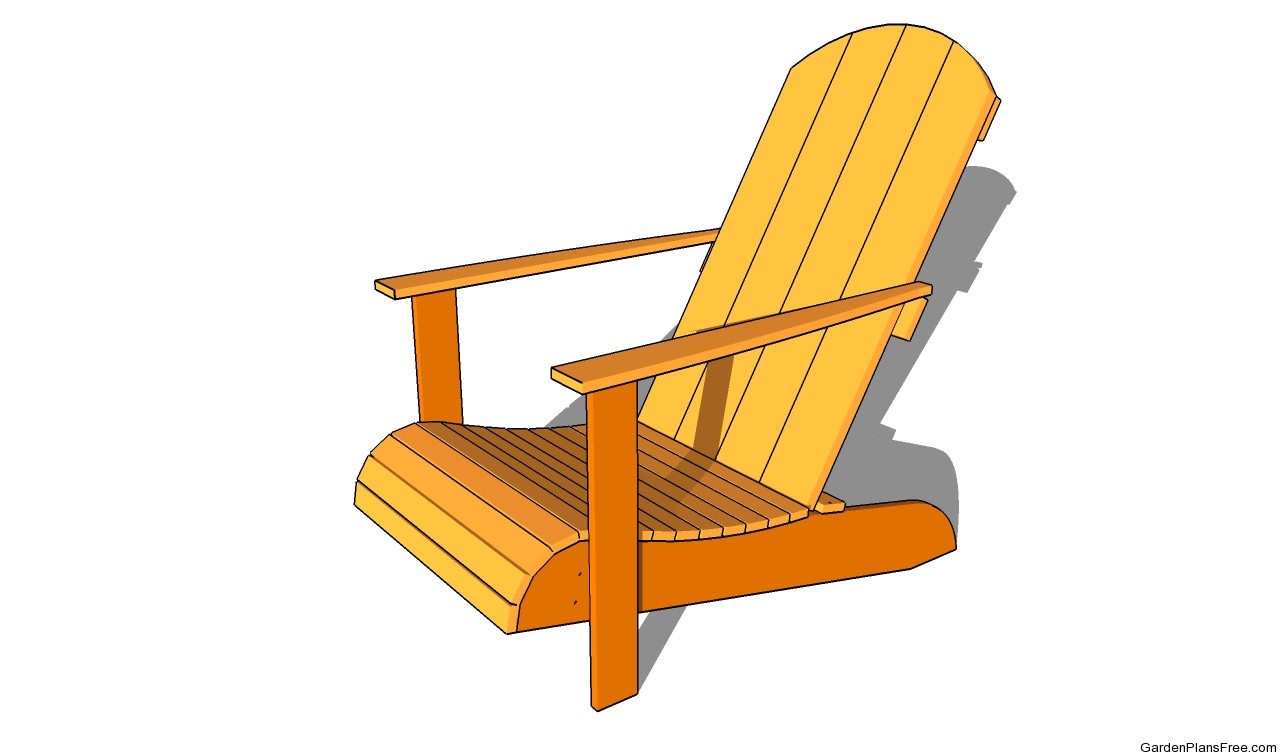
Garden chair plans
Last but not least, there are several aspects you should take into account. Therefore, you should fill the holes with wood filler and smooth the wooden surface after it dries out. In addition, check all the screws are inserted properly and round the exposed edges with a router and a 1/4 – 3/4″ bit.
PRO TIP: Apply several coats of paint over the components, in order to protect them from decay. Choose the colors as to fit the design of your garden. Check out free plans for a bar height adirondack chair plans.
This diy project was about garden chair plans. If you have enjoyed the free project, we recommend you to LIKE and SHARE it with your friends, by using the social media widgets.

