If you want to learn more about how to build a bar height adirondack chair you have to take a close look over the free plans in the article. I have designed this simple adirondack bar stool so you can get the job done quickly and so you keep the costs down. I have simplified the complicated designs of similar pieces, but I kept the essential characteristics. More furniture plans HERE.
If you want to get the job done in a professional manner, we recommend you to plan everything with attention, as to prevent costly mistakes and to build a professional garden bench. Invest in high quality materials, such as cedar, pine or redwood, as the structure will be exposed to all kinds of weather. Apply a few coats of paint over the components, to enhance their appearance and to protect them from bad weather.
Plant Stand – Free DIY Plans
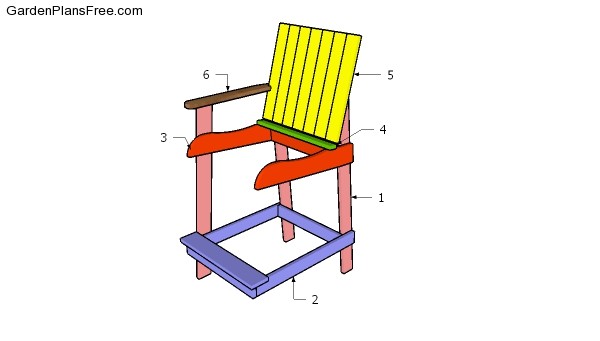
Building a bar height adirondack chair
Materials
- 1 – 4 pieces of 1×3 lumber – 34 1/2″ long, 2 pieces – 38 1/2″ long LEGS
- 2 – 1 piece of 1×3 lumber – 19″ long, 4 pieces – 24 1/2″ long, 1 piece – 17 1/2″ long, 1 piece – 20 1/2″ long SUPPORTS
- 3 – 2 pieces of 1×4 lumber – 22 1/4″ long, 1 piece – 17 1/2″ long SUPPORTS
- 4 – 12 pieces of 1×2 lumber – 19″ long SLATS
- 5 – 1 piece of 2×2 lumber – 16″ long, 1 piece of 1×2 lumber – 17″ long, 7 pieces of 1×3 lumber – 18″ long BACKREST
- 6 – 2 pieces of 1×3 lumber – 20 1/4″ long ARMRESTS
- 4 pieces of 1×3 lumber – 6′
- 1 pieces of 1×4 lumber – 6′
- 1 piece of 2×2 lumber – 2′
- 3 pieces of 1×2 lumber – 8′
- 1 5/8″ screws, 1 1/4″ screws
- wood glue, stain/paint
Tools
- Hammer, Tape measure, Carpentry square
- Miter saw, Drill machinery, Screwdriver, Sander, Router
- Safety Gloves, Safety Glasses, Respiratory Mask
Time
- One day
STEP 1:
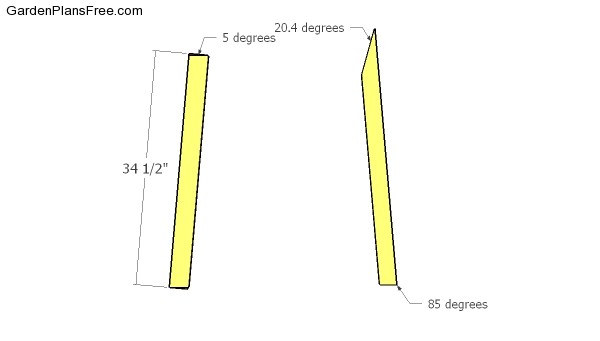
Building the legs
The first step of the project is to build the legs from 1×3 lumber. Make the cuts, as shown in the diagram.
STEP 2:
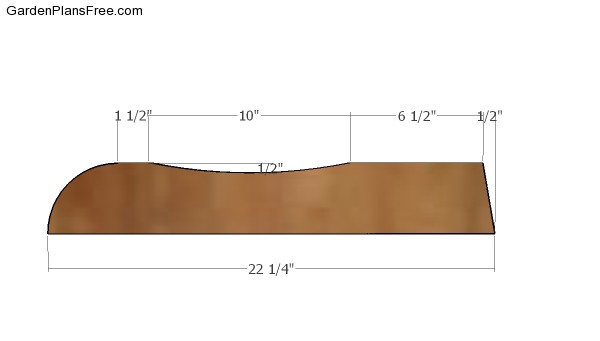
Seat supports
Build the seat supports for the chair, using the 1×4 lumber. Use a jigsaw to make the curved cuts.
STEP 3:
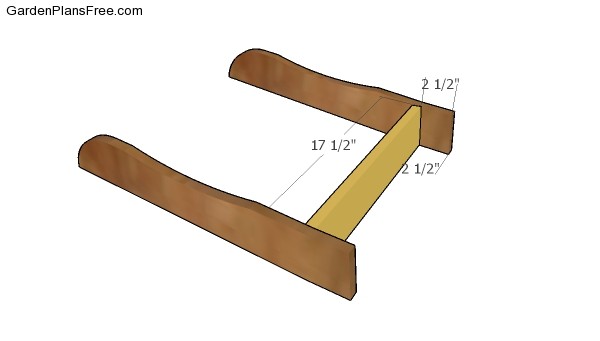
Seat frame
Drill pilot holes through the supports and insert 1 5/8″ screws to assemble the frame, as shown in the diagram. Make sure the corners are square.
STEP 4:
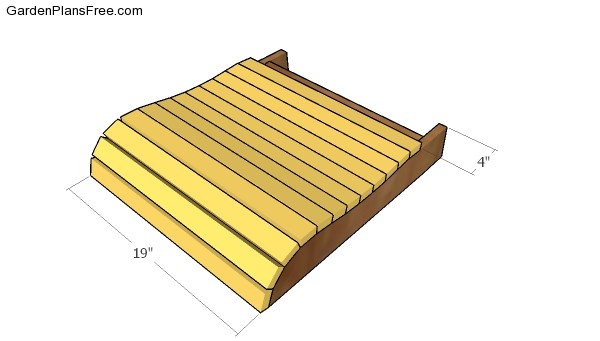
Seat slats
Fit the 1×2 slats to the seat of the chair. Align the edges flush, drill pilot holes and insert 1 5/8″ screws to lock them into place tightly.
STEP 5:
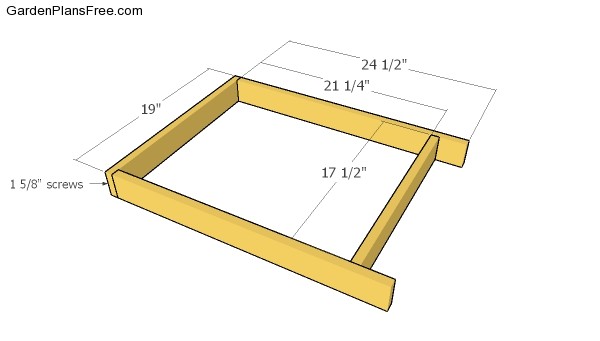
Base frame
Use 1×3 lumber for the lower frame. Drill pilot holes and insert 1 5/8″ screws to lock the frame tightly. Check if the corners are square and align the edges flush.
STEP 6:

Attaching the legs
Fit the legs to the seat frame and to the lower frame. Drill pilot holes and insert 1 1/4″ screws. Use 2 screws for each joint.
STEP 7:
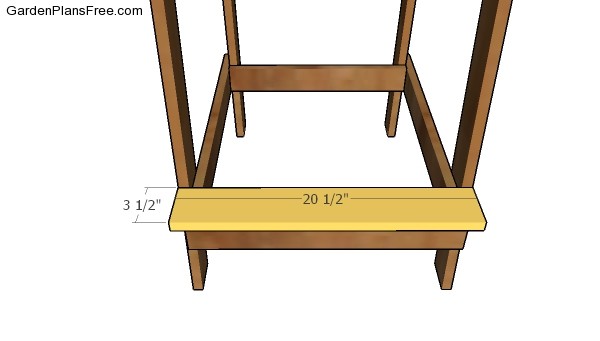
Fitting the bottom step
Fit the 1×4 step to the lower frame. Drill pilot holes and insert 1 5/8″ screws to lock it into place tightly.
STEP 8:
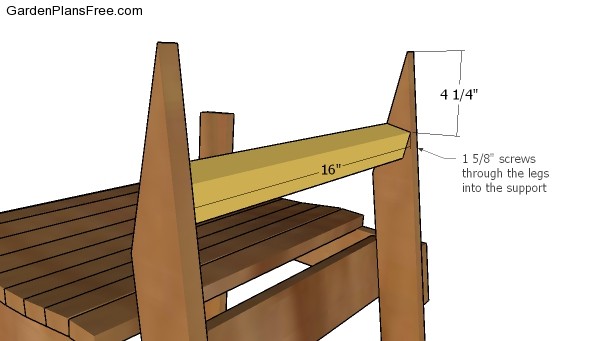
Back support
Fit the support to the backrest of the chair, as shown in the diagram.
STEP 9:
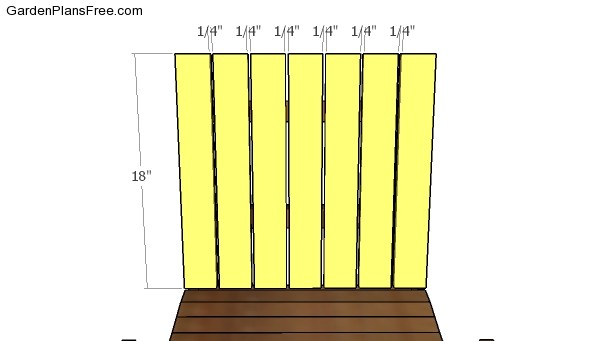
Backrests slats
Fit the 1×3 slats to the backrest of the chair. Drill pilot holes and insert 1 5/8″ screws to lock them into place tightly.
STEP 10:
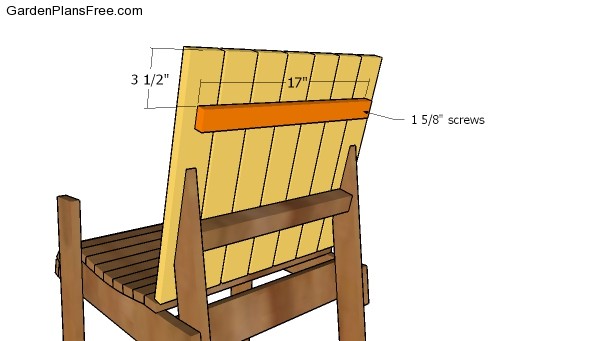
Backrest support
STEP 11:
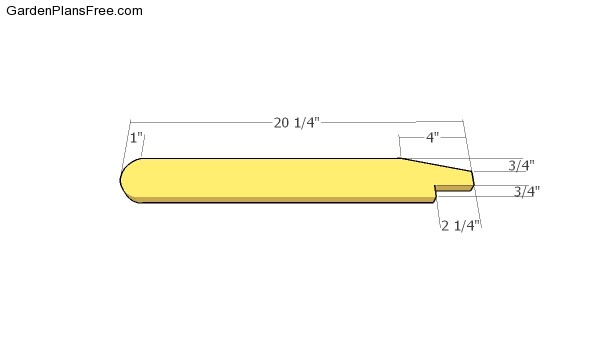
Armrests
Cut the armrests using the info in the diagram. Use a jigsaw to make the curved cuts.
STEP 12:
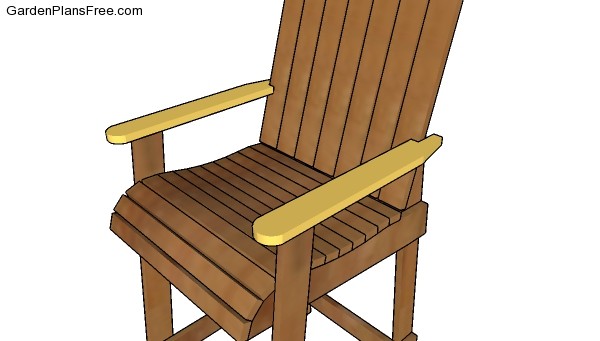
Fitting the armrests
Fit the armrests to the frame of the chair. Drill pilot holes and insert 1 5/8″ screws to lock them into place tightly.
STEP 12:

Bar height adirondack chair plans
Check out my plans for a large and comfy outdoor chair.
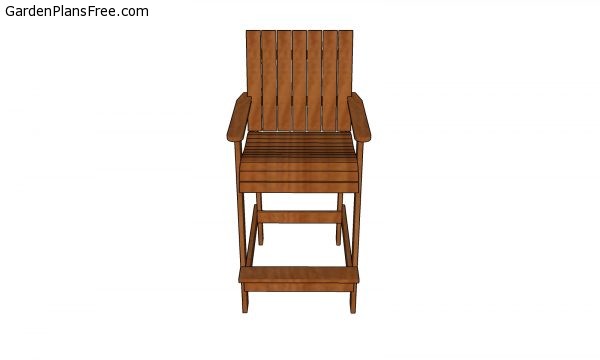
Bar height adirondack chair – diy plans
I recommend you to check if the components are locked into place properly and structure is rigid enough. Make sure there are no protruding screws or sharp edges. Fill the holes with wood putty and then smooth the surface with sandpaper. Install the chain, the eye hooks and the hangers.
PRO TIP: Apply several coats of paint or stain over the components, in order to protect them from decay. Check out the rest of the project to learn more about building garden projects.
Thanks you for reading my article on how to build a bar high adirondack chair. If you enjoyed my design, I recommend you to share it with your friends, using the social media widgets!

