When you finish mowing the lawn or raking up the yard, you’re often left with a surprising amount of organic debris—piles of fresh grass clippings, crunchy fallen leaves, brittle twigs, and even the occasional handful of weeds. For many homeowners, the first instinct is to bag everything up and leave it at the curb. But here’s the thing: all that yard waste is actually a goldmine of natural material that can be reused, recycled, or repurposed to enrich your garden, save money, and help the environment. Instead of treating grass clippings and autumn leaves like trash, why not turn them into something truly useful? In this guide, we’re going to walk you through a wide variety of practical, eco-friendly ways to handle your lawn leftovers. From boosting your compost pile to making nutrient-rich mulch, and even tackling some fun DIY garden projects, we’ve got options for every skill level and yard size.
We’ll break down the basics of composting for beginners, explain how to use clippings and leaves as natural fertilizers, and share tips for creating weed-suppressing mulch paths and moisture-saving layers for garden beds. If you’ve never tried sheet mulching or leaf mold, you’ll learn how simple it is—and how effective! We’ll also cover what not to do, and when it’s okay (or necessary) to dispose of yard waste safely and responsibly. Whether you’ve got a sprawling backyard or a modest patch of green, these ideas are easy to follow, budget-friendly, and designed to work with nature rather than against it. You don’t need fancy tools or deep gardening knowledge—just a willingness to rethink how you handle what your yard naturally produces. So grab your rake or mower, roll up your sleeves, and let’s get started. With a little effort and the right know-how, your yard waste can become one of the most valuable tools in your gardening arsenal. Let’s dive into the best ways to make those grass clippings, leaves, and twigs work for you and your landscape.
Why Reuse Yard Waste? (The Benefits of Grass & Leaf Recycling)
Before we get into the how-tos, let’s talk about why you might want to reuse or recycle your lawn debris in the first place:
- Reduce Landfill Waste: Yard trimmings like grass and leaves make up a significant chunk of municipal solid waste (one study in Texas found they were at least 20% of the trash by weight). Keeping this organic matter out of landfills saves space and cuts down on methane emissions from decomposing yard waste.
- Free Nutrients for Your Garden: What we often call “yard waste” is actually full of nutrients. For example, grass clippings contain about 4% nitrogen (plus other nutrients) and can supply up to 25% of your lawn’s fertilizer needs when left on the grass. Similarly, leaves hold onto 50–80% of the nutrients that trees drew from the soil and air during the season. By reusing these materials, you return nutrients to your soil for free.
- Healthier Soil and Plants: Decomposed organic debris improves soil structure, helps retain moisture, and feeds beneficial soil organisms. In natural settings (like forests), leaves and organic litter create a protective, nourishing carpet over the soil. We can mimic that in our gardens to conserve moisture, suppress weeds, and enrich the earth.
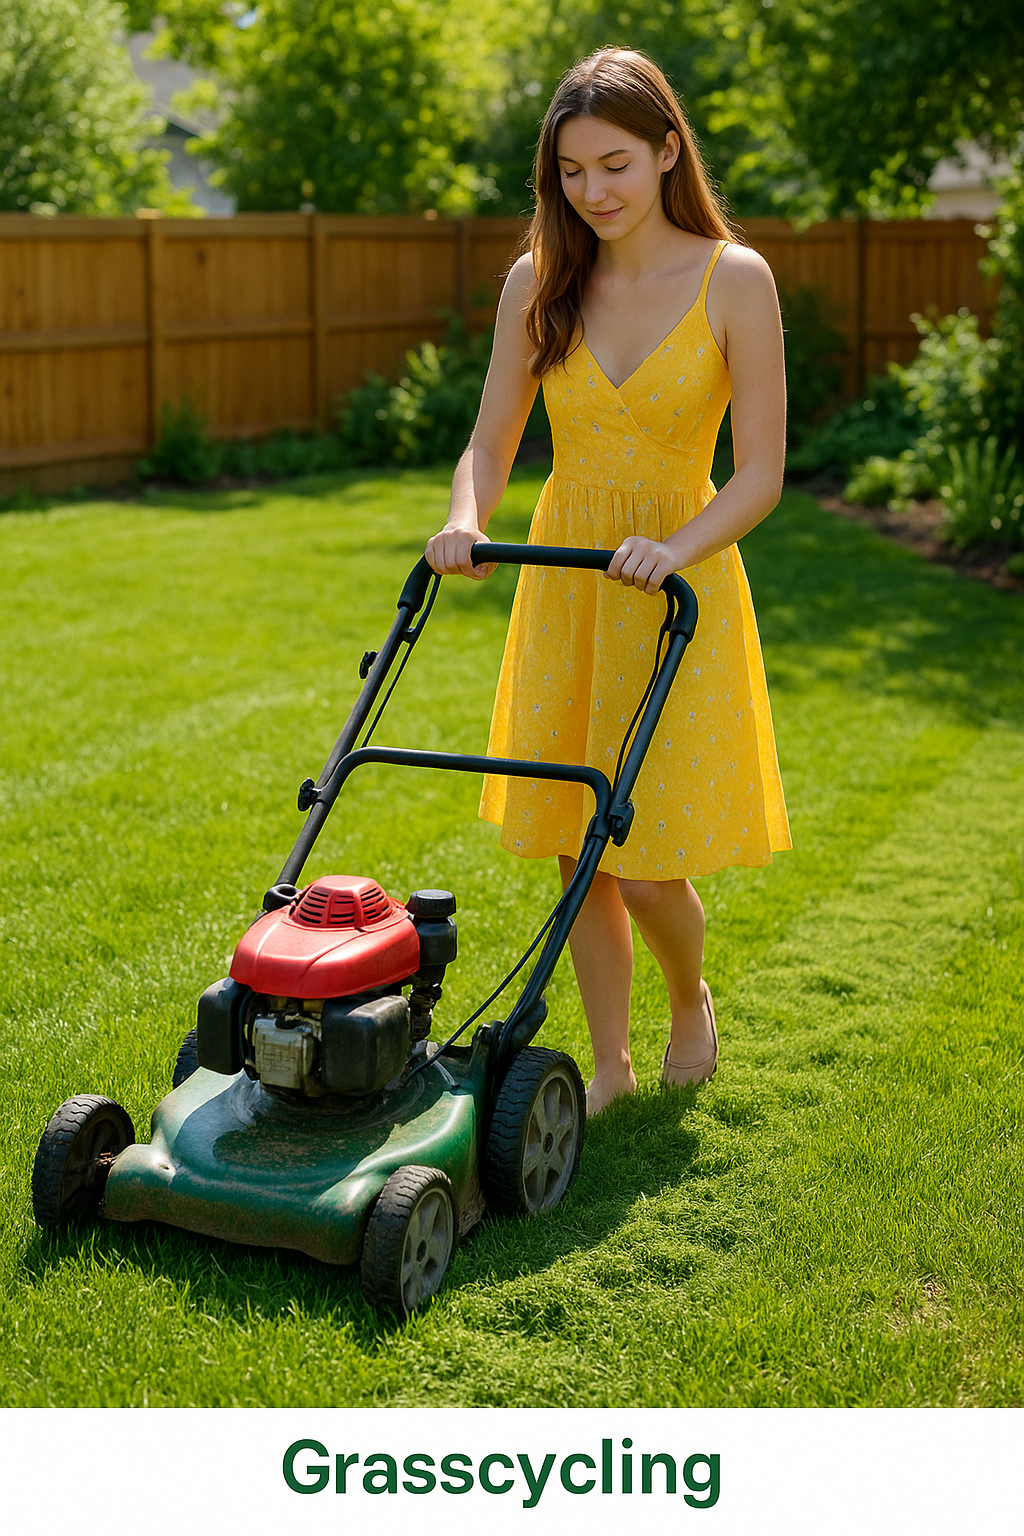
- Save Time and Money: Reusing lawn leftovers can save you the effort of bagging and hauling them away, and reduce the need to buy commercial mulch or fertilizers. For instance, leaving grass clippings on the lawn (often called grasscycling) means you spend less time raking and can cut back on store-bought fertilizer.
- Environmental Benefits: By recycling yard waste at home, you’ll reduce greenhouse gas emissions from transport and decomposition in landfills. Plus, practices like composting and mulching are natural and chemical-free ways to nourish your garden, aligning with sustainable gardening principles.
In short, yesterday’s lawn clippings and autumn leaves are not “garbage” – they’re a treasure trove of organic matter that can be repurposed to help your garden thrive. As one horticulturist put it, hang on to your leaves (and clippings); “it makes no sense to send valuable treasure to the dump”. Now, let’s explore exactly what you can do with each type of yard debris.
Grass Clippings: From Clutter to Garden Gold
After mowing, you might be staring at a turf full of grass clippings or a mower bag filled to the brim. Here are several simple ways to deal with grass clippings that benefit your lawn and garden:
1. Leave Them on the Lawn (Grasscycling)
One of the easiest and most beneficial things to do with grass clippings is to leave them right on the lawn. This practice, known as grasscycling, turns your mower into a natural recycler. The key points to know:
- Nutrients and Moisture: As grass clippings decompose, they release nutrients back into the soil. Clippings are rich in nitrogen, phosphorus, and potassium – the same nutrients in many fertilizers. In fact, clippings left on the lawn can provide roughly 25% of your lawn’s annual fertilizer needs. They also return organic matter and moisture (clippings are 80–85% water), which improves soil health over time.
- No Thatch Worries: Some folks worry that leaving clippings will create thatch (a layer of undecomposed grass). In reality, grass clippings do not contribute to thatch buildup because they’re mostly water and break down quickly. Thatch is more related to grassroots and stems, not the soft green clippings.
- Save Time and Effort: By not bagging clippings, you save the work of raking or emptying mower bags every time. According to the University of Minnesota Extension, lawn clippings usually do not need bagging and can be left if they’re short enough. You’ll finish mowing faster and spend less on yard waste bags.
How to Grasscycle Effectively: Make it easy for the clippings to filter down to the soil. Follow these tips for best results:
- Mow when the grass is dry and not overgrown. Wet, heavy clippings can clump, and very long clippings (from an overgrown lawn) might mat on top of the grass. Try to mow before the lawn gets too tall. As a rule of thumb, never remove more than about 1/3 of the grass height in one mowing.
- Use a mulching mower blade if possible. Mulching mowers or blades chop grass into finer pieces that decompose even faster. But even a regular mower will work if you mow frequently. Clippings about one inch long or less will sift down and disappear quickly.
- If clippings form visible clumps, spread them out. You can go over the clumps again with the mower to disperse them, or lightly rake them to distribute evenly. Excessive clumps left on the lawn can smother the grass beneath and look messy.
- Mow often during peak growth. Regular mowing (perhaps weekly in spring) produces smaller clippings and avoids the need to bag. It also prevents stressing the lawn.
Grasscycling is truly a win-win: your lawn gets fed and you get a break! Many municipalities encourage it as it reduces yard waste. And don’t worry – done properly, your lawn will look just as tidy (the tiny clippings sift out of sight) and will actually be healthier.
2. Compost the Clippings
If you have more clippings than your lawn can handle (for example, if you collected them or you have leftover piles), composting is a fantastic way to turn grass into “black gold” for your garden. Grass clippings are considered a “green” (nitrogen-rich) ingredient in compost, which makes them a perfect complement to dry “brown” materials like fall leaves or straw.
Tips for Composting Grass Clippings:
- Mix Greens and Browns: To avoid a slimy, smelly mess, don’t compost grass clippings alone in a big heap. They’re too high in nitrogen and moisture by themselves. Instead, mix or layer clippings with plenty of carbon-rich, dry material. A simple method is to alternate a few inches of grass clippings with a few inches of brown leaves or shredded newspaper in your compost bin or pile. This balanced approach provides the right carbon-to-nitrogen ratio for efficient decomposition.
- Keep the Pile Aerobic: Grass clippings can compact and exclude air. To prevent anaerobic (stinky) conditions, turn or fluff the pile regularly with a pitchfork. Alternatively, pre-mix clippings with leaves before adding to the pile to keep it breathable. Turning the compost every week or two introduces oxygen and distributes moisture, helping the grass break down faster.
- Watch Moisture: Clippings are moist, so your compost may not need much watering, especially if you also add kitchen scraps. The ideal moisture of a compost pile is like a damp sponge – not soggy. If your grass was wet, mix in extra dry browns. If it’s too dry, sprinkle some water.
- Compost in Batches: During heavy mowing season, you might accumulate clippings rapidly. Consider stockpiling some dry leaves or shredded paper to mix with each batch of fresh grass. This way each addition to the compost has a good mix. You can also compost clippings over time by drying some out (see next tip) if you have more than you can immediately handle.
- Pre-dry (if needed): If you have heaps of fresh, lush clippings, spreading them out to dry for a day or two in the sun will turn them into “hay” that’s easier to mix and less prone to odor. Dry clippings become a bit more like a brown ingredient.
- Hot Composting for Weeds: One concern: If your lawn had dandelions or weeds that went to seed, those seeds could sprout later. A properly hot compost (around 140–150°F) will kill weed seeds, but many home compost piles run cooler. If you’re unsure, it’s safer to not compost heavily seeding weeds or use the finished compost only on ornamental beds (not vegetable gardens) to avoid surprise weeds. As an added precaution, you can let bagged clippings with weed seeds “cook” in the sun (solarize) for a week, or send them to a municipal compost facility which reaches high temperatures.
Composting grass clippings, especially when combined with autumn leaves, creates a nutrient-rich humus you can later add to flower beds, vegetable gardens, or even top-dress your lawn. It’s a great way to complete the nutrient cycle – feeding the soil that feeds your grass.

3. Use Grass Clippings as Mulch
Believe it or not, those green clippings also make an excellent mulch in gardens. Mulching is simply covering the soil surface around plants to hold in moisture, suppress weeds, and add organic matter. Here’s how to mulch with grass clippings effectively:
- Mulch in Thin Layers: Fresh grass clippings are high in water and can form a dense mat if piled on too thick. To prevent mold or a slimy layer, apply clippings in thin layers (about 1/2 inch to 1 inch thick) at a time around your plants. Let that layer dry out and brown up, then you can add additional layers over time. This creates a multi-layer mulch that breathes.
- Use Dried Clippings for Thicker Mulch: Alternatively, dry the clippings in the sun until they turn hay-like, then apply a thicker layer (2–3 inches) as mulch. Dried grass mulch is less likely to clump and still suppresses weeds well. Some gardeners collect clippings, let them dry, and then use them as a free mulch for vegetable gardens or around fruit trees.
- Keep Mulch Away from Stems: As with any mulch, don’t pile grass right up against the stems of plants (especially young seedlings) to avoid overheating or disease. Leave a couple of inches of space around plant bases.
- Benefits of Grass Mulch: Grass clippings mulch can do wonders – it retains soil moisture, adds nutrients as it breaks down, and even can deter some pests. For example, some gardeners find that a mulch of dried grass clippings around vegetable plants helps reduce certain pests and improves yields (one study noted better yields in some crops with grass clipping mulch). Plus, it’s free and readily available! Just be sure the grass wasn’t treated with herbicides (more on that in the Caution below).
Using clippings as mulch is a great option if you don’t have a compost bin or need to cover a garden bed quickly. After mowing, just carry the bag of clippings over to your garden and spread them in the rows or around established plants.
4. Make “Grass Tea” Fertilizer (Liquid Compost)
For a more advanced but fun project, you can turn fresh grass clippings into a liquid fertilizer, sometimes called grass clipping tea. The idea is similar to compost tea: you steep the nutrient-rich clippings in water to create an organic plant feed.
How to Make Grass Clipping Tea:
- Fill a Bucket: Take a bucket (say 5 gallons) and fill it about two-thirds full with fresh grass clippings.
- Add Water: Fill the bucket to the top with water, covering the clippings. You can stir to submerge and mix the grass.
- Steep: Let the mixture sit and steep for about 3 days. Keep it outside – it will get smelly as it brews! Stir the “tea” daily if possible to oxygenate and help extract nutrients.
- Strain and Dilute: After 3 days, strain out the clippings (wear gloves, it will smell like potent manure/grass). You’ll have a dark, nutrient-rich liquid. Dilute this liquid with water (typical dilution is about 1 part “grass tea” to 10 parts water, or until it’s the color of weak tea).
- Apply to Plants: Use the diluted grass tea to water the base of plants or as a foliar feed (avoiding the edible parts of vegetables). It provides a natural nitrogen boost and micronutrients.
This grass tea is an eco-friendly fertilizer for free – perfect for heavy-feeding plants like corn, tomatoes, or roses. Just use it sparingly (maybe once a week or biweekly), as it can be strong. And avoid pouring it directly on plant leaves in hot sun, as it could burn – best to water the soil around plants.
5. Last Resort: Proper Disposal
After mulching, composting, and creative reuses, you might still have times when you need to get rid of excess clippings – for example, a big spring cleanup or if your lawn was treated (see caution below). If you must dispose:
- Municipal Yard Waste Programs: Most cities have programs for yard waste collection. You can bag clippings in paper yard bags or designated bins for curbside pickup. These programs typically compost the waste on an industrial scale. Do not mix grass clippings with regular trash (and never dump them in storm drains or wild areas). Sending clippings to a compost facility is far better than a landfill, since they’ll be turned into mulch or compost.
- Community Compost Sites: If your town or a local community garden has a drop-off for green waste, consider contributing your clippings there. Often, community gardens welcome leaf and grass donations to fuel their compost piles.
- Small Amounts as Soil Amendment: You can also dig small quantities of clippings directly into vegetable garden soil (a practice called trench composting). They will break down in place and enrich the soil. Just don’t bury so much that it creates odors or nitrogen tie-up; moderate amounts mixed with soil are key.
Caution – When Not to Use Grass Clippings: If your lawn has been treated with pesticides or herbicides (like weed-and-feed products or broadleaf weed killers), be careful with reusing those clippings. Some lawn herbicides (for example, ones containing clopyralid or similar chemicals) can persist in grass clippings for a long time and could harm garden plants if those clippings are used as mulch or compost. Always read the lawn product label; it often tells you if clippings should be left on the lawn or not used in compost for a certain period. As a rule of thumb, if your lawn was treated with a persistent herbicide, it’s safer to leave those clippings on the lawn itself (grasscycling) for a few mowings, or dispose of them via municipal yard waste, rather than mulching your veggie patch with them. Also, avoid using grass clippings with a lot of weed seeds in areas where you don’t want those weeds. When in doubt, compost them hot or let them decompose fully before use.
Grass clippings are abundant in summer, but as you can see, they’re also incredibly useful. By grasscycling, composting, or mulching, you turn a disposal problem into a gardening asset. Next, let’s tackle those autumn leaves and garden litter with similar creativity.
Fallen Leaves: Autumn’s Treasure for Your Garden
When the leaves start piling up in fall (or even throughout the year for some evergreens), don’t dread the rake – think of all the great uses for that leafy bounty. Dried leaves are a fantastic resource for gardeners, essentially free organic carbon and minerals delivered by nature. Here’s how to make the most of your fallen leaves:
1. Mulch the Leaves In Place (Mow Over Them)
One of the easiest ways to handle a light layer of leaves on the lawn is to mulch mow them. Instead of raking every last leaf, take your lawn mower (ideally with a mulching blade) and run it over the leaves to shred them into smaller pieces. The shredded leaves will filter down into the grass, much like grass clippings, and decompose over the winter, releasing nutrients.
- Benefits: Mulching leaves into the lawn feeds the soil and can even improve the lawn’s vigor come spring. Research shows that a thin layer of shredded leaves will not harm your grass – in fact, it can suppress weeds and add organic matter. The City of Maywood notes that whether mulching leaves or returning clippings, you save time and improve the soil without any raking or hauling.
- How-To: If leaves are covering more than about 20% of the lawn, you may need to do multiple passes or mow more frequently during peak leaf drop. Set the mower to a higher cut height and mow when leaves are dry if possible. The result should be dime-sized leaf bits that sift into the grass. If you still see a lot of leaf debris, go over it again or rake up the excess and use those elsewhere (like in compost).
- Mulching on Beds: You can also use your mower to shred leaves for use in garden beds. Simply mow over leaf piles (spread them out first) and collect the shreds in the mower bag. These shredded leaves make an excellent mulch around shrubs, perennials, and trees.
This method is great for beginner gardeners or anyone short on time – you’re essentially doing what nature does (breaking leaves down) but a lot faster, and you eliminate the need to bag up leaves for disposal.
2. Rake and Reuse as Garden Mulch
If you prefer or need to rake leaves (such as thick accumulations or leaves on patios, etc.), put those piles to good use as mulch in your garden beds. Dry leaves can be spread around plants just like wood chips or straw. Here’s how:
- Shred for Best Results: While you can use whole leaves as mulch, they tend to mat down and can blow around. Shredded leaves are far superior. You can shred leaves by running a lawn mower over them as mentioned, or using a leaf shredder or blower/vacuum that mulches. Even stuffing leaves in a garbage can and using a string trimmer inside can chop them up. Shredded leaves become a lovely, light mulch that stays put and breaks down faster.
- Apply Generously: Pile the shredded leaves a few inches thick (3–6 inches is fine for winter mulch around trees and perennials). Around smaller annuals or vegetables, 2–3 inches is good. The leaf mulch will insulate the soil, prevent erosion, and gradually enrich the soil as it decays. It’s perfect for winterizing perennial beds – just mound the leaves over the root zones after the first frost. In veggie gardens, use leaf mulch between rows to keep weeds down.
- Where to Use: Leaf mulch is excellent for almost all plants – vegetable gardens, flower beds, around shrubs and trees, even in containers as a top dressing. One caveat: if you have leaves from black walnut trees, avoid using them around vegetable gardens or sensitive plants, as they contain juglone (a natural chemical that can inhibit some plants). Otherwise, most tree leaves (maple, oak, birch, fruit trees, etc.) are garden-safe and nutrient-rich.
- Replenish as Needed: Leaves break down over the season, effectively becoming compost on-site. You may need to rake and replace leaf mulch each year (which is easy since new leaves fall annually!). This yearly addition will continuously improve your soil’s organic content.
Using fallen leaves as mulch is both eco-friendly and cost-saving – you’re essentially replacing store-bought mulch with a free alternative that might even be better. According to experts, leaves contain 50–80% of the nutrients a plant absorbed during the year, so by mulching with them, you return those nutrients to the soil for future plant growth. It’s a full-circle, sustainable practice.
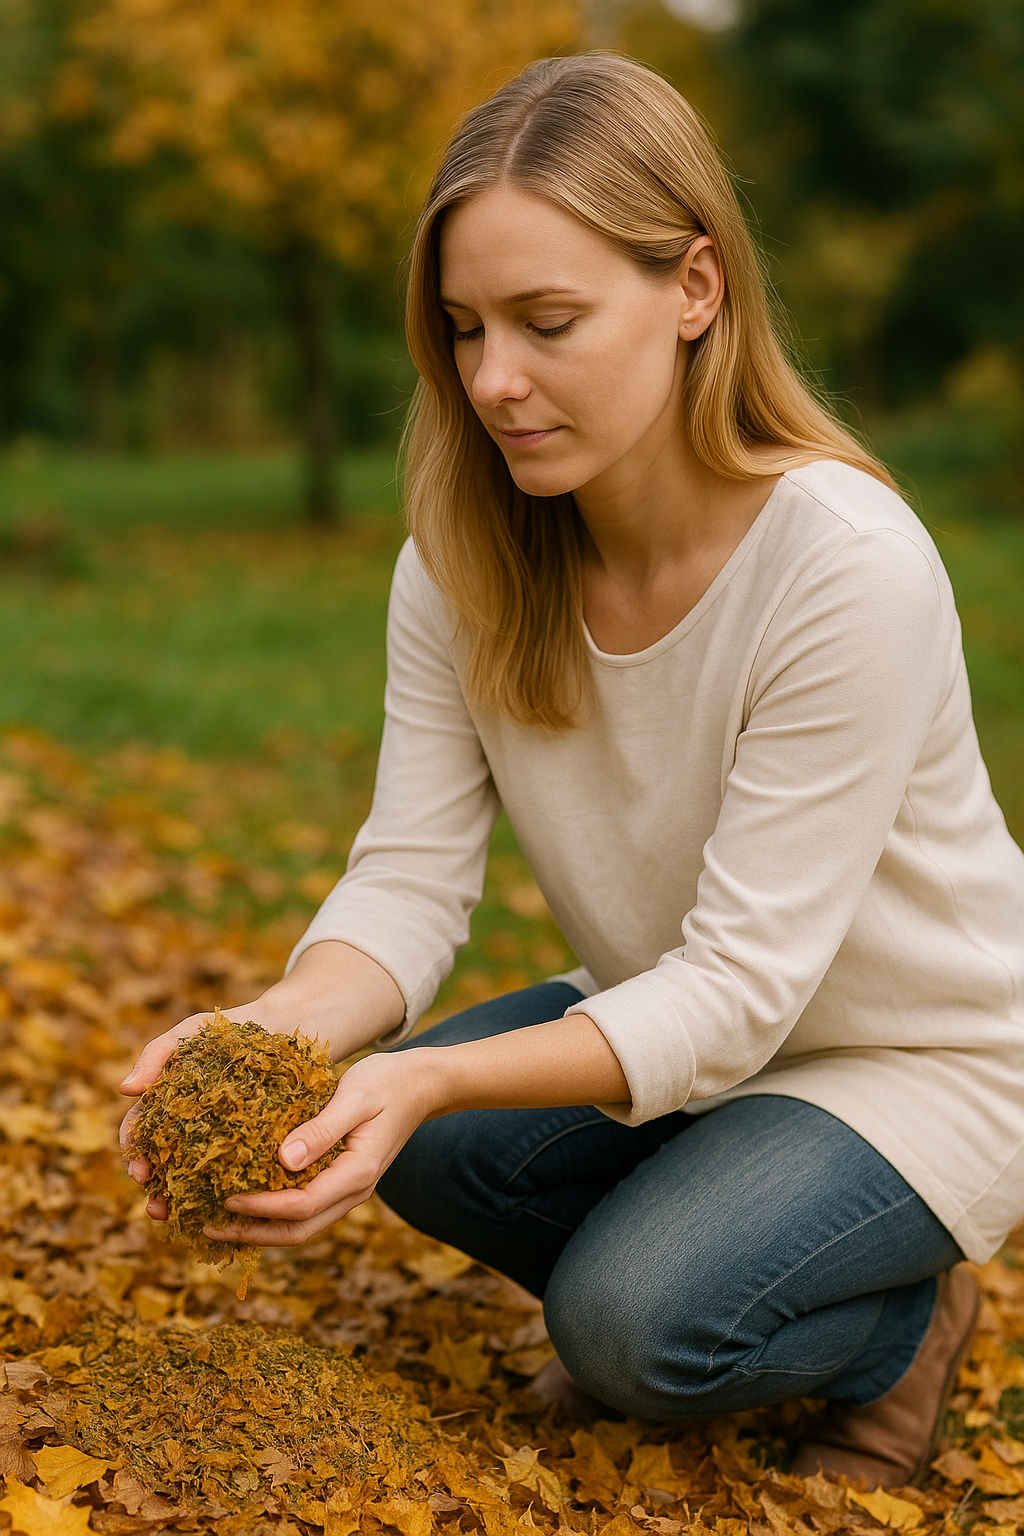
3. Compost the Leaves (Brown Gold!)
Composting leaves is a classic way to create rich garden compost, often called leaf mold when leaves are composted alone. Leaves are considered a “brown” high-carbon ingredient in compost, which balances “green” materials like grass or food scraps. Here’s how you can compost leaves:
- Build a Leaf Pile or Bin: You can compost leaves in a simple heap, a wire bin, or in garbage bags (more on that in a moment). If you have space, a dedicated leaf compost pile is wonderful. Pile up moist leaves, and nature will do the rest – albeit slowly. To speed it up, chop the leaves first and moisten them. Ideally, mix in some nitrogen sources like grass clippings or a handful of blood meal to heat things up.
- Keep It Aerobic: Pure leaves can compact as they break down. Turning the leaf pile occasionally or inserting a few sticks or corn stalks can help air flow. But even if you just leave it, eventually fungi will break the leaves down into a dark, crumbly leaf mold. This can take 6–12 months (faster if shredded and kept moist).
- Moisture Matters: A leaf compost pile should be kept about as damp as a wrung sponge. If yours is out in the open, autumn rains may keep it moist; cover with a tarp if needed to hold moisture, or to prevent overly soaking during heavy rain (you want moist, not a sopping swamp).
- Layering: You can also layer leaves with other garden waste in a traditional compost bin. They are an ideal carbon source to mix with grass clippings, green plant prunings, and kitchen scraps. For example, alternate 3–4 inches of leaves with 2 inches of fresh grass clippings. The greens will provide heat to break down the leaves. Over months, you’ll get a balanced compost.
Leaf Mold (Composting Leaves Alone): Leaf mold is simply decomposed leaves, and it’s a gardener’s dream soil amendment – light, fluffy, and great for improving soil structure. To make leaf mold easily:
- Rake leaves into a large heap or wire enclosure.
- Wet them down.
- Forget about them for a year (keep moist in dry spells).
After 1–2 years, the bottom of the pile turns into a dark, sweet-smelling, crumbly material you can mix into soil or use as a top-dress. If you’re impatient, you can shorten this by shredding leaves and keeping the pile aerated and moist, sometimes yielding finished leaf compost in 6 months.
Pro Tip: If space is an issue, try the garbage bag method for leaf mold. Stuff leaves (shredded if possible) into large black plastic bags. Sprinkle a bit of water to dampen (and a scoop of garden soil or compost to inoculate microbes, optionally). Tie up the bags and poke a few holes for air. Stash them behind a shed or out of the way. In 6–12 months, check the bags – you’ll likely find partially composted leaves. This method contains the mess and still produces a usable amendment. (Though more plastic use isn’t ideal, it is a convenient option for small yards or urban gardeners.)
By composting leaves, you are essentially “saving” all that goodness for your garden. Leaves are truly a valuable resource – why bag them up for the curb when you can turn them into rich soil? Even if you only compost a portion of your leaves, your garden will thank you.
4. Create Leaf Mold Piles for Soil Improvement
If you have lots of leaves and some extra space under a tree or in a corner, you can simply pile up leaves to let them decompose slowly (even without using them as formal mulch). This approach is more akin to how nature does it and can be nearly zero-effort:
- Designate an out-of-the-way leaf pile area. Pile the leaves maybe 2–3 feet high (they’ll settle). You can corral them with some chicken wire or snow fencing so they don’t blow around.
- Over the seasons, occasionally toss more leaves on and sprinkle with water if they get bone dry.
- Over a year or two, dig into the bottom – you’ll find soft, dark leaf mold forming. You can then dig this into vegetable beds or potting mix.
Meanwhile, even before they fully turn to compost, a leaf pile can serve as a home for beneficial critters. Earthworms love decomposing leaves and will congregate in such a pile, further breaking them down and enriching them with worm castings.
5. Insulate and Protect Plants with Leaves
Leaves also have a great use as a natural insulator for tender plants and root systems in winter:
- Winter Mulch: Pile dry leaves over the crowns of perennials that are borderline hardy, or around rose bushes (some gardeners create chicken-wire rings around rose bushes and fill with leaves to protect the graft union from freeze). Just remove or spread them out when growth resumes in spring.
- Protect Root Crops: In cold climates, some people mulch heavily with straw or leaves over root veggies like carrots or beets to keep the ground from freezing deeply, so they can harvest later into winter.
- Wrapping Evergreens: You can also tie up a column of leaves in burlap and place around sensitive small shrubs for winter (this is an alternative to burlap wrapping – the leaves act like a coat).
- Potted Plants: If you have planters that you leave outside, heap leaves around and on top of the pots to insulate the roots from cold. The leaves can be held in place with burlap or mesh.
6. “Leave the Leaves” for Wildlife
A more recent movement among nature enthusiasts is the idea of leaving some leaves undisturbed for the sake of local ecology. The reasoning: leaf litter provides habitat for many beneficial insects, pollinators, and small wildlife. Butterflies, moths, and other insects often overwinter as eggs or pupae in fallen leaves. Salamanders, toads, and spiders find refuge under leaf cover. If we remove every leaf, we might be cleaning up important homes for these creatures.
Consider leaving leaves in certain areas:
- Flowerbeds or under trees: Instead of a thorough fall cleanup, leave a layer of leaves in places like under hedges or in flowerbeds (especially if they’re not overly thick and smothering your plants). Come spring, you can gently rake aside any that haven’t broken down, but you’ll find many have composted in place.
- Naturalized areas: If you have a wooded area or wild corner, feel free to leave the leaves completely. They’ll form a natural mulch and gradually enrich the soil as in a forest.
- Create a Wildlife Pile: Even a deliberate “leaf pile” left in a corner can act as a shelter for butterflies or even small mammals. Combine leaves with small branches to create a more stable brush pile (more on brush piles in the twig section). The U.S. Fish & Wildlife Service notes that brush and leaf piles provide shelter and nesting sites for many species – from chipmunks and rabbits to beneficial insects.
Balancing aesthetics and wildlife needs is personal – maybe you don’t want leaves on your main lawn, but you can allocate a part of the yard to be more natural. By doing so, you support biodiversity and require less labor.
7. Pine Needles – A Special Note
If your “leaves” include pine needles (pine straw), you’re in luck – pine needles are excellent mulch. Many gardeners prize pine straw for its neat look and beneficial properties:
- Pine needles are slow to break down, so they last a long time as mulch. They form a loose, interlocking mat that stays put even on slopes.
- They help suppress weeds and allow water to percolate through easily to the soil.
- There’s a common belief that pine needles acidify the soil (since they’re slightly acidic when fresh), making them ideal for acid-loving plants like blueberries, azaleas, or hydrangeas. While pine mulch may have a mild acidifying effect over a long time, in practice it’s usually minimal. Still, pine needles make a great mulch for shrubs, perennial beds, and paths.
- Rake up fallen pine needles and use them just like you would leaves – around 2–3 inches thick around plants. Because they’re lightweight and airy, you might need a thicker layer (3–4 inches) for good weed suppression.
- One bonus: pine straw mulch tends not to compact heavily. And as it breaks down slowly, it adds organic matter gradually.
If you don’t have pines, some people even seek pine needles from neighbors or purchase bales of pine straw for mulching. But if you do have them naturally, definitely utilize this valuable resource rather than tossing it. Tip: Wear gloves when handling piles of pine needles – they can be prickly.
8. Responsible Leaf Disposal (If Necessary)
If after mulching, composting, and crafting with leaves you still have too many, or perhaps have leaf bags full of diseased leaves (for instance, leaves with tar spot fungus or other tree diseases), you may need to dispose of some. Best practices:
- Municipal Leaf Pickup: Most towns have autumn leaf pickup or drop-off sites. Check if they want them in paper bags or loose raked to the curb. These collected leaves are often composted on a large scale by the city – a good end use.
- Burning Caution: In some rural areas, burning leaves is allowed, but this is not recommended – it causes air pollution (and that smoky leaf smell, while nostalgic, isn’t healthy to breathe). It also wastes the organic matter. Only resort to burning if it’s legally permitted, safe, and you truly have no other option (and never burn poison ivy or the like, as the smoke is dangerous). Composting or community disposal is far preferable.
- Leaf Mold Giveaway: If you have gardening friends or community gardens nearby, see if anyone wants bags of leaves. Gardeners who compost heavily or make lasagna beds will often gladly take extra leaves off your hands.
In summary, fallen leaves are a boon, not a burden. In the words of many gardeners: “leaves are garden gold.” By mulching them into lawns, spreading them in beds, or composting them, you boost your garden’s fertility naturally. And you’ll save on buying mulch or fertilizers. So this fall, embrace the leaves!
Twigs and Branches: Turning Stick Piles into Useful Solutions
After windy days, pruning sessions, or general yard cleanup, we often end up with a collection of twigs, sticks, and small branches. Don’t hurry to drag them to the curb – these woody materials have plenty of practical and creative reuses. From building wildlife habitats to crafting garden structures, here’s what you can do with those sticks:
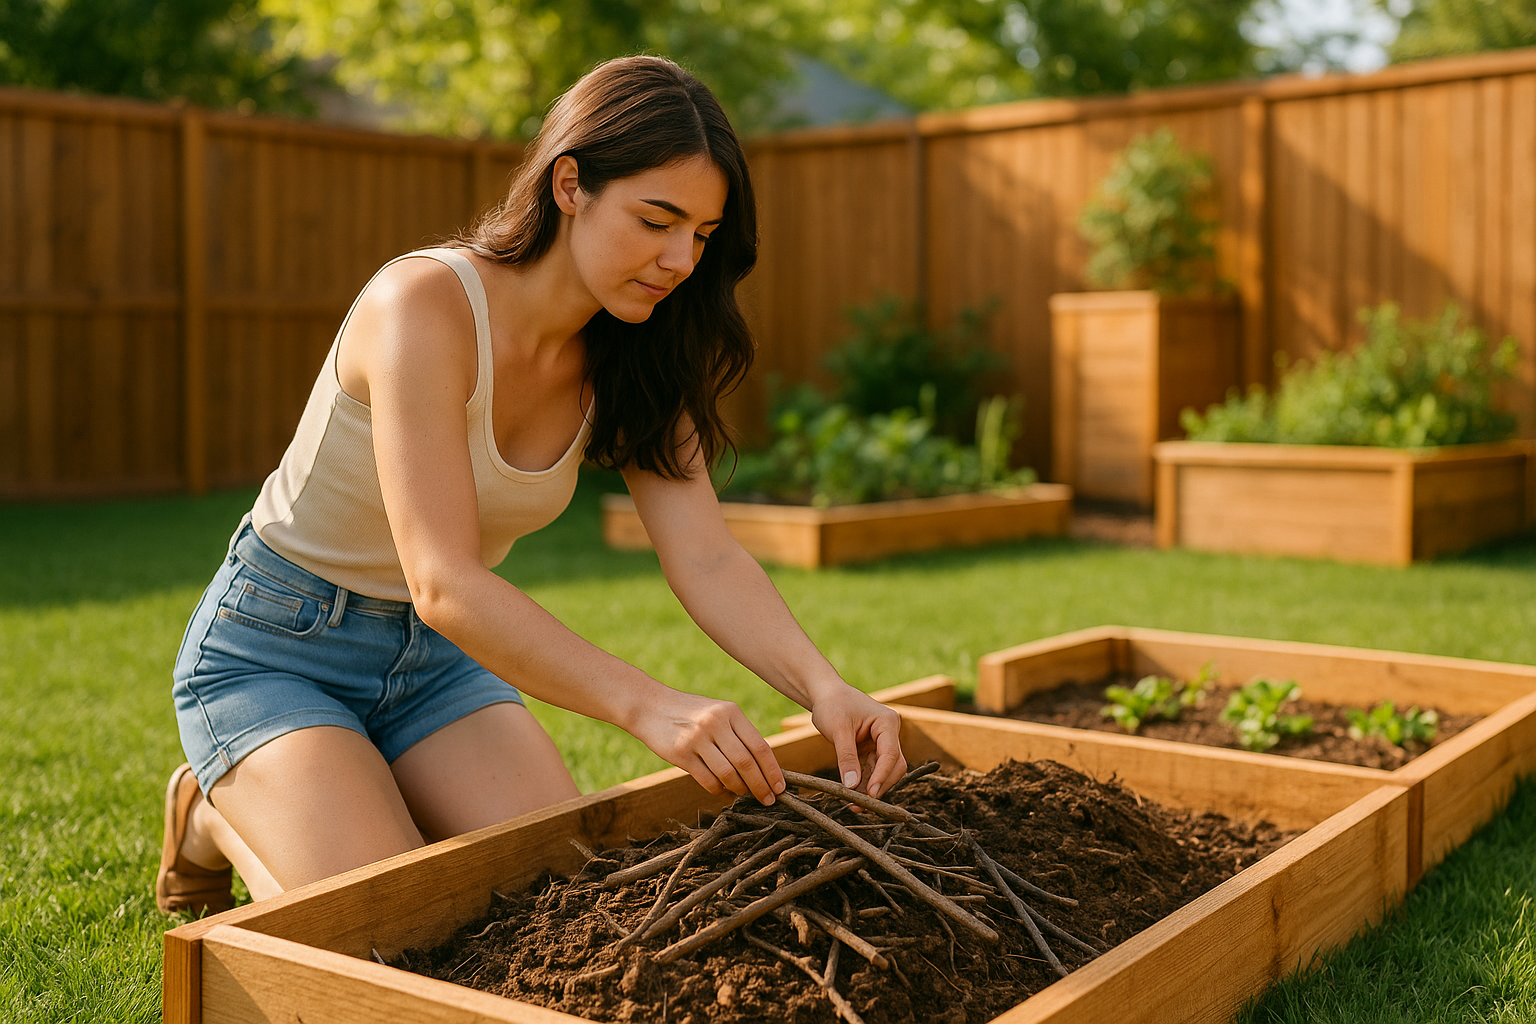
1. Start a Compost or Hugelkultur Base
Woody debris can be used to improve your compost or even form the foundation of a raised bed:
- Brown Material for Compost: While large sticks take a long time to break down, small twigs (finger-width or less) can go into your compost as a carbon source. It’s best to chip or chop them up a bit first. You can lay a bundle of twigs at the bottom of a new compost pile to help airflow (they create a coarse layer that prevents the bottom from getting mucky).
- Hugelkultur & Raised Bed Fill: Consider using branches in the base of raised garden beds or mounds. Hugelkultur is a permaculture technique where rotting wood and sticks are buried under soil to create a moisture-retentive, slowly decomposing bed. If you’re building a raised bed, you can throw logs and thick branches in the bottom (it saves soil fill and will break down over years, enriching the bed). Twigs and small branches can similarly be buried in trenches or mounds in the garden to improve drainage and add organic matter over time. As Kotona Living suggests, you can place branches at the bottom of raised beds or planters as a way to recycle them on-site. This also reduces the amount of soil you need to purchase for filling large beds.
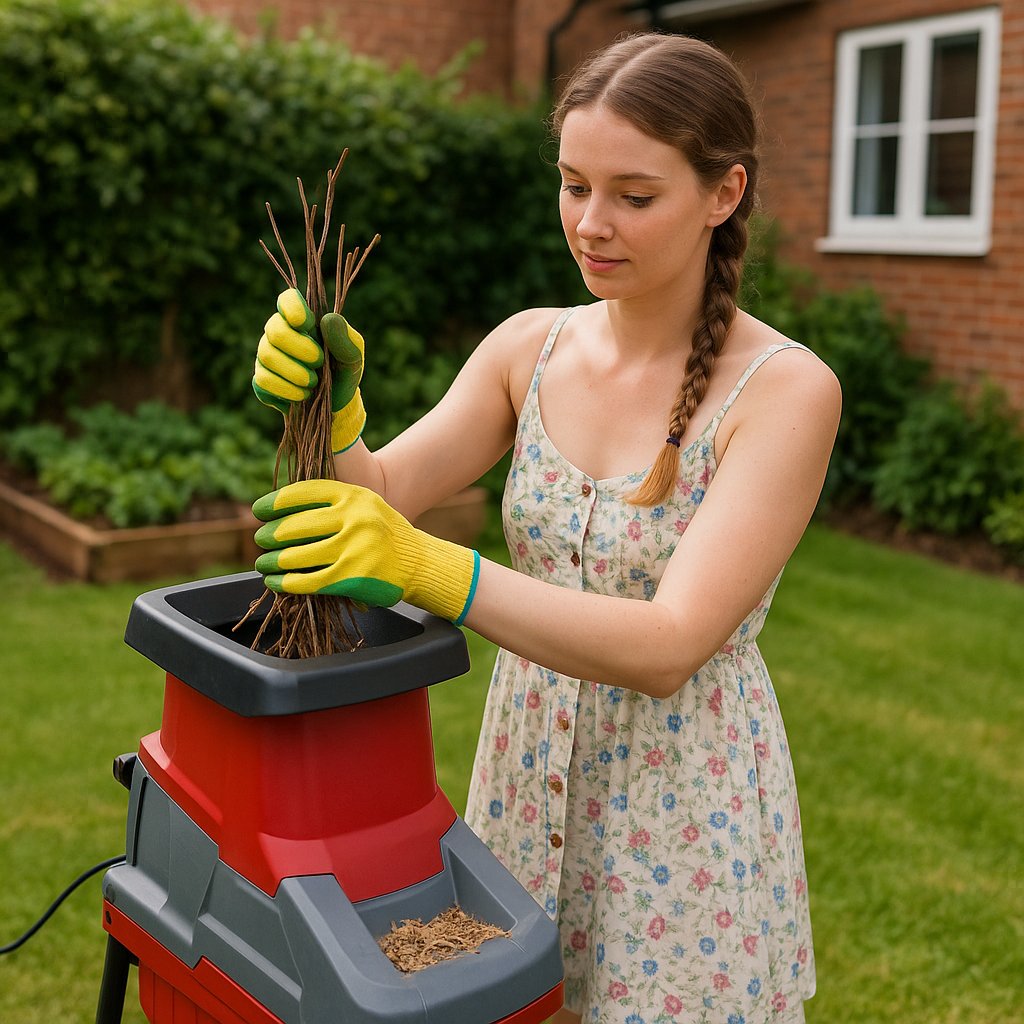
2. Chip It for Mulch
If you have access to a wood chipper (or know someone who does, or your city offers chipping services), turning branches into wood chip mulch is an excellent use. Wood chips are great for suppressing weeds on garden paths, around trees, or in perennial beds. Even twig-sized material, once chipped, creates a natural mulch. Some tips:
- Rent or Share a Chipper: For a big pile of sticks, you might rent a small wood chipper for a day or see if a neighbor wants to go in on one. Feed the dry or fresh branches in, and collect the chips.
- Use the Mulch: Fresh wood chips can be used on paths or around established shrubs and trees. It’s wise to let very green wood chips age a few months before using directly around tender plants, as they can tie up a bit of nitrogen on initial decomposition. But for walkways or just as ground cover under trees, you can use them immediately.
- City Services: Some municipalities will chip your brush at the curb or allow drop-off at a yard waste center where they turn it into mulch. They often give away or sell the resulting mulch back to residents. This is a form of recycling – just be mindful if you drop off branches, you might not get your chips back, but at least it stays out of the landfill and comes back as a useful material.
3. Build a Brush Pile (Wildlife Habitat)
One of the simplest and most beneficial things to do with excess twigs and branches is to create a brush pile in a quiet corner of your yard. Pile up branches, sticks, and even toss some leaves in there. This seemingly messy stack actually becomes a sanctuary for all sorts of wildlife:
- Shelter for Creatures: Brush piles provide shelter for small mammals like rabbits, chipmunks, and hedgehogs, and reptiles/amphibians like turtles, lizards, and salamanders. Birds will also hop in and use the pile for cover, especially in winter or during bad weather. Insects will colonize the decaying wood (providing food for those birds). It’s like a free critter hotel!
- How to Make: Simply choose a spot out of the way (along a fence line, at the back of the property, or under a group of trees). Start with larger logs or thick branches on the bottom to create a base. Pile smaller branches and twigs on top. Aim for a pile at least a few feet high and across (4–6 feet in diameter and height is great for a substantial wildlife refuge). You can lay the branches in a crisscross pattern so it’s stable and has pockets of space inside for animals to move around. Over time, the pile will settle and break down – you can always add more on top.
- Benefits: Not only are you providing a safe space for wildlife, but the lower branches in contact with soil will slowly decompose, returning nutrients to the earth. This is a very eco-friendly way to “dispose” of branches because it sequesters carbon in your yard (releasing it slowly into the soil as opposed to burning wood which releases carbon immediately into the air). In essence, a brush pile is a slow compost heap for woody material that also happens to benefit the local ecosystem.
If you worry about looks, you can make a more organized brush pile (some call it a dead hedge or stick fence). Drive a pair of stakes into the ground about 2–3 feet apart, then another pair parallel a few feet away. You can then sandwich the piled branches between these pairs of stakes, effectively creating a long, narrow brush pile “fence” that looks tidier. Plant some native shrubs or wildflowers nearby to integrate it into the landscape. This method was traditionally used to contain livestock or mark boundaries, and today it’s gaining popularity for its wildlife value and zero-waste approach.
4. DIY Garden Edging and Structures
For those who are a bit more on the crafty side, branches and twigs are raw material for creative garden structures:
- Woven Branch Edging or Fencing: Flexible branches (like willow, birch, or even thin maple shoots) can be woven into low fences or edging for garden beds. This is sometimes called wattle fencing. Push some stout sticks or rebar into the ground as posts, then weave thinner twigs in and out to create a rustic fence. It’s charming and uses up lots of twigs! Even a simple low border around a flower bed can be made by weaving twigs.
- Raised Bed Walls: As shown in the image above, you can construct the sides of raised beds by weaving long, flexible sticks between upright stakes. This creates a beautiful raised planter with zero lumber needed. It’s essentially a large-scale basket made of your pruned branches.
- Trellises and Teepees: Long, straight branches make excellent plant supports. For instance, gather three or four long sticks of similar length, lean them together in a teepee shape, and tie at the top – voila, a bean teepee trellis for your pole beans or sweet peas. For shorter plants, use forked sticks pushed into the ground as supports, or make an A-frame trellis by crossing two sticks and tying them, making multiple “A”s and laying horizontal sticks across like rungs.
- Plant Stakes and Markers: Instead of buying bamboo stakes, trim straight twigs to use as stakes for staking perennials or marking rows in the garden. You can even sharpen one end in a pencil sharpener for a neat look to poke into the soil.
- Decorative Crafts: There are countless artsy projects with twigs: making a rustic wreath, a picture frame, wind chimes (hanging driftwood-like sticks), or even furniture if you’re adventurous. I would probably grab some branches and build a whimsical arbor or archway. For example, one creative idea: use thin birch twigs to form an arch over a garden path (tie them onto a rebar frame or existing arch) for a fairy-tale look. Another: bundle an array of sticks and attach to a wall as a “bug hotel” with little cavities for insects.
Safety Tip: When working with branches, wear gloves (to avoid splinters) and eye protection if cutting or chipping. If using power tools like a chipper or saw, follow all safety guidelines.
5. Fuel (Firewood or Biochar)
It’s worth mentioning that dry branches can of course be used as firewood or kindling for fire pits, wood stoves, or campfires. Small sticks are great for starting fires. Larger branches, once fully dried (“seasoned”), can be cut to length and used in outdoor fire pits or wood-burning stoves if they are hardwood and properly dried.
- Check Local Regulations: Some areas prohibit open burning of yard waste due to smoke pollution or wildfire risk. Always adhere to local laws and safety – never burn during dry, windy conditions.
- Fire Pit Use: If you have an outdoor fire pit, save a stack of dry twigs as kindling. It’s satisfying to start a cozy fall fire with twigs you collected. Just be cautious if the wood might be from poisonous plants (don’t burn things like poison ivy vines or oleander branches; the smoke is toxic).
- Biochar: For the permaculture enthusiasts, you could even convert small branches to biochar. This involves charring wood in a low-oxygen burn to create a sort of charcoal that can be added to soil. It’s a bit complex to do safely on a small scale, but some gardeners do small biochar burns in a barrel. The resulting charred sticks (cooled and crushed) can be mixed into compost or soil to improve fertility and carbon storage. This is an advanced project but a very sustainable one if done right.
6. When to Toss: Smart Disposal of Woody Debris
If you truly have no use for certain woody debris – for instance, diseased wood (like branches from a tree with fungal canker) or an overwhelming volume of sticks after a storm – proper disposal is next:
- Yard Waste Collection: Bundle sticks with twine for curbside pickup if your city provides that service. Many places require bundles under a certain length (say 4 feet) and weight. The nice thing is those will usually be composted or mulched by the city (often chipped into municipal mulch).
- Disposal Site: Take larger limbs to a community brush drop-off site. They often turn huge piles of brush into wood chips via industrial grinders.
- No Dumping in Wild Areas: Avoid the temptation to throw sticks into a nearby woods or empty lot – it can introduce pests or weeds. If you own woods, adding organic matter isn’t the worst, but it’s better to keep things contained. Also, never dump yard waste in parks or preserves; it’s illegal and can harm those ecosystems.
Twigs and branches may seem like the trickiest yard waste to handle, but as we’ve shown, they are far from useless. By embracing a bit of creativity and ecological thinking, you can find a use for almost every stick – whether it’s enriching your soil, housing wildlife, or building something fun. As one article quips, a “garden full of twigs and branches – lucky me!” because you’ve got free wood to work with. So next time you trim the shrubs or pick up sticks, try one of these ideas.
Other Yard Debris and Final Tips
We’ve covered grass, leaves, and woody debris in detail. Here are a few more miscellaneous yard waste items and tips on handling them:
- Garden Trimmings & Spent Plants: After vegetable harvest or flower pruning, you’ll have soft plant debris (like vines, stems, faded annuals). These are great for compost – they count as “greens” if still juicy, or “browns” if dried. Chop up thick stems (e.g. sunflower stalks) to help them break down. If any plants were diseased (tomatoes with blight, etc.), it’s safest to dispose of those rather than compost, unless you’re confident in achieving a hot compost. Many plant diseases can overwinter in debris, so either burn or put out for municipal pickup those infected parts.
- Weeds: Composting weeds can be tricky. Weeds that have not gone to seed (or are not super aggressive perennials) can be composted – they actually add good nutrients. But if they’ve set seed or are things like ivy or Bermuda grass runners, you risk spreading them. A truly hot compost (above 140°F) will kill most weed seeds, but cool compost might not. A safe practice: collect weeds (especially seedy ones) in a black plastic bag, let it sit in the sun for a few weeks to “solarize” and kill seeds, then add to compost or trash. Or drown weeds in a bucket of water to make a weed tea/fertilizer (it will stink but the weeds will die and break down). Never toss invasive weeds into a pile at the back of your yard – some, like kudzu or English ivy, might just take root where you dumped them! Either compost them thoroughly or use municipal green waste bins.
- Thatch and Lawn Dethatching Waste: If you rake out lawn thatch (the layer of dry, dead grass debris) or bag a lot of moss (in damp climates), you can compost this material as well. Thatch is mostly dead grass stems (brown, high-carbon), so mix with greens. If the thatch is very dry, wet it in the compost. Moss can be acidic, but in moderate amounts it’s fine in compost too.
- Pinecones, Seed Pods, Acorns: These tough nuts and cones will break down slowly, but they can still be composted or used decoratively. Pinecones can be added to a brush pile or used as mulch in a dry area (they look interesting but don’t break down fast). Acorns can sprout, so if you compost them, try to crush or smash them first, or compost over a long period. Alternatively, leave them out for squirrels if you don’t mind – they’ll happily carry them off for you (though you might get oak seedlings later from their forgotten stashes!).
- Pet Waste and Litter: This isn’t exactly lawn clippings, but sometimes people ask: can I compost pet poop or used rabbit/guinea pig bedding from the yard? Pet waste from carnivorous animals (dogs, cats) should not go into your regular compost that will be used on edibles, due to pathogen risks. It’s best disposed of via the trash or special pet waste composters. Herbivore droppings (rabbit, goat, etc.) are actually great fertilizer – rabbit manure can go straight on garden as a mild fertilizer, and bedding hay/straw with droppings can be composted or used to mulch ornamentals (avoid using pet waste on food crops unless you hot compost it very well).
- General Safety Note: Whenever handling yard waste, wear appropriate gloves (especially with thorny trimmings or unknown weeds – there could be irritants). If you’re allergic to mold, a mask might be smart when dealing with decayed leaves or turning compost. Also, be mindful that decomposing piles (particularly grass clippings piles) can generate heat. Large piles of grass clipping can get hot enough to steam or even theoretically catch fire if they’re huge and tightly packed (like wet hay bales). It’s rare in a home setting with moderate piles, but to be safe, don’t store a giant unventilated heap of fresh grass in a shed or against a wooden fence. Spread it out or compost it in thinner layers.
- Tool Recommendations: To make all these tasks easier, a few tools and gadgets can help:
- A good leaf rake and maybe a lawn sweeper for gathering leaves.
- A mulching mower or leaf shredder to mince up leaves and clippings.
- Compost bin or tumbler to manage decomposition neatly (though a simple pile works too).
- A pitchfork or compost aerator to turn piles.
- Pruners, loppers, or a small saw for cutting down branches to manageable size.
- A chip shredder (if you frequently deal with lots of sticks – even a small electric one can handle branches up to 1.5 inches thick, producing useful mulch).
- Sturdy paper yard waste bags if you plan to use city pickup (and a marker to label bags if required, e.g. “invasive plants – landfill” if you have to separate those).
While we won’t name specific brands, you can find many of these tools at garden centers or home improvement stores. They are worthwhile investments for turning yard work into productive gardening.
Finally, remember that yard waste management doesn’t have to be all-or-nothing. You might choose to grasscycle the lawn clippings but send away excess sticks, or compost leaves but not have time to shred them – and that’s okay. Even implementing a couple of these reuse strategies will cut down what you throw away and benefit your garden. Start with what’s easiest for you and build from there. For instance, you could begin by simply not bagging your grass next mow (easy win!), or by raking leaves into your perennial beds instead of hauling them off.
Conclusion: Embrace the Cycle of Reuse
Instead of seeing lawn clippings, leaves, and twigs as a chore to be discarded, start seeing them as resources in your home garden. Gardening teaches us about cycles – seeds to plants to compost to soil and back to seeds. Yard waste reuse is a perfect example of nature’s recycling in action. By grasscycling, you feed your lawn naturally. By composting leaves, you create rich soil amendments. By piling up sticks, you provide habitat and eventually nutrients as they break down. These practices not only reduce waste and save money, but they also connect you to your garden’s ecosystem in a deeper way.
To recap some actionable takeaways for the average home gardener:
- When mowing, skip the bag if conditions allow, and let clippings nourish the lawn.
- Set up a simple compost bin for mixed yard and kitchen waste – alternate those grass clippings with autumn leaves and let decomposition work its magic.
- Use readily available debris (leaves, grass) as mulch to suppress weeds and lock in moisture, instead of buying mulch each year.
- Get creative with twigs: outline a new garden bed, edge a pathway with mini branch fences, or stack a cozy brush pile for wildlife.
- Always handle any potentially problematic waste (chemically treated or diseased plants, seedy weeds) carefully – when in doubt, keep them out of your compost and use municipal disposal to prevent future issues.
- Pat yourself on the back for every bag of yard waste you don’t send to the landfill. You’re making a difference!
Gardening is often about working with nature rather than against it. By finding uses for lawn leftovers, you work with the natural processes of decay and regeneration. And in a friendly, practical sense – it makes your gardening easier and more rewarding. You might even find you look forward to those piles of fall leaves because now you have a plan for them.
So the next time you’re standing in your yard, rake or mower in hand, surveying the “mess” of cut grass, scattered leaves, and fallen sticks, you can smile. You’ve got a toolkit of ideas to turn that mess into mulch, that waste into wealth for your garden. Grab a mug of coffee (or a glass of iced tea in summer) and get to it – your garden will be greener and your waste bin lighter. Happy gardening, and happy recycling of those yard materials!
Sources: Most of the tips above are drawn from sustainable gardening practices and extension services. For instance, leaving clippings on the lawn is widely recommended by horticultural extensions, and studies have quantified the nutrient return (up to 25% of fertilizer needs from grasscycling). The value of leaves is supported by research noting their high nutrient content and benefits as mulch/compost. Wildlife experts highlight brush piles as beneficial shelters. All in all, the consensus is clear – reusing yard debris is good for your garden and the planet. So implement these ideas with confidence, and enjoy the results in your flourishing garden!