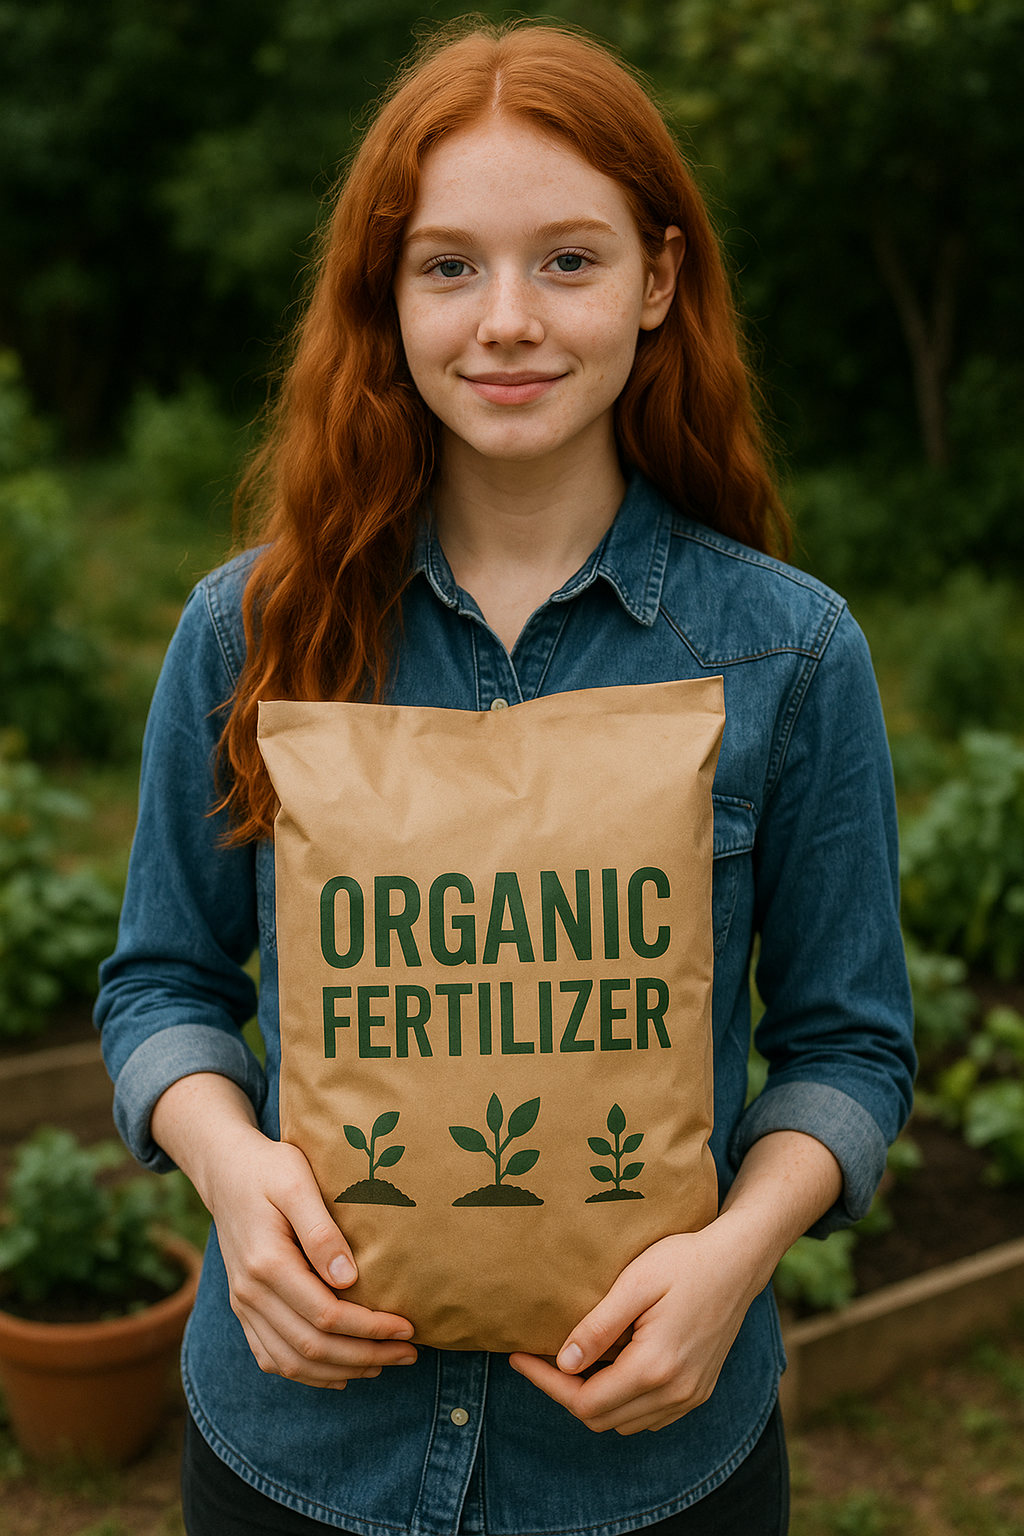
Maintaining a thriving vegetable garden doesn’t have to mean spending a fortune on chemical fertilizers or complicated routines. In fact, natural and organic fertilization methods can be easy, low-cost (often free!), and effective – perfect for busy beginners with small gardens. Whether you’re tending a few patio pots, an indoor herb garden, or a little backyard veggie patch, this friendly guide will walk you through simple DIY ways to feed your plants organically.
We will cover indoor and outdoor tips, homemade fertilizers like compost, worm castings, compost teas (including banana peel tea and more), how and when to use them, common mistakes to avoid, and seasonal care strategies. By the end, you’ll know how to build a low-maintenance fertilization routine that keeps your garden (and the soil) healthy and productive, naturally. Let’s get started!
Why Choose Organic Fertilizers for Your Small Garden?
Going organic with your garden fertilizer offers a bundle of benefits, especially for a small-scale or home setup:
- Healthier for You and Your Plants: Organic fertilizers come from natural materials (like kitchen scraps, manure, leaves) rather than synthetic chemicals. This means no harsh chemical residues on your veggies and herbs, making them safer to eat (especially important for kids and pets who might be around the garden). You’re feeding your plants in a gentle way, providing nutrients as nature intended.
- Soil-Building Benefits: Unlike synthetic fertilizers that give plants a quick nutrient fix but don’t improve soil, organic methods feed the soil itself. Natural fertilizers like compost and manure add organic matter that improves soil structure, helps it hold moisture, and encourages beneficial soil organisms. Over time, this creates rich, fluffy soil that roots love. Think of it as long-term investment in your soil’s health.
- Slow, Steady Nutrient Release: Organic fertilizers usually break down slowly, releasing nutrients over time rather than all at once. This slow-release feeding is ideal for busy gardeners – there’s less risk of “burning” plants with too strong a dose, and you don’t have to fertilize as frequently. For example, worm castings (earthworm compost) have a natural coating that makes them a “time-release” fertilizer, gradually supplying nutrients to plants without overwhelming them.
- Environmentally Friendly: Using kitchen scraps, yard waste, and other natural materials recycles nutrients and reduces waste. You’re keeping organic matter out of landfills and returning it to the soil. Plus, you avoid the runoff of excess chemical fertilizers that can pollute waterways. It’s a win-win for your garden and the planet.
- Cost Effective & DIY-Friendly: Most organic fertilizing methods are very budget-friendly – often free! Instead of buying lots of products, you can make compost from food scraps, collect free manure from a local farm, or soak banana peels in water for a nutrient-rich “tea.” With a bit of knowledge (which you’ll get from this guide), you can turn waste into garden gold and save money on store-bought fertilizers.
- Great for Small Gardens & Containers: Organic fertilizers can be easily tailored to small spaces. A single compost bin or worm bin can yield plenty of fertilizer for a mini-garden. Also, natural fertilizers are generally mild, so they work well in containers and indoor gardens where using strong chemicals could build up salts or damage sensitive roots.
In short, organic fertilization keeps things simple, safe, and sustainable – perfect for beginners learning the ropes of gardening. Now that we know why to go organic, let’s look at understanding what nutrients your plants need and how natural fertilizers provide them.
Understanding Soil Nutrients in a Nutshell
Before diving into specific fertilizer methods, it helps to know the basics of what nutrients your veggies need and how organic fertilizers meet those needs:
- The “Big 3” Nutrients (N-P-K): Plants primarily need Nitrogen (N) for leafy growth, Phosphorus (P) for strong roots and fruits, and Potassium (K) for overall health and flowering/fruiting. These are often listed as N-P-K numbers on fertilizer labels. Organic fertilizers provide these too, just in a more slow-release, natural form. For example, well-rotted compost or worm castings contain all three nutrients in small amounts, while something like banana peels are particularly high in potassium.
- Secondary Nutrients and Micronutrients: Aside from N-P-K, plants also use calcium, magnesium, sulfur (secondary nutrients) and trace elements like iron, zinc, copper, etc. One big benefit of using organic matter is that it often contains a broad spectrum of these micronutrients. Worm castings, for instance, are rich in micronutrients such as iron, sulfur, calcium, magnesium, zinc, and more. Eggshells are mostly calcium carbonate, offering calcium (and a bit of magnesium) to soil when they break down. A diverse mix of organic amendments can help ensure your plants get a balanced diet.
- Soil Life = Nutrient Helpers: Healthy soil is teeming with microbes (bacteria, fungi) and larger critters (earthworms, insects). These organisms are your silent garden helpers – they break down organic fertilizers into forms plants can absorb. For example, compost and worm castings come loaded with beneficial microbes that continue working in your soil. Some microbes even help protect plants from diseases or pests. By using natural fertilizers, you’re feeding these soil organisms too, keeping the whole ecosystem healthy. It’s often said in organic gardening: “Feed the soil, and the soil feeds the plant.”
- Slow and Steady vs. Instant Feeding: Chemical fertilizers are like fast food – quick nutrient boost but can cause a surge in growth that the soil can’t sustain. Organic fertilizers are more like a home-cooked meal – slower to digest but with lasting benefits. Don’t be surprised if organic methods seem gentler or slower at first; that’s normal. Over time, as your soil’s organic matter builds up, your plants will grow more robustly with fewer inputs. (Patience is key – gardening is a marathon, not a sprint!)
- Soil Testing (Optional but Useful): If you’re curious about your soil’s nutrient levels or pH, you can do a soil test (many university extensions offer low-cost testing). This isn’t mandatory for beginners, but it can be helpful if you suspect deficiencies. For example, very acidic soil might benefit from a bit of lime or wood ash (for calcium and to raise pH), whereas alkaline soil might need sulfur or just lots of compost. However, generally if you add organic matter regularly, you’re likely improving your soil’s fertility and structure steadily.
In summary, plants need a variety of nutrients, and organic fertilizers supply those while also improving the soil that supports your plants. Next, let’s explore the types of natural fertilizers you can use in your small garden, and how to make/apply them.
Types of Natural Fertilizers for Small Gardens
There are many organic fertilization methods out there, but we’ll focus on the most beginner-friendly, low-cost options. You might not use all of these, but it’s good to know what’s available and pick what fits your situation. We’ll cover each one’s benefits, how to make it (if DIY-able), and how to use it for both outdoor and indoor gardens.
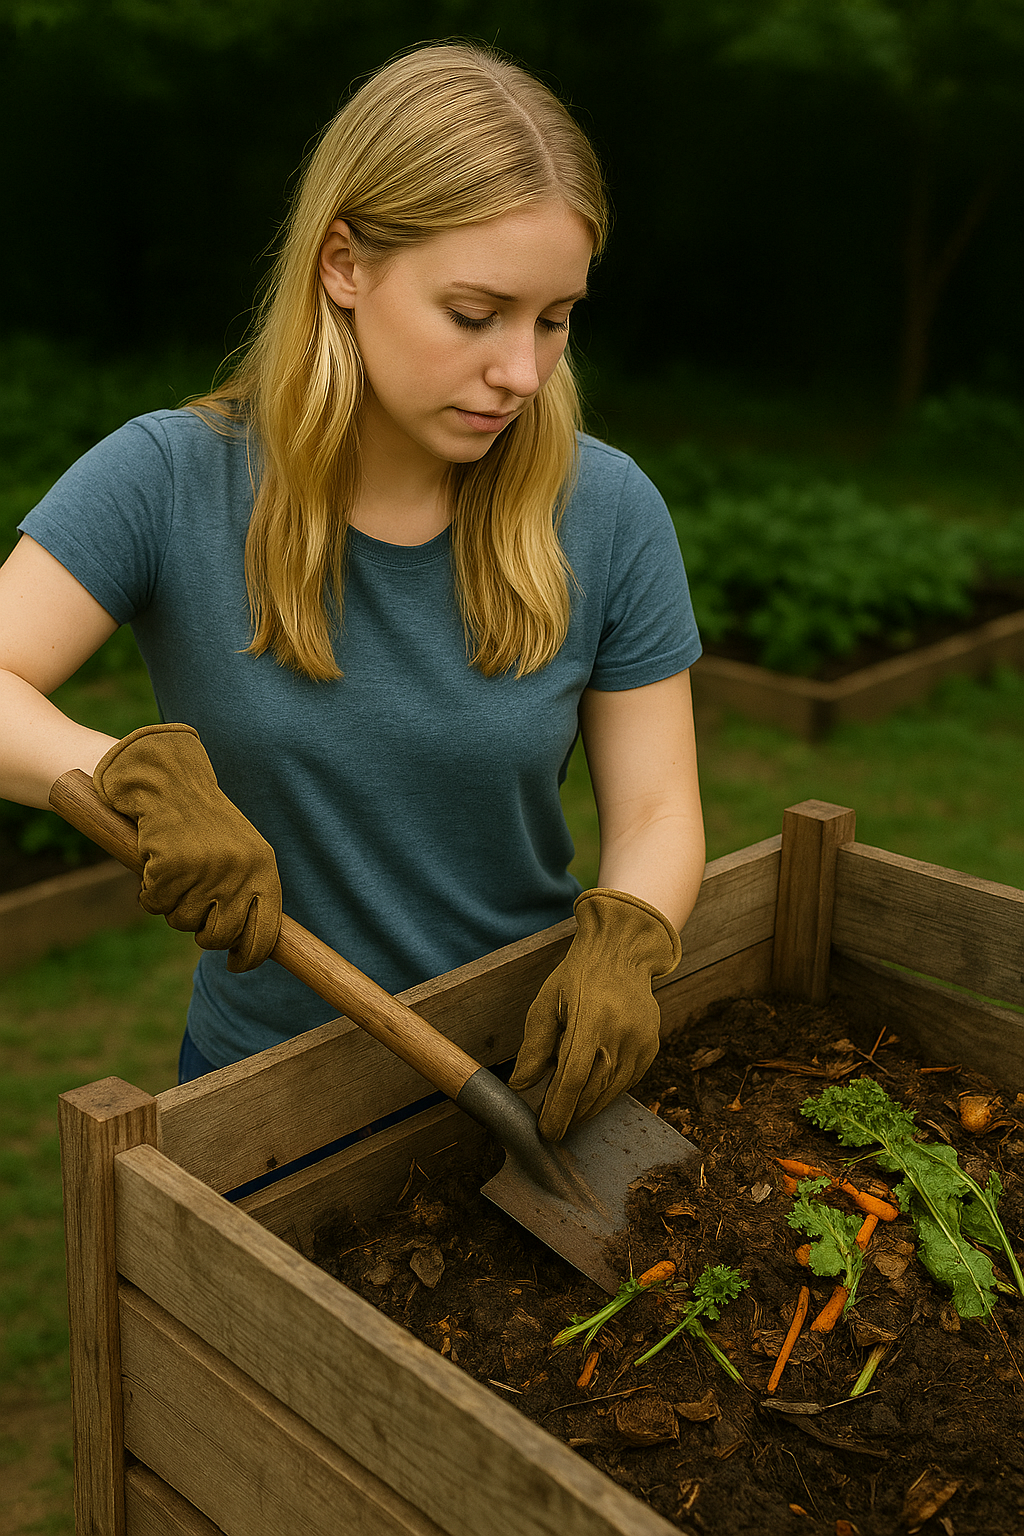
1. Compost – Black Gold for Your Garden
What It Is: Compost is often called “black gold” by gardeners. It’s the end product of decomposed organic matter – think kitchen scraps, fallen leaves, grass clippings, and other once-living materials turned into dark, crumbly soil-like material. Finished compost is rich in humus (organic matter) and teeming with beneficial microbes.
A simple open compost bin built from wood scraps, holding decomposing grass and garden clippings. Even a small bin like this can turn kitchen and yard waste into nutrient-rich compost over time.
Nutrient Content: Compost contains a little bit of everything nutrient-wise, but in moderate amounts. Typically, well-rotted compost might have an N-P-K roughly around 1-1-1 (give or take). So it’s not a high-analysis fertilizer, but that’s okay – its strength is in improving soil structure and gradually releasing nutrients. Think of compost more as a soil conditioner and slow nutrient feeder. In fact, extension experts note that the fertilizer value of compost is relatively low compared to chemical fertilizers and heavy-feeding plants may still need additional nutrients for best growth. Compost feeds your plants slowly over time as soil organisms break it down.
Benefits:
- Improves soil texture, drainage, and water retention dramatically. Adding compost to sandy soil helps it hold water, and adding to clay soil helps open it up for better drainage.
- Provides a wide range of micronutrients and some macros, and fosters a healthy soil microbial community.
- Buffers soil pH and can help moderate both acidic and alkaline tendencies.
- Readily available from your own waste – truly a DIY fertilizer.
How to Make Compost (Outdoors): Starting a compost pile or bin is one of the best things a gardener can do. Here’s a simple way to compost at home:
- Choose a Spot or Container: Pick a location outdoors that’s convenient but out of the way (at least a few feet from the house to avoid any pest issues). You can compost in an open pile or use a bin (store-bought or homemade from wood pallets or a garbage can with holes). Size can be small – even a 3-foot square pile can work.
- Add Green and Brown Materials: Compost needs a mix of “greens” (nitrogen-rich, moist materials like fruit/veggie scraps, coffee grounds, fresh grass clippings) and “browns” (carbon-rich, dry materials like dried leaves, straw, shredded paper/cardboard). Aim for roughly 2-3 parts browns to 1 part greens by volume. This balance keeps the pile from getting too wet or smelly.
- Moisture and Air: Keep the pile about as moist as a wrung-out sponge – not soaked, not bone dry. If it’s dry, sprinkle some water. If it’s sopping (and smelly), add more dry browns. Turning or stirring the pile every week or two adds oxygen that speeds up decomposition. (Busy gardener tip: if you don’t turn it often, it will still compost eventually – it might just take longer. Turning is like exercise for the pile, helps it “cook” faster.)
- Patience: Depending on conditions, you can have finished compost in a few months (with active turning) or it may take 6-12 months if you’re doing “cold composting” (adding as you go and not turning much). You’ll know it’s ready when it’s dark, crumbly, and smells earthy, with no obvious chunks of food or leaves.
For small gardens, you can also try trench composting or dig-and-bury method: dig a hole or trench in an unused part of your garden bed, dump kitchen scraps in, and cover with soil. Over weeks, worms and microbes will break it down right in the ground, enriching that spot for future planting. This is super low-effort and great if you have limited space or don’t want a visible pile.
Using Compost in the Garden: Compost can be used in several ways:
- Soil Amendment: If you’re preparing a planting bed or potting mix, mix compost into the soil. For new garden beds, a common recommendation is to spread about a 3–4 inch layer of compost on top and work it into the top 6-12 inches of soil. For existing beds, you can add a thinner layer (0.5–1 inch) each year and lightly mix it in. This annual addition maintains soil fertility.
- Mulch: Use compost as a mulch around plants. A 1-2 inch layer on the soil surface will help suppress weeds, keep soil moist, and feed the soil slowly as it breaks down. Just take care that the compost is fully mature if you’re placing it around growing plants (immature compost can sometimes rob nitrogen temporarily as it finishes decomposing).
- In Potting Mix: You can mix compost into potting soil for containers (indoor or outdoor). A general guide is no more than 1/3 to 1/2 of the mix as compost, the rest being something like coconut coir/peat and perlite for drainage. Tip: Sift compost first for container use to remove large bits. Many gardeners successfully grow container veggies in a mix of about 25-50% compost with the remainder a soilless mix. It provides nutrition and beneficial microbes to the pot. (Note: If using compost in indoor pots, be mindful it could introduce some fungus gnats or bugs if not sterilized – one way around that is to only use vermicompost or pasteurized compost for inside, or keep indoor soil mix more on the soilless side and feed with compost tea/castings instead. More on indoor care later.)
- Compost Tea Base: Compost can be used to brew “compost tea,” which we’ll discuss in a moment, to create a liquid fertilizer.
For Indoor Gardens: You wouldn’t have a compost pile indoors (for obvious yuck factor), but you can absolutely use compost that you made outdoors (or bought) to enrich indoor containers. Also, an indoor worm bin (coming up next) is a neat alternative to make compost inside without smells. For feeding indoor potted veggies or herbs, you can scratch a small amount of compost or worm castings into the topsoil every month or two, or apply diluted compost tea as you water. This provides gentle nutrition. Just avoid piling raw scraps on houseplants – always compost them first or use a liquid extract method to keep things clean inside.
Overall, compost is the cornerstone of organic gardening. If you do nothing else, start a little compost – your future self (and your plants) will thank you! Now, let’s look at another fantastic natural fertilizer that you can even produce in a small apartment: worm castings.
2. Vermicompost (Worm Castings) – Nature’s Perfect Plant Food
What It Is: Vermicomposting is the process of using special composting worms (usually red wigglers) to eat your kitchen scraps and produce worm castings – essentially worm poop, which is an outstanding fertilizer and soil amendment. Worm castings look like dark, coffee-ground-like crumbly soil and are 100% organic humus full of nutrients and microbes. Many gardeners consider worm castings to be a step above regular compost in fertilizing power.
Nutrient Content: Worm castings are typically much richer in nutrients than normal compost. Analyses vary based on what the worms are fed, but castings can have an N-P-K ratio anywhere from about 1-0-0 up to 5-5-3. For example, one source gives an average NPK around 5-5-3 – meaning quite a good nitrogen and phosphorus content for an organic fertilizer. They also contain plenty of micronutrients (iron, calcium, magnesium, etc.). Importantly, these nutrients are in a form that’s readily available to plants but released slowly (thanks to a mucus coating the worms add) so they won’t burn roots.
Benefits: Worm castings are often called “plant superfood.” Here’s why:
- Gentle yet Effective Fertilizer: Castings provide a concentrated dose of nutrients that plants can easily absorb, but they are so gentle they won’t burn even delicate seedlings. You can use them lavishly without fear of overdose.
- Microbe-Rich & Protective: They come loaded with beneficial microorganisms. These microbes help suppress soil-borne diseases and even deter some pests. In fact, worm castings have been noted to help fight plant diseases and repel certain insects in the soil.
- Improves Soil Structure: Castings have a fine texture that helps aerate soil and hold moisture. They’re like little sponges – great for soil tilth and water retention.
- Odorless and Indoor-Friendly: Unlike raw manure or fish emulsion, worm castings have almost no odor (just a mild earthy smell). This makes them ideal for using in indoor plants or for those with a sensitive nose.
How to Make Worm Castings (Vermicomposting): Setting up a worm bin is fun and easy, even if you don’t have a yard. Many apartment gardeners keep a small worm bin under the sink or in a closet/balcony. Here’s a quick rundown:
- Container: You’ll need a bin to house the worms – it can be a plastic storage tote or a wooden box (about 8–12 inches deep). Drill a few small air holes in the sides and bottom (for drainage and airflow), and keep a tray underneath to catch any drips. Alternatively, there are commercial stackable worm bin systems, but a DIY bin works fine.
- Bedding: Start with moist bedding material – shredded newspaper or cardboard, coconut coir, straw, or partially finished compost. Bedding should be damp (again, like wrung sponge).
- Get Worms: Red wigglers (Eisenia fetida) are the best composting worms; they thrive in rotting organic matter. You can order them online or maybe get some from a fellow gardener or a bait shop. A starter batch of 0.5 to 1 lb of worms is plenty to begin.
- Feed: Add your food scraps (veg and fruit peels, coffee grounds, tea bags, crushed eggshells in small amounts, etc.) by burying them in the bedding. Avoid meat, dairy, oily foods, or excessive citrus/onion which can create odor or acidity issues. Cover the scraps with bedding to deter flies.
- Maintenance: Keep the bin in a fairly cool, dark place (60-80°F is ideal). Every week or so, add new food in different spots. If things get too wet, mix in more dry bedding. If too dry, sprinkle a little water. The worms will happily chomp away, and after a couple of months you’ll see dark castings accumulating.
- Harvest Castings: After 3-6 months, you can harvest worm castings. One method is to push all the contents to one side of the bin and put fresh bedding/food in the empty side – the worms will migrate to the new food over a week or two, allowing you to scoop out the finished castings from the old side. Another method is to dump out the bin onto a plastic sheet and manually separate worms from compost (do this under a light; worms will move away from light, making it easier to gather the top layer of castings).
You now have amazing worm compost to use! Don’t worry, using worm castings does not usually mean adding live worms to your pots (though a few eggs might hitchhike – not a problem). It’s the dark crumbly castings that are the good stuff.
Using Worm Castings:
- Mix into Soil or Potting Mix: You can mix worm castings directly into your garden soil or potting mix. A general guideline is to use castings as about 10-20% of the volume of your potting mix for robust growth. For example, mix 1 part castings with 3 parts regular potting mix. This is great for seed starting or transplanting – it gives a gentle nutrient boost.
- Top Dress Around Plants: In garden beds or pots, sprinkle castings on the soil surface around plants and lightly rake or scratch them in. Aim for a layer about ½ inch to 1 inch thick around your plant’s root zone. Do this every month or two during the growing season. For instance, many people top-dress tomatoes or peppers with a cup of castings mid-season to keep them fed. Even houseplants can get a half-inch layer on the soil every few months.
- Make Worm Tea: Just like compost tea, you can brew a worm casting tea. Steep a few handfuls of worm castings in a bucket of water for 24 hours or more, stirring occasionally. Then strain and use the liquid to water your plants or as a foliar spray. This “worm tea” contains soluble nutrients and microbes – fantastic for giving seedlings a quick boost or feeding container plants. A typical recipe is 1 part castings to 3 parts water, soak for a day or two. Dilute the resulting tea (if it looks very dark) until it’s the color of weak tea. Apply by watering the soil or spraying leaves (best used fresh, within a day or two of brewing).
One big plus: worm castings won’t burn plants or seedlings, so you can use them liberally. They are arguably the most user-friendly fertilizer – no mixing, no measuring needed. For indoor gardens, worm castings are a superstar because they’re odorless and clean. Mix them into your indoor potting soil or make a quick casting tea to water your indoor veggies and herbs.
If you don’t have your own worm bin, you can sometimes buy worm castings from garden centers or farmers markets (but it might be pricy). It could be worth it for a small garden, though. Otherwise, consider starting a worm bin – it’s a perfect project for a busy gardener since the worms do most of the work!
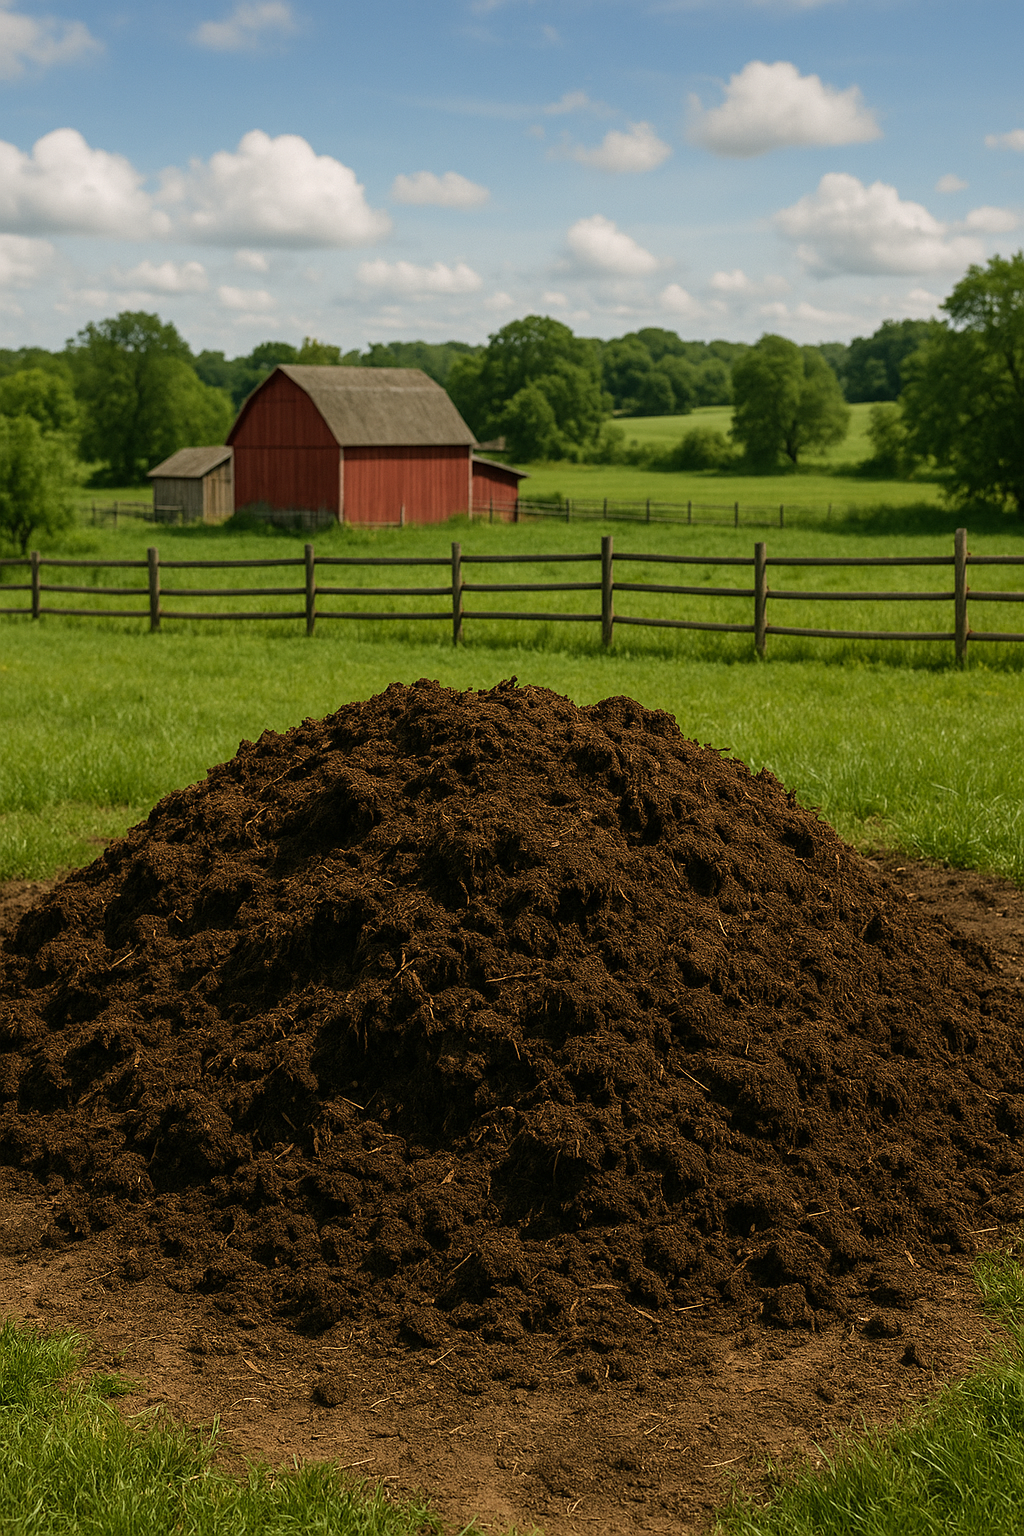
3. Manure (Aged or Composted) – A Traditional Nutrient Powerhouse
What It Is: Animal manures have been used in agriculture for millennia as fertilizer. Common types include cow, horse, chicken, sheep, goat, and rabbit manure. Fresh manure can be very high in nitrogen (especially poultry manure) and other nutrients, but it’s “hot” – meaning it can burn plants and often contains pathogens or weed seeds. Aged or composted manure is manure that has been allowed to decompose and mellow, reducing odor, killing off harmful bacteria and weed seeds, and stabilizing nutrients. This aged manure is excellent for the garden.
Nutrient Content: Generally, manures are good sources of nitrogen and also contribute phosphorus, potassium, and micronutrients. For example, chicken manure is particularly high in nitrogen (often needs careful aging due to how “hot” it is), while cow/horse manure is lower in nitrogen but still valuable and adds a lot of organic matter. A ballpark nutrient content for cow manure (aged) might be around 1-0.5-1 (N-P-K), and chicken manure can be closer to 3-2-2 once composted. Manure also contains calcium and other secondary nutrients. It acts both as a fertilizer and soil builder.
Benefits:
- Boosts Fertility: Manure can significantly enrich soil nitrogen, which is great for leafy vegetable growth. It’s often combined with compost to create super-charged garden soil. Some organic gardeners apply generous amounts of composted manure to achieve high yields without any chemical fertilizer.
- Improves Soil Structure: Like compost, manure adds organic matter. It can help sandy soil hold moisture and helps break up clay soil by creating air pockets.
- Feeds Soil Life: Microbes love breaking down the remaining organic material in manure, further contributing to a lively soil ecosystem.
Using Manure Safely: Never use fresh manure directly on your vegetable garden (especially near harvest time) – it can harm plants and there’s a risk of contaminating your produce with pathogens like E. coli. Always compost it or let it age sufficiently. The USDA organic standards recommend that raw manure be applied 120 days before harvest of any crops that touch the soil (like root crops or leafy greens) and 90 days before harvest for crops that don’t touch soil (like trellised beans or tomatoes). This ensures any harmful bacteria die off before you pick your veggies. A practical approach is to apply manure in the fall or very early spring and then plant later on.
If you’re buying manure or getting it from a farm, look for the well-composted stuff (often sold in bags as “composted manure”). If sourcing from a local farm or stable:
- Ask if it’s aged: Ideally, get manure that’s been piled for 6+ months. It should be somewhat crumbly, not fresh-dropping smelly.
- Compost it yourself: You can mix manure with other yard waste in a compost pile. A hot compost (130-150°F) for several weeks will sanitize it. Tip: Manure from horses often has weed seeds (from hay); composting at high heat helps kill those seeds.
- Avoid certain manures: Do not use pig, dog, or cat feces in veggie gardens – they can carry parasites or diseases that can infect humans. Also, human waste is not advisable unless processed in specialized composting systems. Stick to herbivore manures (cow, horse, sheep, goat, rabbit) or poultry.
How to Apply Manure:
- Pre-Planting Incorporation: The most common method is to spread aged manure over your garden bed well before planting season (like in fall or late winter). A layer about 1–2 inches thick can be tilled or dug into the top 6-8 inches of soil. In a small garden or raised bed, you might incorporate a few shovelfuls per square yard. This enriches the soil for the coming season. Many gardeners do this in autumn, so the manure breaks down over winter.
- Manure Tea: Similar to compost tea, you can steep aged manure in water to make a manure tea for liquid feeding. Fill a burlap sack or old pillowcase with a shovel of manure and submerge in a 5-gallon bucket of water. Let it sit for a couple of days, stirring occasionally. The water will extract soluble nutrients. IMPORTANT: Manure tea can be potent; dilute it until it’s the color of weak tea (usually a dilution of about 1:10 of the concentrate) before applying. And again, apply to the soil, not the edible leaves, to be safe. This is great for heavy-feeding plants like corn or squash during growth. It will have a smell, so it might be an outdoor-only activity.
- Top-Dressing: You can also side-dress plants with composted manure during the growing season by adding a little in a ring around a plant (not touching the stem). But make sure it’s well composted and not too rich, or it could burn young plants. When in doubt, compost it more or mix with soil/compost.
A general recommendation by organic growers is a 2-3 inch layer of well-rotted manure once a year on the garden, worked in. This, combined with other organic matter, can keep a garden productive without synthetic fertilizers. Just don’t overdo it every single year without soil testing, because manures (and composts) can build up phosphorus over time to excessive levels. Moderation and monitoring are key.
For indoor container plants, manure is rarely used (mainly due to odor and mess). If you have access to rabbit droppings or well-processed bagged worm manure, those are mild and could be mixed in a bit of potting mix. But generally, stick with compost, castings, or liquid feeds for indoor veggies rather than raw manure.
4. Compost Tea – Liquid Gold for Quick Feeding
What It Is: Compost tea is a homemade brew created by steeping compost in water to extract nutrients and beneficial microbes into a liquid form. It’s essentially a way to turn solid compost into a gentle liquid fertilizer you can water or spray onto plants for a quick nutrient boost and microbial inoculation. Think of it as making “tea” for your plants!
Why Use It: Compost tea allows you to apply the goodness of compost in situations where solid compost might not be ideal – for example, feeding container plants, foliar feeding (spraying leaves), or giving seedlings a mild dose of nutrients. The tea contains soluble nutrients (a relatively low level, so it won’t replace a season’s fertilizer needs but helps interim feeding) and lots of beneficial microorganisms from the compost. Gardeners use compost tea to improve plant vigor and soil life; some even report it can help suppress foliar diseases when sprayed on leaves, thanks to those beneficial microbes competing with pathogens.
How to Make Compost Tea: It’s very easy:
- Ingredients: You need finished compost (from yard waste or worm compost – avoid manure-based compost for teas to reduce pathogen risks) and water. Non-chlorinated water is best (let tap water sit out 24 hours to dissipate chlorine, or use rainwater).
- Recipe: A common ratio is about 5 parts water to 1 part compost by volume. For example, fill a bucket with 5 gallons of water and add about 1 gallon worth of compost.
- Steeping: Stir the mixture, then let it sit and steep for 1–3 days. Stir it at least once a day to oxygenate and help extraction. You can also use a mesh bag (like an old pillowcase or paint strainer bag) to contain the compost, which makes straining easier – this acts like a big tea bag.
- Strain and Use: After a day or two, the water will be a brownish “tea.” Strain out the solids (through cheesecloth, a fine mesh, or the bag removal) – the solids can go back to your compost pile or be spread in the garden. The liquid is your compost tea.
You can use it straight or dilute it (if it’s very dark, diluting 1:1 with water is common). Since compost tea is mild, it’s hard to over-apply. However, it’s best used fresh – within a day or two – because the microbial brew can start to go anaerobic and smelly if left sitting too long.
Applying Compost Tea:
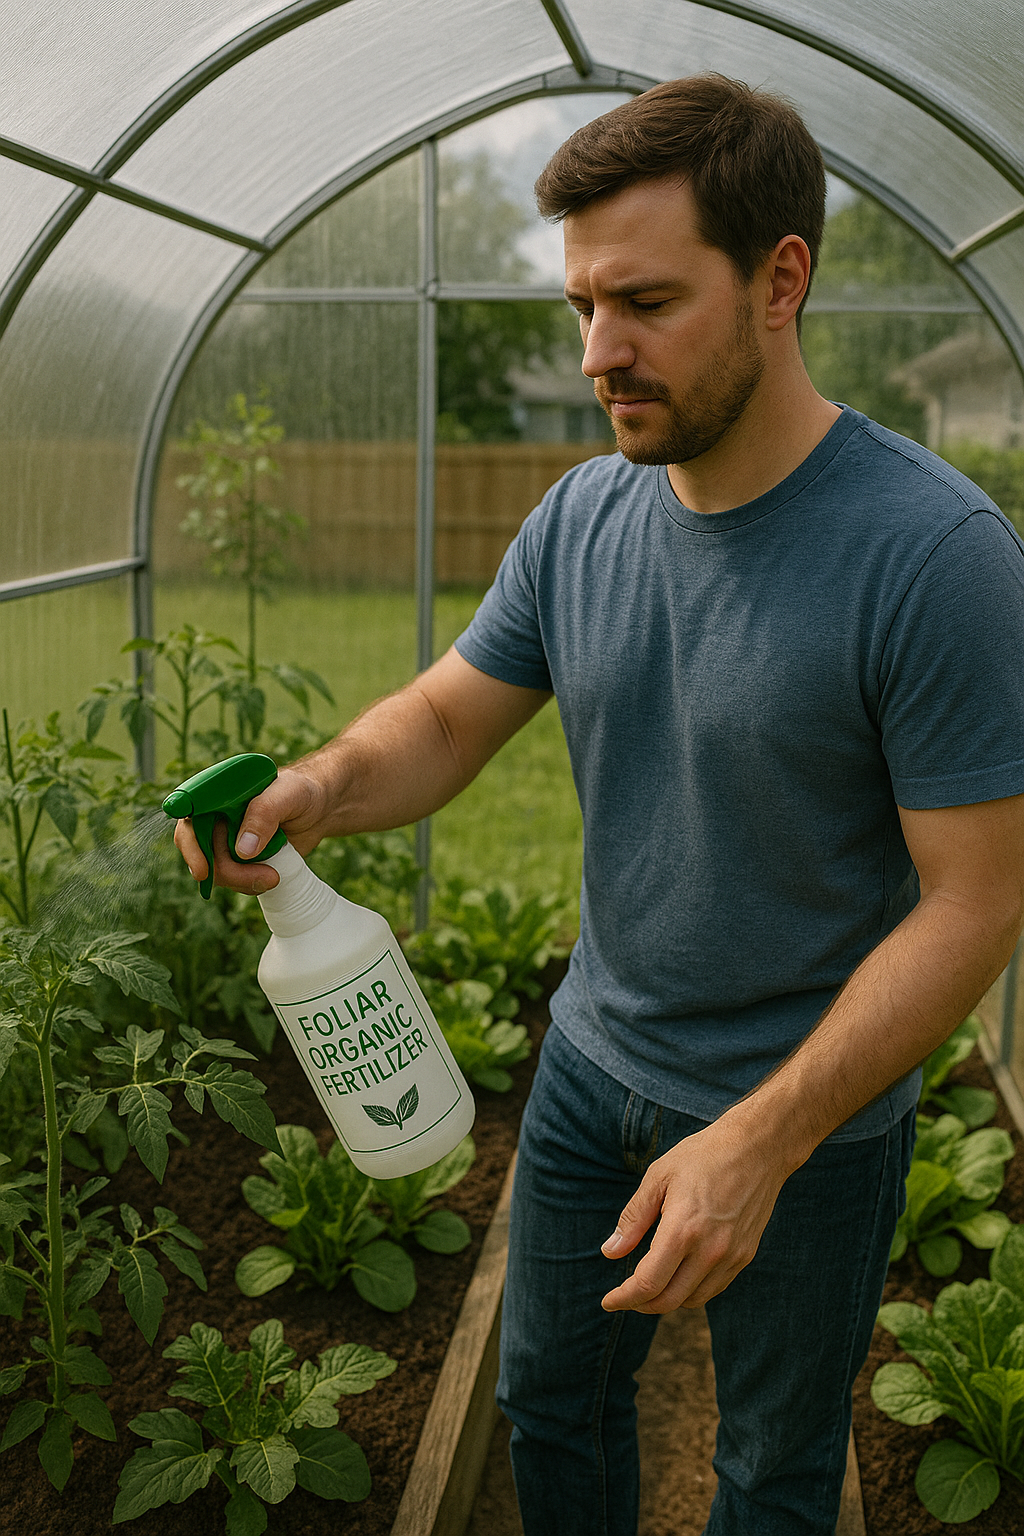
- Soil Drench: Simply water your plants with the tea, soaking the soil around the root zone. This feeds nutrients to roots and adds beneficial microbes to the soil. Seedlings and transplants love a drink of compost tea to help reduce transplant shock and encourage root growth.
- Foliar Spray: Put the tea in a spray bottle or garden sprayer and mist it onto plant leaves (do this in early morning or evening, not under hot sun, to avoid leaf burn). The idea is that leaves can absorb some nutrients directly (especially micronutrients), and the microbes in the tea can colonize leaf surfaces, potentially blocking disease spores from taking hold. If you foliar feed, make sure to strain the tea super well so you don’t clog your sprayer nozzle.
Use compost tea about once every 2–4 weeks during the growing season for a nutrient/microbe top-up. It’s a nice supplement to your regular fertilization routine; just remember it’s relatively low in nutrients compared to say, a concentrated fish emulsion or commercial liquid fertilizer. As the University of Maryland Extension notes, compost tea contains small amounts of nutrients and is great for improving soil life and suppressing disease, but should be viewed as a supplement, not a primary fertilizer.
Safety Tip: Since compost tea isn’t heated or sterilized, there is a small risk it could contain harmful bacteria if the source compost had them (especially true if you used manure or if the compost wasn’t fully finished). To be safe, use compost tea on the soil, and avoid spraying on leaves of crops you’ll eat raw (like lettuce) close to harvest. If you do spray, give it time (a few weeks) or rinse produce well before eating.
For indoor plants, compost tea can be a great, nearly odor-free way to fertilize. Just be careful to not store it sealed up (it can ferment). Brew small batches that you can use immediately. Your potted herbs or leafy greens will perk up from a dose of compost tea.
One more variant: Aerated Compost Tea (ACT), where you actively bubble air through the tea with an aquarium pump to multiply microbes. This is more advanced and frankly not necessary for beginners – a simple steep does fine for general use. So don’t worry about needing pumps or fancy setups unless you become a compost tea enthusiast down the road.
5. Plant-Based “Tea” Fertilizers (Banana Peels, Weeds, etc.)
Beyond compost, gardeners have gotten creative with making liquid fertilizers from various plants and kitchen scraps. These are sometimes called botanical teas or extracts. They can be wonderful free fertilizers, though some are more proven than others. Let’s cover a few popular ones that are easy for beginners:
Banana Peel Tea: Bananas are famous for their potassium content – and that goes for banana peels too. Gardeners often use banana peels to create a potassium-rich fertilizer for flowering and fruiting plants (tomatoes, peppers, roses, etc., all love potassium).
- How to Make: There are a couple of methods. The simplest: take 2-3 banana peels, chop them up, and drop into a jar or bucket of water (say, 1-2 liters of water). Let this sit for anywhere from 2 days up to a week. The water will leach out some nutrients (primarily potassium, also small amounts of phosphorus, calcium, and magnesium from the peels). It may start to ferment if left too long, so 2-3 days in warm weather is usually enough to get a decent “tea.” It might smell a bit funky (sweet rot smell) if left a week – use a lid loosely placed on top to contain odor but not build pressure if fermenting.
- How to Use: Strain out the peels (you can toss them into your compost pile afterward so nothing is wasted). Dilute the banana peel tea with water before using – a common suggestion is 1 part banana tea to 5 or 10 parts water. This is because while it’s not super strong in nutrients, you still want a gentle feed and to spread it out. Water your plants around the base with this diluted tea. You can do this as often as once a week during blooming/fruiting phase.
- What it Provides: Primarily potassium (K) and a bit of other minerals from the peels. It does not supply nitrogen in any meaningful amount, so think of this as a supplement for boosting flowering/fruiting rather than a standalone fertilizer. Banana peel tea is sort of like giving your plants a sports drink for that K boost. Interestingly, some gardeners also claim that banana peel solution can help deter aphids due to a smell that repels them.
- Use for Indoor Plants? Yes, you can use diluted banana peel water on indoor plants too – it’s mild and shouldn’t smell once diluted and applied. Just don’t leave peels sitting out uncovered in the house (fruit fly magnet). Always cap or cover the brew container and maybe put it in a garage or under the sink.
Other Fruit/Veggie Scrap Teas: Similar to banana peels, people use avocado skins and pits, rice washing water, or even water used from boiling vegetables or eggs (cooled down) to water plants. These contain minimal nutrients but in the spirit of waste-not-want-not, you can use cooled cooking water (as long as no salt was added) to water your garden – it does contain some leached vitamins and minerals. Egg boiling water, for instance, will have a bit of calcium from the shells. While these are not major fertilizers, every little bit can contribute.
Eggshell Tea (Calcium supplement): We talked about eggshells as a soil amendment in solid form later, but there’s also a quick method to extract calcium: water-soluble calcium can be made by dissolving eggshells in vinegar (a bit advanced, used in Korean Natural Farming techniques) – it creates calcium acetate that plants can use immediately. A simpler kitchen hack: put crushed eggshells in a jar of vinegar, and after a few days, the vinegar will be loaded with calcium (the shells dissolve). Dilute that vinegar (a few tablespoons in a gallon of water) and water plants, particularly those needing calcium like tomatoes (to help prevent blossom-end rot). Be cautious with this approach: it lowers pH (vinegar is acidic) so only a small amount is needed and not often. If that’s too involved, just stick to ground eggshell powder or composting them.
Weed or Grass-Clipping Tea: Don’t waste those nutrient-rich weeds from your yard – you can make fertilizer from them! Many common weeds (like stinging nettle, comfrey, dandelion, yarrow, clover) actually contain tons of nutrients they’ve pulled from the soil. By soaking them, you can create an “green tea” fertilizer:
- How to Make: Fill a bucket about half to two-thirds full of fresh weeds or grass clippings (chopped up a bit), then fill to the top with water. Let it steep for a week or two. Warning: this will smell horrendous as it ferments (like swampy manure smell). Keep it far from the house and cover it loosely. Stir occasionally if you dare.
- Use: After 1-2 weeks, strain off the liquid. This is a strong fertilizer concentrate loaded with nitrogen and potassium (nettle tea, for example, is known to be high in nitrogen and various minerals). Dilute it about 1:10 with water (it should look like weak tea) before applying. Use it to water around plants. Your plants will get a nice nutrient boost similar to a compost tea or manure tea. Comfrey leaves are famously high in potassium, so comfrey tea is often used to promote flowering and fruiting.
- Frequency: Perhaps every 2-4 weeks. And do rinse any vegetable leaves that might have been splashed if you’re going to harvest soon, since this tea is basically fermented gunk (effective, but stinky).
Despite the smell, weed teas are a fantastic free fertilizer. You’re literally turning weeds into plant feed – talk about full circle! Plus, it’s safe and organic.
Seaweed (Kelp) Fertilizer: If you live near the ocean (or can collect seaweed), this is another organic fertilizer. Fresh seaweed can be rinsed (to remove excess salt) and then either composted or soaked in water to make a seaweed tea. Seaweed is full of potassium, micronutrients, and natural growth hormones that can stimulate plant growth. Many commercial organic fertilizers are seaweed-based. For DIY, if collecting beach seaweed is legal in your area, you can use it similarly to weeds: soak to make a liquid, or dry and crumble it into soil. Just use moderation and rinse salt off. This can be a bit location-specific, but worth mentioning for coastal gardeners.
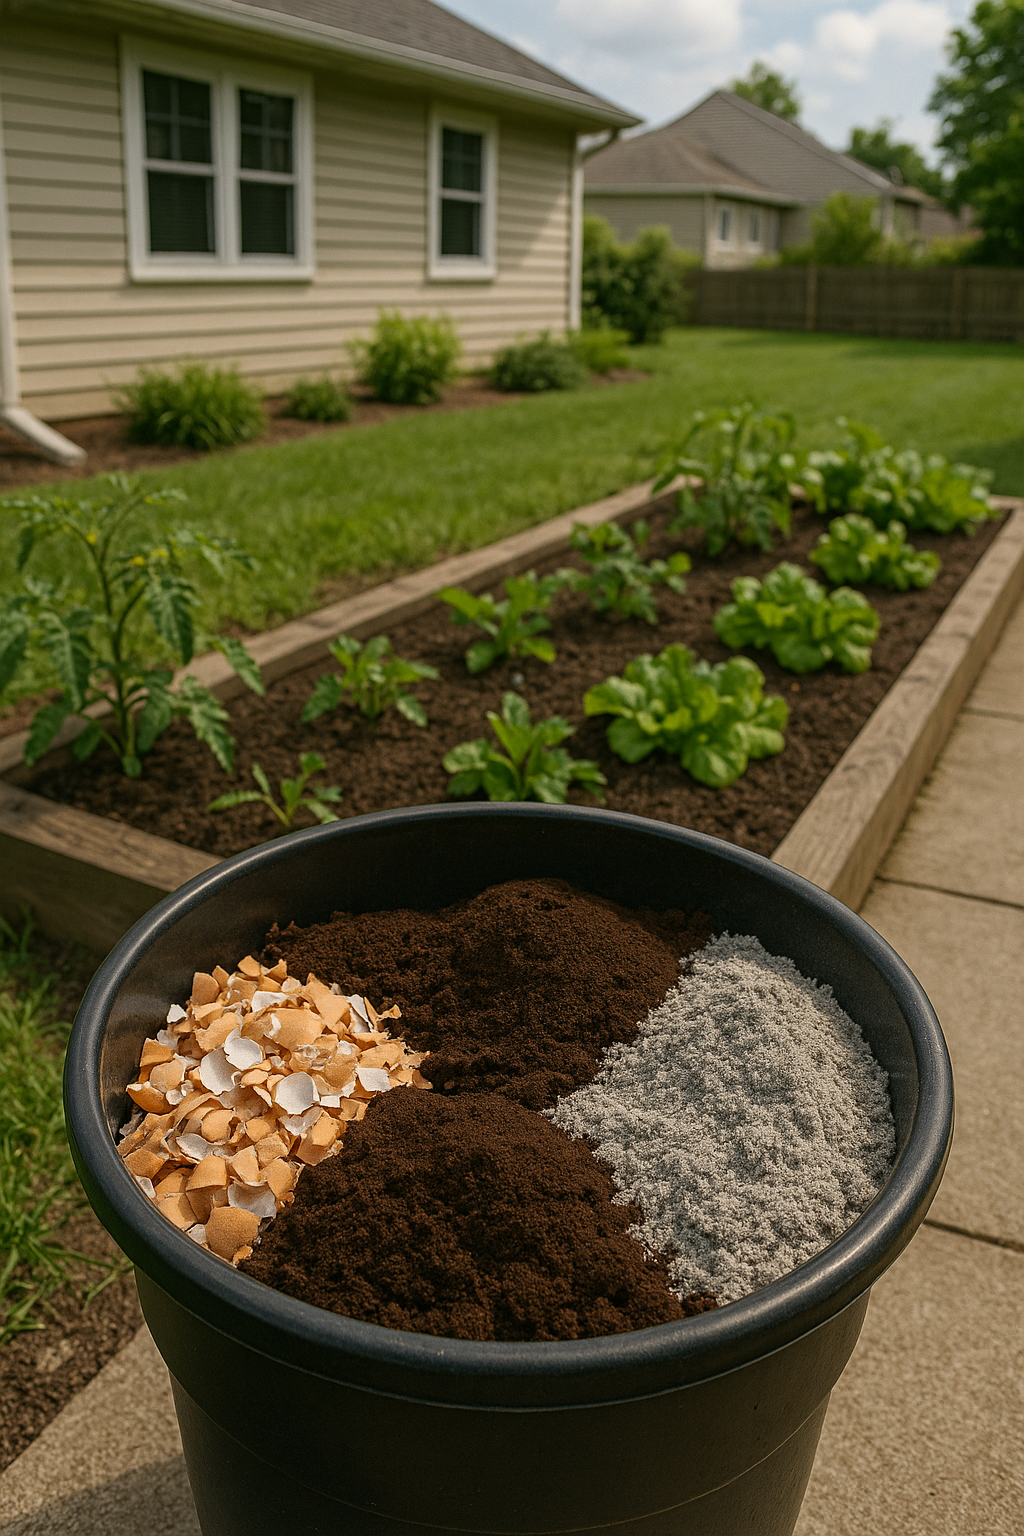
6. Solid Organic Amendments (Eggshells, Coffee Grounds, Wood Ash, etc.)
We’ve covered the big players (compost, manure, etc.), but there are also simple household wastes and natural materials you can add directly to your soil to boost fertility. These tend to release nutrients slowly, but they are free and easy to use. Here are a few common ones:
Crushed Eggshells (for Calcium): If you eat a lot of eggs, don’t toss those shells! Eggshells are about 95% calcium carbonate – essentially lime – plus small amounts of phosphorus and magnesium. Gardeners often save and crush them to add to tomato planting holes or compost. The idea is to provide calcium to prevent issues like blossom-end rot in tomatoes, which is related to calcium deficiency. However, eggshells in their chunky form break down very slowly in soil – it can take a year or more for a half eggshell to decompose and release its calcium. To get any immediate benefit, you should grind eggshells to a fine powder (a coffee grinder or mortar and pestle works). Powdered eggshell will be more readily accessed by plant roots and soil microbes, acting somewhat like garden lime to raise pH and add calcium.
- How to Use: Once ground, you can mix eggshell powder into the soil (a tablespoon or two per plant or per pot is plenty), or add it to your compost. It’s great to sprinkle in the planting hole for tomatoes, peppers, or eggplants, which appreciate extra calcium. If you don’t grind, you can still put crushed pieces in the garden – they’ll improve soil eventually and they’re very welcome in the compost or worm bin (worms use small shell pieces as grit for digestion and it buffers acidity in the bin).
- Eggshell Myth-busting: Some folks place half-broken shells around plants to deter slugs (sharp edges theory) – results are mixed on that. Also, adding a few eggshells alone won’t instantly cure blossom-end rot on tomatoes; often that’s more about uneven watering. But as part of your organic regimen, eggshells return calcium to the soil rather than it ending up in the trash. Just understand the timeline – finely ground eggshell is effective faster, whereas large pieces “will take at least a year to break down, making their stored calcium available perhaps the next growing season”.
- Indoor use: You could mix a pinch of eggshell powder into potting mix for long-term calcium supply. It won’t dissolve quickly, so it’s more for slow release.
Coffee Grounds: If you brew coffee, you have a fantastic soil amendment right there. Used coffee grounds are high in organic matter and contain nitrogen (about 2% by weight before brewing) plus minor potassium and phosphorus. Most of the immediate acidity is washed out in brewing, so spent grounds are near neutral pH (around 6.5-6.8) – meaning they won’t significantly acidify soil as many think. The primary benefit of coffee grounds is how they improve soil structure and feed soil life:
- Grounds incorporated into soil encourage microbial activity; as soil microbes consume them, they release “microbial glues” that promote good soil structure and improve drainage”. They can help make clay soil more friable and help sandy soil hold together a bit.
- They do have some nutrients, but much of the nitrogen in fresh grounds is tied up by microbes initially, so they don’t immediately fertilize heavily. Over time as decomposition continues, that nitrogen becomes available. So think of grounds as a mild slow-release nitrogen source and soil conditioner.
- How to Use: It’s best to mix coffee grounds into soil or compost rather than layer them thick on top. A thin layer on top can dry out and repel water, and even grow mold – not ideal. Incorporate a half-inch layer of grounds into the top 4-6 inches of soil. Oregon State University suggests using coffee grounds in moderation – no more than 20% of a compost pile volume, and not to dump huge amounts in one spot. For small gardens, you can sprinkle your weekly grounds around different plants or add them to the compost bin (they count as “green” nitrogen-rich material in compost).
- Compost Boost: Grounds are a great compost additive; mix with leaves or straw to balance (roughly 1 part grounds to 3 parts leaves is a good mix for a hot compost).
- Safety Note: Very high amounts of coffee grounds in soil can suppress plant growth (due to caffeine and other compounds), so again, use in moderation and mix well.
- Slug Deterrent?: Some claim a band of grounds deters slugs (caffeine is a natural pesticide to them). There is research that a 1-2% caffeine solution can indeed kill slugs, but used grounds probably don’t have enough caffeine left to do that. However, OSU noted that spraying brewed coffee can repel slugs. That’s more pest control than fertilizing though.
For indoor plants, you want to be cautious with grounds – fungus gnats and mold can appear if there’s too much uncomposted organic matter. A little mixed into your potting mix is fine, but don’t top-dress potted plants with thick layers of straight coffee grounds. Better yet, compost the grounds first via vermicomposting and then use the castings.
Wood Ash: If you have a wood-burning stove or fire pit, wood ash is a handy garden amendment in small doses. Ash is high in potassium (K) and also contains calcium (it’s alkaline, acting like lime). Average wood ash might have an analysis around 0-1-3 (N-P-K) – essentially it provides potassium and a bit of phosphorus, and no nitrogen. It can raise soil pH due to the calcium carbonate in it. Use ash only if your soil or plants can tolerate a pH increase (don’t use around acid-loving plants like blueberries or azaleas).
- How to Use: Sprinkle small amounts of cooled, powdery wood ash on your garden beds and lightly rake it in. A general guideline is no more than 5-10 lbs of ash per 100 square feet per year (that’s about a bucketful) – less if your soil is already neutral or alkaline. It’s great for vegetable gardens that tend to be acidic or where you need potassium. For example, tomatoes and root crops appreciate some potash; wood ash can supply that and calcium. Just avoid heavy application, as too much ash can over-alkalize soil or add excess salts.
- Composting Ash: You can also add ash to your compost pile in thin layers. It will reduce acidity of the compost and add minerals.
- Safety: Only use ash from natural wood (no charcoal briquettes with additives, no painted or treated wood). And wear a mask or avoid breathing the dust – ash is fine and alkaline (can irritate lungs).
- Indoor use: Not recommended to put ash in potting mix for indoor plants, as it can drastically change pH and it’s messy. Stick to outdoor garden use.
Green Manures/Cover Crops: While not a fertilizer you “add” in the usual sense, planting cover crops is an organic fertilization strategy worth mentioning. A cover crop (or “green manure”) is a crop you grow not to harvest, but to later turn into the soil, thereby adding organic matter and sometimes nutrients. For instance, planting legumes like clover, vetch, or peas can actually add nitrogen to the soil – these plants have symbiotic bacteria on their roots that fix nitrogen from the air into forms plants can use. When you till or dig those plants under, that nitrogen and the plant’s biomass feed your soil for the next crop. Non-legume cover crops like rye or oats don’t add nitrogen, but they capture leftover nutrients and add organic matter and improve soil tilth with their roots. In a small garden, cover crops can be as simple as sowing some buckwheat in summer in an empty patch (buckwheat grows fast, smothers weeds, and its residue adds nutrients) or planting winter rye or a mix of oats and peas after harvest in fall.
- When/How: Plant cover crop seeds in bare areas during off-season (fall after harvest or early spring before main planting, depending on the crop). Let them grow, then cut them down and dig them into the soil a few weeks before you plan to plant your veggies. As they decompose, they enrich the soil.
- Example: Sow crimson clover in late summer; it grows, fixes nitrogen, then winter-kills if it’s cold or you cut it, and you turn it under in spring – now you have nitrogen in the soil for your spring veggies.
- For Busy Gardeners: It might sound like extra work, but some cover crops can be very low maintenance (you basically just scatter seeds and let them go). Even a small 4’x4’ garden can benefit from a winter cover crop if you won’t be using it in winter. It’s an optional strategy but very aligned with organic principles of feeding the soil.
We’ve gone through a toolbox of natural fertilizers. Here’s a quick summary table of these organic fertilization options, their key nutrients, and pros/cons for easy reference:
| Organic Fertilizer | Main Nutrients & Benefits | How to Apply (Basics) | Pros | Cons / Cautions |
|---|---|---|---|---|
| Compost (home-made or store-bought) | Balanced but low N-P-K (approx ~1-1-1); rich in humus & microbes. Improves soil structure, water retention. | Mix 20-30% into soil before planting; top-dress 0.5-1” annually; or use as mulch. | Free from waste; improves soil long-term; feeds soil life. | Nutrients release slowly; may not meet heavy feeders’ full needs. Large volumes needed for big nutrient boost. |
| Worm Castings (Vermicompost) | Higher nutrients than regular compost (variable up to ~5-5-3 NPK); loaded with micronutrients and beneficial microbes. Will not burn plants. | Mix ~10% into potting mix; top-dress ½–1” around plants monthly; brew worm tea for seedlings. | Odorless and safe; great for indoor use; improves plant growth and health (disease resistance). | Limited supply unless you have a worm bin; can be pricier if buying. Nutrient content still moderate (not a replacement for all fertilizing in heavy feeders). |
| Aged/Composted Manure (cow, horse, chicken, etc.) | Good source of Nitrogen (esp. chicken), plus P, K, calcium. Improves soil like compost. NPK varies (e.g., poultry ~3-2-2, cow ~1-0.5-1). | Apply 1–2” layer in fall or early spring, till into soil. Or use manure tea (steep a few days, dilute to iced-tea color). | Excellent soil conditioner and nutrient boost; often free from farms; long-lasting fertility. | Must be well-aged (min. 90-120 days before harvest); fresh manure can burn plants and carry pathogens. Some manures (horse) may contain weed seeds if not composted. Strong odor if fresh. |
| Compost Tea (liquid extract of compost) | Very low levels of all nutrients; high in beneficial microbes. Helps with nutrient uptake and disease suppression. | Steep 1 part compost in 5 parts water for 1-3 days. Apply by watering soil or spraying foliage weekly to monthly. Use fresh. | Easy to apply; feeds and waters simultaneously; great for seedlings and foliar feeding. | Nutrient content is dilute – supplemental use only. Should avoid using manure-compost in tea to be safe. Tea can spoil if not used quickly. |
| Banana Peel Tea (and other fruit scrap teas) | Moderate Potassium (K) boost; small amounts of P, Mg, Ca from peels. No nitrogen. May help repel aphids (banana smell). | Soak banana peels in water for 2-5 days. Dilute 1:5 or 1:10 with water. Water plants, especially fruiting ones, about weekly. | Uses kitchen waste; easy to make; provides K for flowering/fruiting. Safe for all plants (when diluted). | Very low N – not a complete fertilizer. If over-fermented can smell. May attract pests if peels are left on soil (bury or compost them). |
| Grass/Weed Tea (Fermented plant tea e.g. nettle or comfrey tea) | High Nitrogen (from green plant matter) and Potassium (especially comfrey/nettle) plus micronutrients. Acts like a mild general fertilizer. | Ferment weeds/greens in water ~1-2 weeks. Dilute ~1:10 (weak tea color). Apply around plants biweekly. | Free fertilizer from weeds; very nutrient-rich; excellent for overall plant nutrition. | Smelly during brewing. Need to dilute well. Use gloves when handling (esp. nettle). Don’t use weeds with seed heads (to avoid spreading seeds). |
| Eggshells (crushed or powdered) | High Calcium source; can help raise soil pH if soil is acidic (like lime). Minor magnesium. Beneficial for preventing calcium deficiencies (e.g., in tomatoes). | Rinse, dry, and crush shells. Powder for faster results. Work into soil or compost. Add a teaspoon of powder to planting holes for tomatoes/peppers. | Recycles kitchen waste; provides long-term calcium; improves compost (adds minerals). | Slow release (powder needed for same-season effect). Large pieces take a year+ to break down. Not a standalone fertilizer (only calcium). |
| Coffee Grounds (used) | Approximately 2% Nitrogen by weight (before brewing; a bit less after), plus small P, K and micronutrients. Improves soil structure and feeds microbes, enhancing drainage. pH ~6.7 (nearly neutral after brewing). | Mix into soil or compost (up to 20% of mix). Work a thin layer (¼–½”) into topsoil; or add in compost with browns. Can be used as light mulch if covered with other mulch. | Readily available free resource (even Starbucks gives away bags of grounds); boosts organic matter; can help deter slugs when used in certain ways. | Too much can inhibit plants (caffeine, excess nitrogen tie-up). Don’t apply thick layer on surface alone (can crust and mold). Best composted or used sparingly. |
| Wood Ash (from fireplaces) | High in Calcium (liming effect) and Potassium (K). Average NPK ~0-1-3. Raises soil pH (reduces acidity). Good for root and fruit development due to K. | Sprinkle lightly on garden (no more than 5-10 lbs/100 sq ft yearly). Incorporate or let rain wash it in. Use on acidic soils or around plants that like neutral to alkaline soil (e.g. brassicas). | Excellent free source of K and lime; good for heavy-feeding root crops, brassicas. | Alkaline: can over-lime soil if overused. Avoid on acid-loving plants. Handle fine ash carefully (wear mask/gloves). Contains no nitrogen. |
This table might look overwhelming, but don’t worry – you don’t need all these for a successful garden! Many gardeners pick a couple of primary strategies (like compost + maybe one specialty feed like manure or a particular tea) and get great results. The key is to understand what each amendment offers and use it appropriately.
Now that we’ve explored the what of organic fertilizers, let’s talk about when and how to apply them in a practical routine, and how to tailor your approach to indoor vs. outdoor gardening.
How and When to Apply Organic Fertilizers
Feeding your garden naturally is as much about timing and technique as it is about the materials you use. Here we’ll cover general guidelines for when to fertilize and some best practices for applying these organic feeds, both for outdoor garden beds and indoor containers.
General Timing Guidelines
- Before Planting (Soil Prep): The best time to beef up your soil fertility is before you plant each season. For outdoor gardens, this means in early spring and/or fall. Work in compost or aged manure into the soil ahead of planting. This ensures nutrients are available as soon as seedlings go in. For example, mixing a few inches of compost into a new bed in spring provides a nutrient-rich foundation. If using something slow-acting like lime (for pH) or rock phosphate, those also go in pre-plant so they have time to take effect. In containers, start with a good potting mix that includes compost or castings so the initial nutrient needs are covered.
- At Planting Time: When transplanting seedlings or sowing seeds, you can add specific amendments in the planting hole or row. For instance, sprinkle a pinch of bone meal (for phosphorus) or some worm castings in each hole when transplanting tomatoes or peppers. For direct-seeded veggies, you might sprinkle a light band of organic fertilizer (like an all-purpose 5-5-5 organic granular) along the row – but since we’re focusing on DIY, you could use finely crumbled compost or a dash of blood meal (for quick nitrogen) if needed. Many gardeners also water in transplants with dilute compost tea to help them settle with minimal shock.
- During the Growing Season: This is often called side-dressing or top-dressing. Many vegetables benefit from a mid-season nutrient boost, especially if they are heavy feeders (tomatoes, corn, cucumbers, cabbage, etc.) or if you have a long growing season with successive crops. Organic options for side-dressing include:
- Applying a ring of compost or manure around each plant (scratch in lightly).
- Sprinkling some poultry manure pellets or organic meal fertilizers (if you have them) around plants – but avoid touching the plant stem.
- Watering with compost tea or manure tea every few weeks.
- Adding a scoop of worm castings around the root zone mid-season.
Timing examples: After your tomato plants have been in the ground for about a month and are starting to flower, give them a side-dress of compost and a drink of compost tea. When sweet corn is knee-high, side-dress with some aged manure or nitrogen-rich amendment (corn is a nitrogen hog). Leafy greens like lettuce might not need much if soil was rich, but if they start to pale, a quick compost tea or fish emulsion drink can perk them up.
- End of Season / Off-Season: Don’t forget the end of the season. When crops are done, you can replenish the soil by adding compost or sowing a cover crop. In autumn, many gardeners spread fallen leaves or compost over the beds to break down over winter. This is essentially fertilizing for next spring. If you have areas resting (fallow), a cover crop like clover will add fertility for the next cycle.
- Indoor Timing: Indoor veggies (like herbs, salad greens, maybe a dwarf tomato or pepper under lights) don’t have a “season” in the same way, especially if grown under consistent conditions. Instead, time your feeding to the plant’s growth stage. After a seedling has its second set of true leaves, you can start feeding lightly (diluted compost tea or a pinch of castings in the pot). When an indoor plant is actively growing, give it organic nutrients perhaps every 2-4 weeks. In lower light or cooler periods (or if a plant is resting), you can ease off. Indoor pots also often need a “soil refresh” every so often: every few months, you might top up the pot with a little fresh compost or repot the plant into a mix with new compost/castings to renew nutrient supply.
Application Methods and Tips
- Top-Dressing Beds: This means spreading an amendment on the soil surface around plants. For example, you can top-dress with compost, worm castings, or a balanced organic granular fertilizer. Gently rake it into the top inch of soil or cover with a bit of mulch to keep it from drying out. Then water it in to help release nutrients into the soil. Top-dressing is easy and low-disturbance for established plants. With organics, you don’t worry about burning, but it still takes time for them to leach down, so applying before a rain or watering after helps.
- Side-Dressing Plants: This is specifically adding fertilizer alongside a plant (usually in a ring or shallow trench a few inches away from the stem). With compost or manure, you might dig a shallow furrow around a tomato plant and bury a handful of compost, then cover it. The plant’s roots will grow into that zone. With liquid feeds, you “side-dress” by pouring it around the base of the plant.
- Foliar Feeding: Spraying diluted liquid fertilizer on leaves can give a quick nutrient uptake for some elements (especially micronutrients). Seaweed extracts or compost teas are commonly used foliarly. Do this in early morning or late afternoon to avoid leaf burn and allow uptake. It’s a good supplement if you notice, say, a micronutrient deficiency (yellowing between veins might indicate iron or magnesium – some Epsom salt in water sprayed on leaves can green up magnesium-deficient plants, for example). But foliar feeding is a short-term fix; soil feeding is still needed for the bulk of nutrients.
- Watering in: Whenever you apply a granular or solid fertilizer, watering after application helps start the nutrient release. Conversely, if you’re applying a liquid like compost tea, apply it in place of a normal watering so the plant is well-watered and also fed. Avoid applying liquids to bone-dry soil (a lot will run off) – a slight pre-moistening of soil can help absorption.
- Depth for incorporation: For pre-plant amendments like compost or manure, mix them into the root zone depth (6-12 inches deep). You don’t need to till deeply beyond where roots will grow. For trees or shrubs (if any fruit trees in your garden), you typically top-dress under the dripline rather than deep digging to avoid root damage.
- Rate and Quantity: One advantage of organic fertilizers is the risk of over-fertilizing is lower than with synthetics, but it’s still possible to add too much of a good thing (especially manures high in ammonia nitrogen or if repeatedly adding high-phosphorus compost leading to buildup). A simple rule of thumb per 100 square feet of garden for a season might be: 2-3 cubic feet of compost, or 20-30 lbs of composted manure, or 5-10 lbs of a more concentrated organic fertilizer. If combining, use lower amounts of each. It’s hard to quantify DIY stuff exactly, but for instance, if you have a 4’x8’ raised bed (32 sq ft), working in one 5-gallon bucket of compost (which is ~0.7 cu.ft, ~20 lbs) each spring is a reasonable starting point. Side-dressings might be a trowel-full of compost per plant mid-season.
- Observation: The best way to know if your fertilization is on track is to observe your plants. Dark green, robust growth (without being all leaves at the expense of fruit) indicates they’re well-fed. Pale or yellow lower leaves can signal nitrogen deficiency – time for a feeding. Purplish tints on leaves might mean phosphorus is lacking (common in cold soils or if P is low). Stunted or poorly flowering plants might need a boost of potassium or phosphorus. With organic methods, changes won’t be overnight, but you can often correct issues by side-dressing some manure or giving a couple compost tea treatments. Also watch overall vigor – organic-fed plants often grow a bit slower initially than chemically fed ones, but catch up later with steady, healthy growth. So don’t panic if your organic tomatoes aren’t as giant early on as your neighbor’s Miracle-Gro tomatoes; by fruiting time you may very well catch up, with the bonus of better soil health.
- Avoiding Overfeeding: Too much fertilizer (even organic) can cause lush foliage but poor fruiting, or excess salts in soil (especially with repeated heavy manure use). If your plants are overly leafy and not setting fruits/flowers, ease up on nitrogen-rich feeds. If you see leaf burn at edges or strange issues despite feeding, consider doing a soil test to see if something is in excess. One common beginner error is to assume more = better. Plants have optimal ranges; for example, tomatoes need plenty of N early on, but once they start flowering, too much N will reduce fruit set – at that stage they need more P and K. That’s why something like switching to banana or comfrey tea (higher in K) during flowering while easing off high-nitrogen feeds is a strategy.
- Specific Crops Timing: Some specifics: Leafy greens (lettuce, spinach) appreciate steady nitrogen, so monthly top-dressing of compost or a couple of fish emulsion waterings will keep leaves tender. Root crops (carrot, beet) don’t want excess nitrogen (causes hairy roots or lush tops but small roots); they benefit from compost and a bit of wood ash for potassium at planting, then not much feeding later. Fruit vines (tomato, cucumber, squash) like a dose of nitrogen early (compost, manure), then more potassium and phosphorus as they start flowering – so you might give compost/manure initially and then later maybe some bone meal or ash or an organic bloom fertilizer. Beans and peas (legumes) usually don’t need much nitrogen fertilizer at all – they fix their own; just ensure some P and K in soil via compost and they’re good. Over-fertilizing beans can actually reduce yield.
Indoor vs. Outdoor Differences
Outdoor gardens have natural factors at play: rain can wash nutrients down, microbiology is abundant so organic matter breaks down at a decent clip, and plants are subject to seasonal growth patterns. Indoor plants in containers rely entirely on what you give them and what’s in that potting mix – there’s no rain bringing nutrients, and possibly fewer microbes (though a healthy organic potting mix will have some). Also, containers get watered frequently, which can leach nutrients out of the soil over time. So indoor or container gardening often needs more regular feeding in small doses.
- Frequency: Container veggies might need a light feeding every 2 weeks (for heavy feeders) or every 4-6 weeks for light feeders, especially if you use a soilless mix without much compost. You can use diluted organic liquid feeds (like half-strength fish/seaweed emulsion, or compost tea) regularly. Or incorporate slow-release organics (like some compost, castings) in the mix so that each watering releases a little.
- Leaching & Salt Buildup: One benefit of organic fertilizers is they are less likely to cause salt buildup than synthetic salts. However, if you use things like manure or frequent fish emulsion, some salts can accumulate. It’s good practice to occasionally water heavily enough that some drains out of the pot (leaching out excess). If you see white crust on soil or pot, flush water through to clean it. Replacing some soil annually helps.
- Soil Refresh: In a raised bed or ground, soil gets continuously improved by your additions. In a pot, after a crop is done, don’t throw out the potting soil – you can rejuvenate it: remove any roots, mix in fresh compost or worm castings, maybe a handful of slow-release organic fertilizer, and reuse for the next planting. This effectively recharges the nutrients.
- Pest Concerns: Indoors, be careful not to introduce pests with your fertilizers. For example, an outdoor compost might have fungus gnat eggs; if you bring that compost inside for a potted plant, you could get gnats. To mitigate: use only well-finished compost, or sterilize it by baking (if you’re up for that odor), or stick to worm castings which usually are very clean. Liquid feeds like compost tea should be used promptly and not left open indoors (they can attract gnats if they start to ferment).
- Odor: Keep indoor fertilizing odor-free: dilute fish emulsions (they can smell fishy for a day, so maybe do it before a weekend trip if using), and prefer things like seaweed extract, which smells less. Compost teas made from plant compost or castings usually have a mild earthy smell that dissipates quickly. Worm castings have virtually no smell. So you can absolutely feed indoor herbs with these methods without stinking up your kitchen.
- Light Levels: Remember, indoor light is often far less than sunlight unless you use grow lights. Plants in lower light won’t use nutrients as fast (because they’re growing slower). So scale down fertilization in a dim apartment window vs a bright greenhouse. Over-fertilizing a low-light plant can do more harm (since it can’t use the nutrients, leading to buildup). In contrast, a plant under strong grow lights might consume nutrients nearly like an outdoor plant.
Now that we have the when and how down, let’s address some pitfalls to avoid and then put it all together into a nice routine.
Common Beginner Mistakes with Organic Fertilizing (and How to Avoid Them)
It’s easy to get excited and make a few missteps when you’re new to natural fertilizers. Here are some frequent mistakes and how you can steer clear of them:
- Overloading on One Thing (Over-fertilizing):
Just because it’s organic doesn’t mean you can’t overdo it. Piling on too much manure or even too much compost at once can create imbalances. For example, excessive manure (especially poultry) can lead to nitrogen burn or phosphorus build-up that can stunt plants. One raised bed was reported “ruined” by someone dumping inches of coffee grounds all at once – it became hydrophobic and too acidic temporarily. Avoidance: Follow the guideline of moderation. Add reasonable amounts of each amendment (as discussed above). If you’re unsure, err on the side of a little less. You can always add more later if needed, but it’s hard to take it back out. Also, mix things into soil rather than leaving huge clumps or piles next to plants. If you see white crusts or burn signs, flush water through the soil to leach excess and hold off on more feeding. - Fertilizing at the Wrong Time:
Timing is key. A common newbie mistake is fertilizing too late in the season for outdoor plants – giving a big nitrogen feed in late summer or fall. This can spur tender new growth that then gets nailed by frost, or it can delay a plant from shutting down for winter. Conversely, not fertilizing when the plant really needs it (like waiting too long to feed heavy fruiting plants) can reduce yields. Avoidance: Fertilize during active growth and taper off as plants reach maturity or as the season winds down. For perennials, don’t push growth late in the year. And always hold off fertilizing new transplants with strong fertilizer until they establish (mild compost tea is fine, but don’t dump a bunch of fresh manure in a hole with a seedling – it’ll “cook” the roots). - Using Fresh Manure or Unsafe Materials:
Eager gardeners might think, “Great, I have a friend with a farm, I’ll just grab fresh manure and throw it on!” but as we discussed, fresh manure can burn plants due to ammonia and can carry pathogens. Similarly, adding meat/dairy to compost or pet wastes can invite pests or disease. Avoidance: Always compost manure before use and adhere to the 90/120 day rule for food safety. When in doubt, let manure age longer. Keep your compost pile mainly vegetarian (fruit/veg scraps) – no meats, fats, or pet poop in regular compost. If you want to compost everything, look into bokashi fermentation or other methods for those, but that’s beyond basic gardening. - Expecting Instant Results:
If coming from using Miracle-Gro in the past, an organic newbie might be disheartened that their compost or banana tea didn’t turn a yellowing plant green overnight. Remember, organic fertilizers are slower and subtler. A plant might take days or weeks to show improvement. Avoidance: Patience! Give organic methods time to work. Use quick fixes (like fish emulsion or compost tea) for mild immediate help, but understand it’s a marathon. Healthy soil is being built under the surface even if you don’t see dramatic changes in a day. Over time, organic-fed plants often outperform because of better root systems and soil health. - Not Composting Properly (or at all):
Some beginners start a compost but get slimy, smelly messes because they threw only kitchen scraps without browns, or they never turned it, or it got waterlogged. Others might skip composting thinking it’s too hard and thus miss out on free fertilizer. Avoidance: Follow basic composting rules (greens + browns, moisture, air). Troubleshoot smells (ammonia smell = too much green, add browns; rotten smell = too wet/anaerobic, turn it and add dry material). If traditional composting is daunting, try easier methods like trench composting or a worm bin. Something like a small worm bin can be more approachable for busy folks – the worms do the work with minimal effort from you. - Using Only One Type of Fertilizer Exclusively:
If you rely just on, say, coffee grounds for all your fertilization, your plants will likely starve or get imbalances. Grounds have benefits but are not complete. Or only using banana peel tea without any compost or other feed – you’ll have a potassium-heavy regimen but lack nitrogen, leading to weak growth. Avoidance: Diversify your approach. Use a combination: e.g., compost for overall fertility + a bit of homemade liquid feeds for targeted boosts. Or manure for N plus ash for K, etc. By mixing different organics, you cover each other’s gaps. The table above shows how each has strengths; together they form a balanced diet. - Ignoring Soil pH and Condition:
Sometimes the issue isn’t lack of fertilizer at all – it could be that the soil pH is locking up nutrients or soil is compacted/waterlogged preventing uptake. Beginners might dump fertilizer when what the soil needs is lime to raise pH or sulfur to lower pH, or more organic matter to improve structure. Avoidance: Observe your soil and plants. If you see chlorosis (yellow leaves with green veins) that doesn’t improve with feeding, it might be an iron lockout due to high pH. If soil is very acidic (lots of pine needles, etc.), wood ash or lime might be necessary in addition to compost. Conversely, if soil is alkaline (common in parts of the Western U.S.), adding sulfur or lots of compost can help make nutrients available. You don’t need to be a soil scientist, but be aware that extreme pH can make fertilizing seem ineffective. Most veggies like pH 6-7.5. Use your organic amendments that can tweak pH (e.g., eggshells/ash to raise pH, pine needles/peat or elemental sulfur to lower pH, if needed). - Not Adjusting for Containers vs. Ground:
Treating container plants like in-ground can cause issues. Pots don’t have the reservoir of soil to draw from, so they can exhaust nutrients quicker. Also, some amendments (like big clods of manure) are not suitable for containers as they can emit ammonia in a confined root space. Avoidance: Use more finely processed or mild amendments in pots (compost, castings, balanced organic granular fertilizers). Feed more frequently but lightly. And refresh the potting mix annually as mentioned. - Applying Fertilizer to Foliage Indiscriminately:
If you pour manure tea or fish emulsion over all the leaves on a sunny day, you might cause leaf scorch or invite disease if leaves stay wet too long. Or using something like molasses spray (some use it to feed microbes) on leaves could encourage mold if done excessively. Avoidance: Target soil mostly. If foliar feeding, do it properly (time of day, correct dilution). Also, rinse edible leaves if they got fertilizer on them (especially any manures or fish products). - Neglecting to Water Properly:
Fertilizer and water go hand in hand. A big mistake is thinking fertilizing will fix a plant that’s actually just thirsty or water-stressed (or vice versa). Overwatering can also wash nutrients out. Avoidance: Keep a consistent watering schedule. Organic-rich soil holds water better, but you still need to ensure plants get regular moisture. Many nutrient “deficiency” symptoms are exacerbated by irregular watering (e.g., blossom-end rot in tomato is largely a watering/calcium transport issue, not just soil Ca). So a key part of fertilizing routine is also watering routine.
By staying aware of these potential mistakes, you’ll become more intuitive about what your garden needs. And remember – plants are forgiving. If something goes wrong, they often bounce back once you correct the issue. With organic methods, you rarely kill a plant outright from fertilizing (as can happen with a big dose of synthetics), so you usually have time to adjust course.
Seasonal Care and Low-Maintenance Routines
One of the goals for busy gardeners is to develop a routine that doesn’t require constant fussing. By syncing your fertilization with the seasons and using slow-release methods, you can save time and effort. Let’s break down a simple seasonal approach and some low-maintenance tips:
Spring – Start Strong
- Soil Preparation: In early spring, as soon as your soil can be worked, incorporate your compost or aged manure. This sets the stage for the whole growing season. If you do only one big fertilization in the year, spring is often it. Think of it as “feeding the soil” so it can feed the plants for months. Add any other amendments your soil needs (based on past observation or tests) – e.g., a bit of bone meal for phosphorus if you noticed poor fruiting last year, or some wood ash if your soil is a bit acidic and you have low potassium.
- Planting Time: When you plant, give each plant a little welcome package: a scoop of worm castings or a sprinkle of organic fertilizer in each transplant hole, or mix some extra compost into the row for seeds. This ensures young plants have access to nutrients in their critical early growth phase.
- Cool Weather Crops: If you’re planting early spring crops like peas, greens, radishes, these typically don’t need heavy feeding if soil is moderately rich. They have short seasons. Just ensure moderate fertility (which your spring soil prep will cover). Over-fertilizing leafy greens can cause them to bolt (go to seed) sooner, so keep it mild for them.
- Mulching: Once seedlings are up and weather warms, add organic mulch (straw, chopped leaves, even a layer of compost as mulch). Mulch conserves moisture and as it breaks down, it feeds soil life, effectively becoming slow-release fertilizer through the season. It also saves you time weeding and watering – big win for low maintenance.
Summer – Feed Continuously (but Efficiently)
- Early Summer Boost: By late spring/early summer, many plants are in full growth or starting to fruit. This is a good time for a side-dress of compost/manure or a round of compost tea. Heavy feeders (corn, tomatoes, squash) especially will appreciate it as they enter their peak growth. This might be the one planned mid-season feeding you do.
- Targeted Liquid Feeding: Instead of fertilizing everything on a strict schedule, let the plants tell you. During summer, keep an eye out for any pale leaves or slow growth – give those a drink of compost tea or diluted fish emulsion. For instance, container cherry tomatoes might start looking light green after producing fruit for a while – a quick liquid feed perks them up.
- Successive Plantings: If you plant a second crop in mid-summer after an early one finishes (e.g., replanting lettuce or sowing beans after harvesting spring spinach), remember that second crop is going into soil that’s already had one crop pull nutrients from it. So before planting the new seeds/seedlings, work in a bit more compost or a handful of organic fertilizer to replenish. It doesn’t have to be as much as spring, but don’t start a second round in depleted soil.
- Foliar Feed/Protection: If you live in a region where fungal diseases (like powdery mildew, blight) are common in summer, using a compost tea foliar spray occasionally might help coat leaves with good microbes. It’s not a foolproof shield, but some gardeners find it reduces disease severity. It doubles as a light feed.
- Hydration = Nutrition: Summer heat means lots of watering, which also means nutrients can leach faster. Mulch helps, and using organic fertilizers means nutrients are in organic forms that don’t all wash out with one rain. Still, if you get heavy rains or you’re watering daily for containers, consider adding a little liquid feed every couple of weeks to containers to compensate for any leaching.
Fall – Replenish and Recycle
- Harvest Time: As crops finish, pull out spent plants and compost them (if disease-free). They will become part of next year’s fertilizer. For any remaining root pieces, you can leave some to rot in the ground – adds organic matter.
- Fall Soil Building: Fall is an ideal time to add materials that need time to break down. Layer on fallen leaves, sprinkle grass clippings, and definitely spread any remaining compost (even if slightly unfinished, it can break down over winter). You might trench compost kitchen scraps in empty beds. You can even bury raw manure in fall in areas you’ll plant in spring – it will age in situ (just don’t plant immediately after).
- Cover Crops: If inclined, sow a cover crop in early fall so it establishes before winter. Even a quick one like buckwheat (if you have about 6-8 weeks before frost) can be turned in before winter. Or winter rye that grows a bit in fall, then again in spring before you till it in.
- Garlic or Overwintering Plants: If you plant garlic in fall or have perennial veggies (asparagus, rhubarb) or a fall crop of something, top-dress those with compost at planting (garlic) or after they die back (asparagus) to enrich their root zone. Garlic especially benefits from some compost and bone meal in fall to fuel its root growth before the ground freezes.
- Soil Testing: Fall is a good time to do a soil test (if you plan to) because you can then apply any needed mineral amendments (lime, sulfur, rock phosphate, etc.) in fall so they adjust over winter.
By doing this fall work, you set yourself up for an easier spring. Some gardeners even do a method called lasagna gardening in fall – layers of compostables (leaves, straw, manure, etc.) on the garden which decompose into rich soil by spring.
Winter – Mostly Rest (for the garden and you!)
- Indoor Gardening: If you have indoor plants or an indoor winter veggie setup, maintain those with modest feeding as needed (since winter growth may be slower under less light). Watch for any pest outbreaks since winter indoor conditions can favor pests; healthy fertilization can keep plants resilient.
- Compost Pile: Your outdoor compost may slow down in cold weather, but you can keep adding to it. You might insulate it with a tarp or extra leaves to keep it somewhat active. Or, start a worm bin indoors to keep composting through winter if your outdoor pile is frozen.
- Planning: Use the downtime to plan crop rotations and what you’ll need. Maybe stockpile some materials: for example, if you have access to manure in winter, you could pile it up now so it’s ready to go by spring. Or collect wood ash from your fireplace over winter, store it in a dry bucket for spring use (keeping in mind how much you’ll need based on soil needs).
Low-Maintenance Routine Tips
Finally, here are some habits and strategies to make organic fertilizing almost effortless over time:
- Continuous Composting: Keep a system going to recycle waste. A simple rotation: have two compost bins – one you add to this year, and one that’s finishing from last year. Each year, use the finished one and then switch. This way you always have compost each season with minimal management.
- Worm Bin for Kitchen Scraps: If you’re super busy, a worm bin can be easier than tending an outdoor pile. The worms happily eat your daily banana peels and coffee grounds, and you harvest castings maybe a couple times a year. Less work, constant output.
- Mulch, Mulch, Mulch: Mulching with organic materials is the ultimate slow-release fertilizer strategy. You lay it once and it feeds all season. It also cuts down watering and weeds (less work!). For example, mulch your tomatoes with straw or untreated grass clippings – they’ll slowly break down and add nitrogen and organic matter. At end of season, the remnants can be turned in.
- Integrated Feeding with Planting: Make it a rule: whenever you plant something new, you add compost or organic fertilizer. This one-to-one habit ensures no crop goes hungry. E.g., when you replace spent beans with a new lettuce seeding, scratch in a handful of compost. It becomes second nature.
- Crop Rotation with Nutrient Builders: Follow heavy feeders with light feeders or soil improvers. For instance, after a heavy-feeding crop (like cabbage), plant a legume cover crop or a bean crop in that spot next to help naturally add nitrogen back. This reduces how much external fertilizer you need to add.
- Simplify Liquid Feeding: If you find brewing teas cumbersome regularly, you can simplify: perhaps brew a big batch of compost tea and freeze some in plastic jugs. Then thaw as needed for later use (some microbes will die, but nutrients remain). Or use a hose-end sprayer attachment that siphons liquid from a bucket while you water – you could put diluted fish/seaweed emulsion in a bucket and as you water the garden, it automatically mixes in fertilizer. This can save time walking around with a watering can.
- Use Perennials and N-fixers: Incorporate a few plants that help fertilize the soil. For instance, some people plant clover in pathways or as living mulch – you can periodically chop and drop it, effectively fertilizing in place. Comfrey is a perennial often grown just to chop its leaves for compost or comfrey tea (it mines nutrients from deep soil). These are like having little fertilizer factories in the garden.
- Schedule Key Tasks: Mark your calendar for a few key fertilizing events – e.g., “Earth Day – side-dress tomatoes with compost”, “July 1st – midseason feed”, “October – spread leaves/compost on beds”. If you do at least those, you’ll cover the bases. Anything extra is bonus.
- Store Amendments Accessibly: Keep your bags of bone meal, kelp meal, or buckets of ash, etc., in a handy dry location. When things are out of sight, they’re out of mind. If you have your organic fertilizer mix right by the garden gate, you’re more likely to toss a handful on when you have a spare minute.
- Observe and Adjust Yearly: Every garden is unique. Over a couple seasons, note what works well. Maybe your soil is naturally high in potassium (some clay soils are), and you notice adding banana peel tea didn’t change much but adding nitrogen did. So focus on what your soil needs. Once your soil reaches a nice fertile equilibrium, maintaining it might just mean annual compost and perhaps a specific amendment for something it lacks. Simplicity is the end goal – a rich soil that mostly takes care of plant needs with minimal intervention.
By employing these strategies, you can truly have a low-maintenance fertilization routine. Some seasoned organic gardeners get to a point where they hardly think about “fertilizing” – they just think about adding organic matter and maybe some specific mineral tweaks, and the garden thrives. Your busy schedule can absolutely mesh with organic gardening; it’s all about working with nature’s slow, efficient cycles rather than against them.
Conclusion
Starting an organic fertilization regimen for your small vegetable garden is a journey that rewards you – and your plants – many times over. In this guide, we’ve covered a lot of ground: from the rich humus of compost to the wiggle-powered magic of worm castings, from banana peel potions to keeping those eggshells and coffee grounds in the loop. By now, you should feel equipped with knowledge and confidence to feed your garden naturally.
Remember, you don’t need to apply every method at once. Begin with one or two that feel most accessible. Maybe start a compost pile or worm bin and try a batch of compost tea. Observe how your garden responds. Gardening is as much an art as a science – each season you’ll learn more about what your plants and soil love best.
Benefits Recap: By choosing organic fertilizers, you’re not just feeding plants, you’re building healthy soil teeming with life. You’re reducing waste by turning kitchen scraps and yard waste into plant food, keeping chemicals out of your homegrown food, and creating a safer environment for pollinators, pets, and family. Over time, you’ll likely find your soil’s texture and productivity improving, your vegetables tasting great, and pest/disease issues possibly diminishing as the ecosystem balances.
Avoiding Pitfalls: We highlighted common mistakes so you can skip them. Go easy on any one thing, give organics time to work, and keep that compost balanced. If something doesn’t go perfectly, don’t be discouraged – even seasoned gardeners have off days (or seasons). Plants are forgiving and resilient.
Stay Curious and Flexible: Organic gardening has a wonderful way of connecting you with nature’s rhythms. You might find yourself paying more attention to weather patterns (planning your fertilizer applications around rains), noticing the return of earthworms in your soil (a sign of health from your organic matter additions), or experimenting with that weird stinging nettle tea your grandma swears by. Embrace the experimentation! Use reputable resources (like extension services or organic gardening groups) when you need guidance – there’s always more to learn, which is part of the fun.
Finally, enjoy the process. There’s a special satisfaction in knowing that you brewed that bucket of compost tea or nurtured those worms that gave you “black gold” castings. Each tomato or basil leaf you harvest carries the care you put into the soil. With a simple, natural approach to fertilizing, you’re not just growing a garden – you’re cultivating a little ecosystem and a sustainable routine that can keep feeding you and your plants for years to come. Check out my other posts, as well!