If you want to learn more about how to build a simple chicken coop you have to take a close look over the free plans in the article. I have designed these easy chicken coop plans so you can grow chickens and have fresh eggs every single day. This is a basic coop that you can make using common materials and a few power tools. Moreover, it features a back nesting box so you can harvest the eggs daily with ease. Another useful feature is that you can just lift the roof up and clean the inside of the house.
If you want to get the job done in a professional manner, we recommend you to plan everything with attention, as to prevent costly mistakes and to build a professional garden project. Invest in high quality materials, such as cedar, pine or redwood, as the bench will be exposed to all kinds of weather. Apply a few coats of paint over the components, to enhance their appearance and to protect them from bad weather.
Easy Chicken Coop – Free DIY Plans

Building a chicken coop
Materials
- A – 2 pieces of 2×2 lumber – 72″ long, 3 pieces – 45″ long, 9 pieces – 8″ long, 12 pieces – 11 3/8″ long BASE
- B – 1 piece of 3/4″ plywood – 48″x72″ long FLOOR
- C – 2 pieces of 2×2 lumber – 72″ long, 3 pieces – 21″ long 2xSIDE WALL
- D – 4 pieces of 2×2 lumber – 45″ long FRONT & BACK WALL
- E – 1 piece of 2×2 lumber – 72″ long, 8 pieces – 32 1/2″ long RAFTERS
- F – 2 pieces of 1/2″ plywood – 48″x48″ long, 2 pieces – 24″x73 1/2″ long WALL PANELS
- G – 1 piece of 3/4″ plywood – 38 3/4″x81 1/2″ long, 1 piece – 38″x81 1/2 long ROOF
- H – 2 pieces of 1×6 lumber – 26″ long, 5 pieces of 1×2 lumber – 11″ long RAMP
- 11 pieces of 2×2 lumber – 12′
- 3 pieces of 3/4″ plywood – 4’x8′
- 2 pieces of 1/2″ plywood – 4’x8′
- 1 piece of 1×6 lumber – 6′
- 1 piece of 1×2 lumber – 6′
- 1 5/8″ screws
- hinges
- latch
- 2 1/2″ screws
- 3 1/2″ screws
- wood glue, stain/paint
- chicken feeder
Tools
- Hammer, Tape measure, Carpentry square
- Miter saw, Drill machinery, Screwdriver, Sander, Router
- Safety Gloves, Safety Glasses, Respiratory Mask
Time
- One week
Simple Chicken Coop – Video
STEP 1:
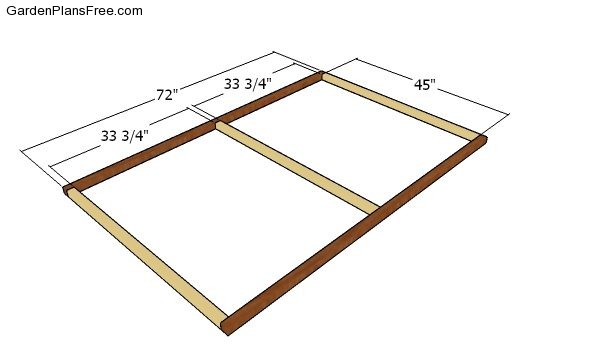
Building the base frame
The first step of the project is to build the frame for the base of the chicken coop. Cut the components at the proper dimensions, as shown in the diagram. Align the edges flush, drill pilot holes and insert 2 1/2″ screws to assemble everything tightly. Make sure the corners are square.
STEP 2:
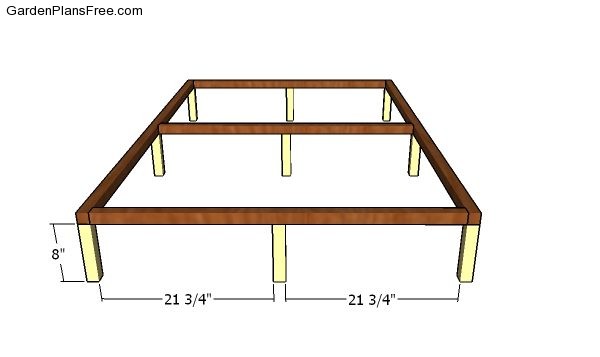
Fitting the legs
Select the location for the chicken coop as the structure will get heavier as you add more components. Attach the 2×2 legs to the base frame, as shown in the diagram. Drill pocket holes at both eds and insert 2 1/2″ screws to assemble everything together.
STEP 3:
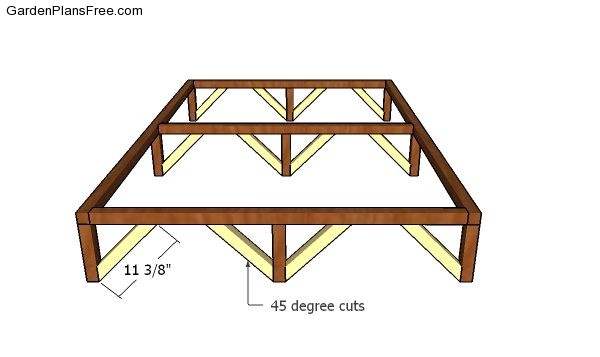
Fitting the braces to the frame
Next, use braces to reinforce the rigidity of the base frame. Use a miter saw to make the 45 degree cuts at both ends of the braces and secure them into place with 2 1/2″ screws. Drill pilot holes to prevent the wood from splitting. Make sure the corners are square.
STEP 4:
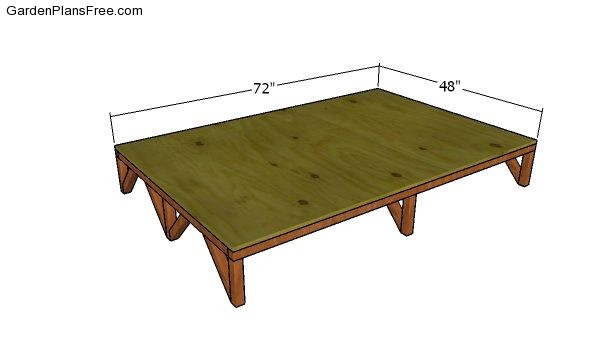
Fitting the floor sheet
Attach the 3/4″ plywood sheet to the base. Align the edges with attention and insert 1 5/8″ screws, every 8″ along the framing.
STEP 5:
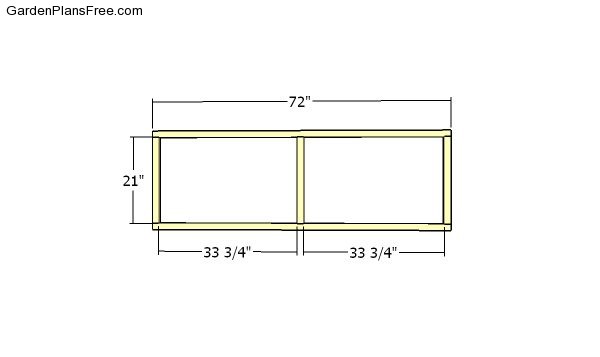
Side wall frames
Build the side wall frames from 2×2 lumber. Cut the components as shown in the free plans. Drill pilot holes through the plates and insert 2 1/2″ screws into the studs. Make sure the corners are square and align the edges flush.
STEP 6:
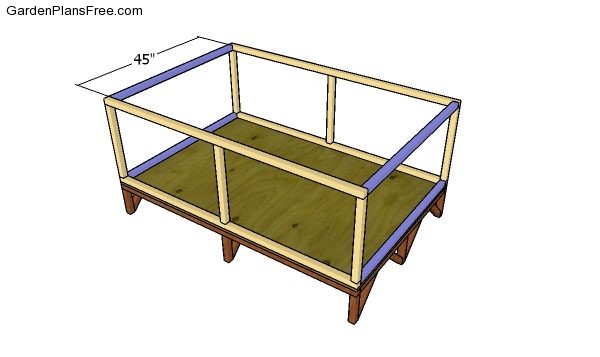
Assembling the frame of the chicken coop
Fit the side walls to the base and align the edges flush. Drill pilot holes through the base and insert 3 1/2″ screws. Next, attach the plates to the front and back of the chicken coop. Drill pilot holes and insert 2 1/2″ screws. Check if the corners are square before inserting the screws.
STEP 7:
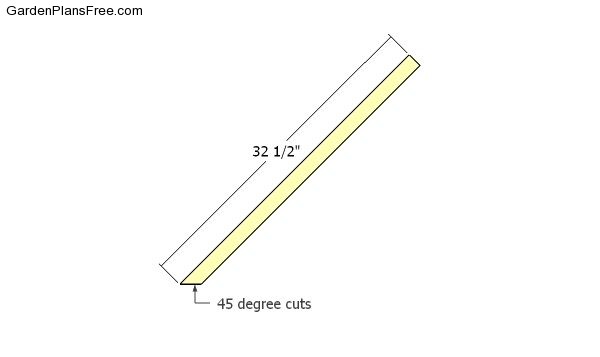
Rafters
Use 2×2 lumber for the rafters. Use a miter saw to cut one end at 45 degrees.
STEP 8:
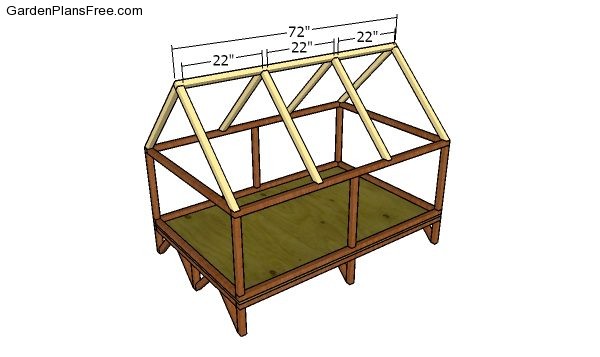
Fitting the rafters
Fit the rafters to the top of the chicken coop, as shown in the plans. Attach the ridge beam with 2 1/2″ screws. Secure the rafters to the top plates with 2 1/2″ screws/
STEP 9:
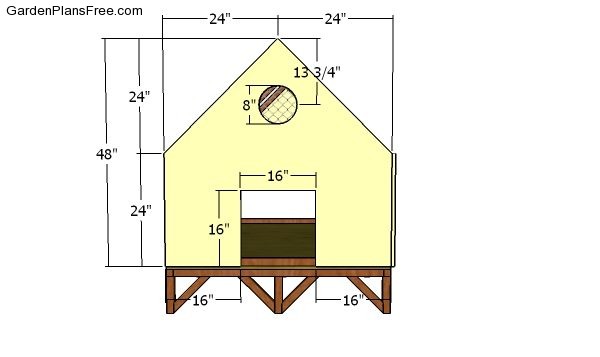
Front wall panel
Use 1/2″ plywood for the wall panels. Make a few cuts to the front wall for the door opening and for air ventilation. Attach the panel to the front of the coop, align the edges flush and insert 1 5/8″ screws to secure it into place.
STEP 10:
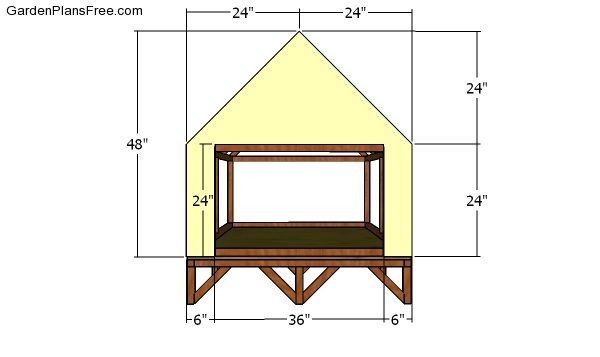
Back wall
Use 1/2″ plywood for the back wall. Mark the cut lines and then cut out the opening for the nesting box with a circular saw. Use 1 5/8″ screws to secure the panel into place tightly.
STEP 11:
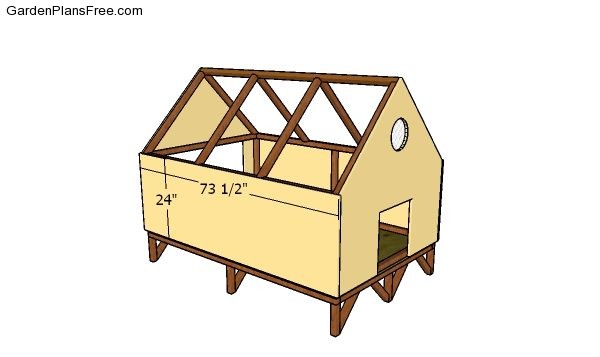
Fitting the side walls
Fit the 1/2″ panels to the sides of the chicken coop. Align the edges with attention and use 1 5/8″ screws to secure it into place.
STEP 12:
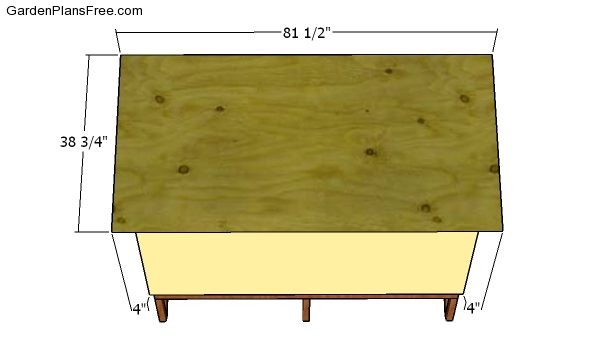
Fitting the roof sheet
Fit the 3/4″ plywood sheet to the rafters. Center the panel into place so it has 4″ overhangs on both sides. Use 1 5/8″ screws to secure the panel along the rafters, every 8″.
STEP 13:
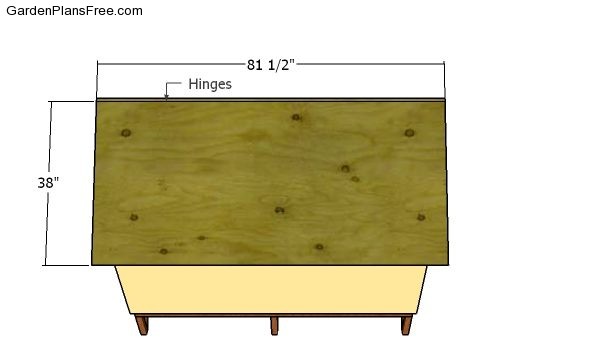
Fitting the roof lid
Fit the other panel to the roof of the chicken. Use hinges to secure the panel into place. In this manner, you can use the roof as a lid and have access to the interior of the coop, for cleaning purposes.
STEP 14:
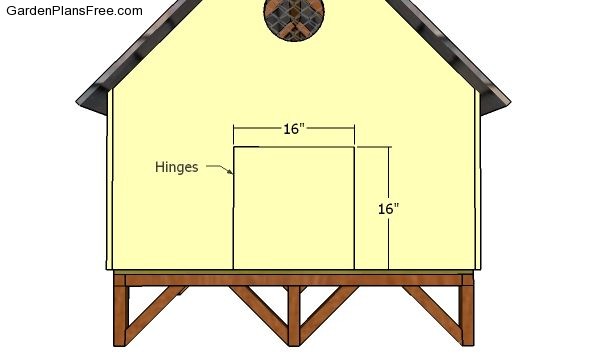
Fitting the door
Attach the door to the front opening and secure it into place with hinges. Add a latch to keep the door locked into place tightly.
STEP 15:
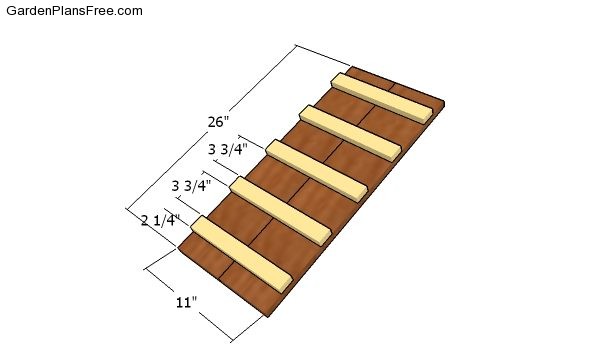
Building the ladder
Assembling the ramp is a straight forward job. Just use two 1×6 boards and 1×2 lumber for the steps. Use 1 1/2″ nails to assemble everything together.
STEP 16:
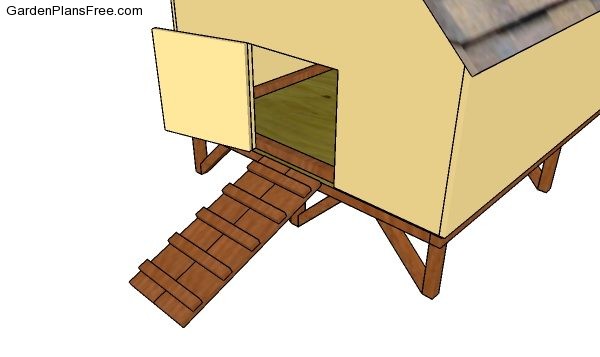
Fitting the ladder to the front
Fit the ramp to the front of the chicken coop. Use 2 1/2″ screws to secure the ramp to the frame of the chicken coop.
STEP 17:
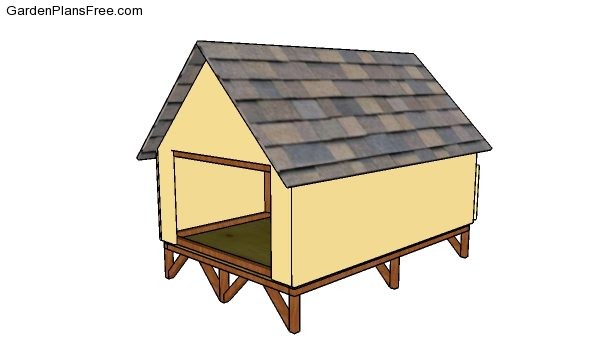
Easy chicken coop plans – back view
See my other chicken coop plans HERE.
STEP 18:
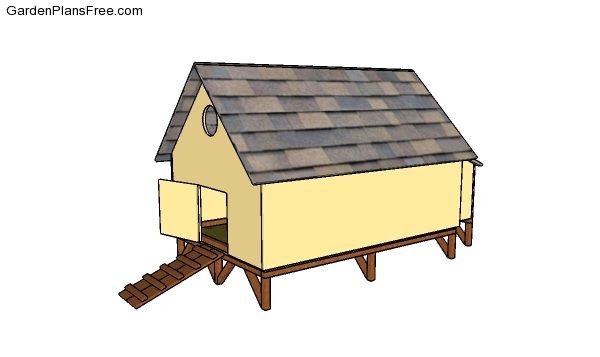
Easy chicken coop plans
In order to waterproof the coop, you have to cover the roof with tar paper. Make sure the strips of roofing felt overlap at least 2-3″ and staple them to the plywood sheets every 8″. Continue the project by installing the asphalt shingles. Place the starting course at the bottom of the roof, before fitting the rest of the shingles. I have a cute 4×4 chicken coop plan that is also worth taking a look.
After installing the roof and the asphalt shingles, there are still a few finishing touches you have to take care of. First of all, you could fill the holes and gaps with wood filler and smooth the surface with medium-grit sandpaper. Check out PART 2 of the project to learn how to build the nesting box. You can always save the plans as PDF or Print them using the floating widget on the left side of the screen (working only on PC or laptop).


