If you want to build a small gate with a rustic design for your garden, you should pay attention to these instructions. Nevertheless, first of all you should analyze you options, as there are so many garden gate plans to choose from. If you like the rustic design of our gate, you could adjust its size, as to fit your needs, while using the same woodworking techniques described in this article.
Secure the posts into concrete before attaching the garden gate. Dig 3-4′ deep holes and set the posts, using 2×4 braces. Afterwards, fill the holes with concrete and let it dry out for several days. Before securing the posts temporarily with braces, you should use a spirit level to check if they are plumb. In addition, fit a straight edge over the posts to see if they are at the same level.
Building a garden gate

Building a garden gate
Materials
- 1 – 2 pieces of 4×4 lumber – 84″ long POSTS
- 2 – 2 pieces of 2×3 – 35 1/2″, 1 piece of 2×3 – 47 1/2”, 1 piece of 2×3 – 42 1/2” FRAME
- 3 – 11 pieces of 1×3 lumber – 48″ long SLATS
- 4 – 4 pieces of 2×6 lumber – 20″ long BEAMS
- 5 – 2 pieces of 2×6 lumber – 78″ long CROSSBEAMS
- 2 pieces of 4×4 lumber – 8 ft
- 2 pieces of 2×3 lumber – 8 ft
- 6 pieces of 1×3 lumber – 8 ft
- 3 pieces of 2×6 lumber – 8 ft
- 2 1/2″ screws
- 1 1/4″ screws
- wood glue, stain/paint
Tools
- Hammer, Tape measure, Carpentry Square
- Miter saw, Drill machinery, Screwdriver, Sander
- Safety Gloves, Safety Glasses, Respiratory Mask
Time
- One Weekend
Garden Gate Plans
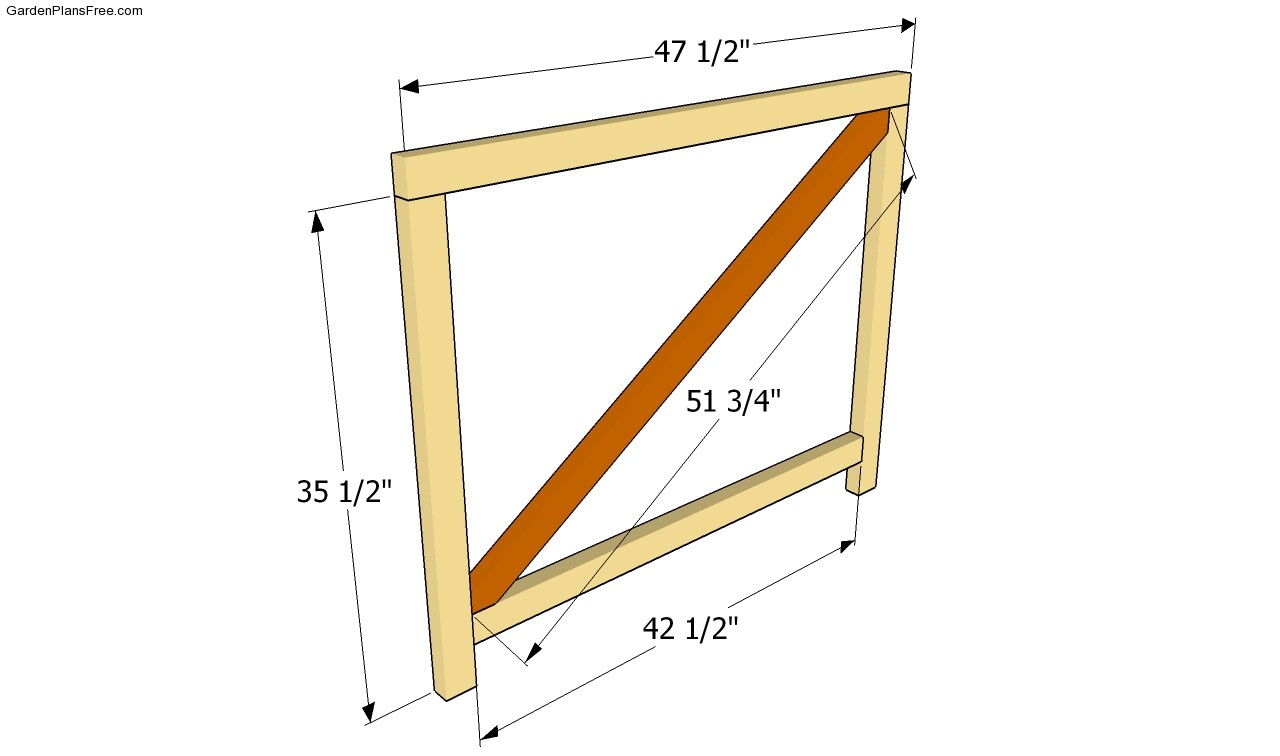
Building the frame of the gate
The first step of the woodworking project is to build the frame of the gate. As you can see in the image, you need to join together 2×3 pieces of lumber. Drill pilot holes trough the components and drive in 3 1/2” galvanized screws, as to prevent the wood from splitting.
PRO TIP: Don’t forget to countersink the head of the screws, before inserting the screws. Check if the corners are right angled and reinforce the frame with the diagonal components.
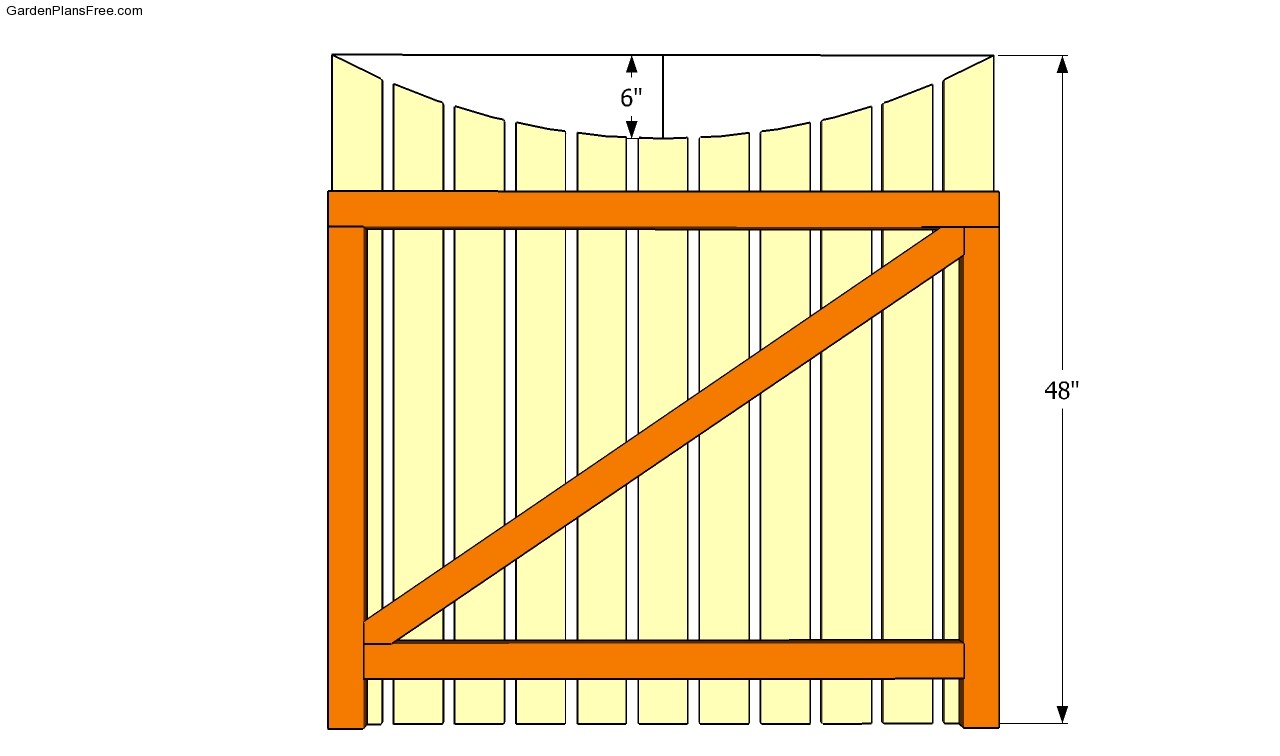
Installing the slats
Next, you need to attach the 1×3 slats to the frame and lock them into place with 1 1/4” screws. Pre-drill the slats at both ends before inserting the screws and make sure they are equally spaced. Mark the curved line on the slats, before getting the job done with a jigsaw. You can adjust the size of the curve, according to your needs and tastes.

Installing the gate
After building the garden gate, you should install it to the posts, as in the image. Make sure the posts are level before securing the gate to the posts with metal hinges. Use a spirit level to check if the gate is plumb and the top horizontal. Add a latch to lock the door whenever is necessary.
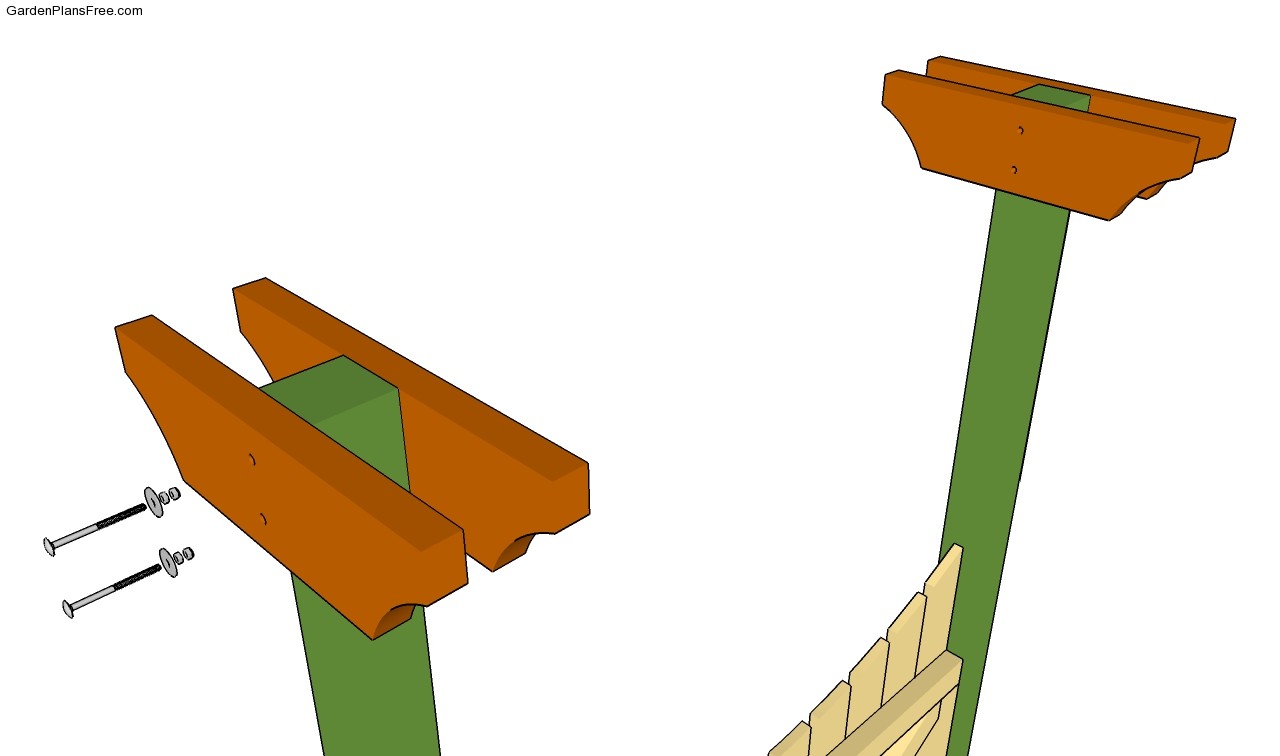
Installing the supoort beams
Although this step is not compulsory, we think that it will add character to your woodworking project. Build the support beams from 2×6 lumber, making sure you cut the ends in a decorative manner. Drill pilot holes both trough the beams and posts, before inserting the 7″ carriage bolts.
PRO TIP: Clamp the beams into place after leveling them. Then, drive pilot holes trough the components and insert the carriage bolts.
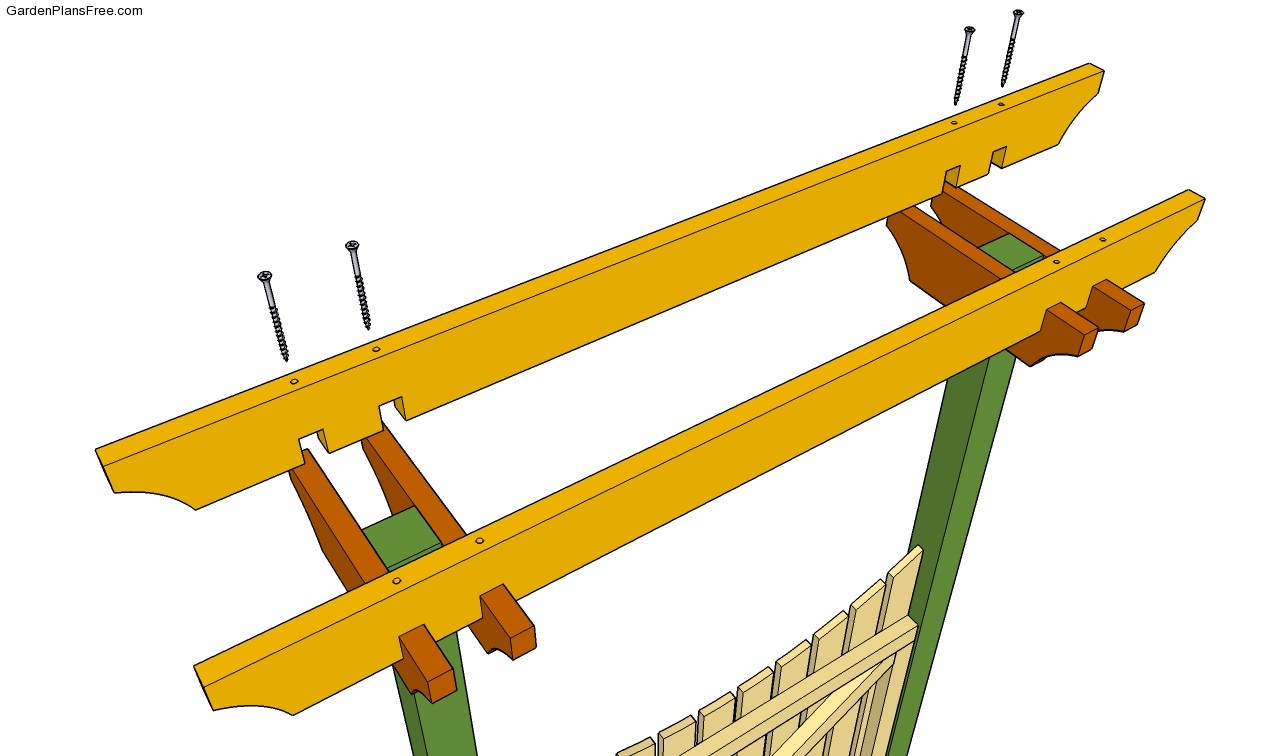
Installing the crossbeams
Next, you need to secure the crossbeams into place, as in the image. After building the wooden components, you should drill pilot holes trough the crossbeams and drive 3 1/2” wood screws into the support beams. Align the components properly, before securing them into place with wood screws.
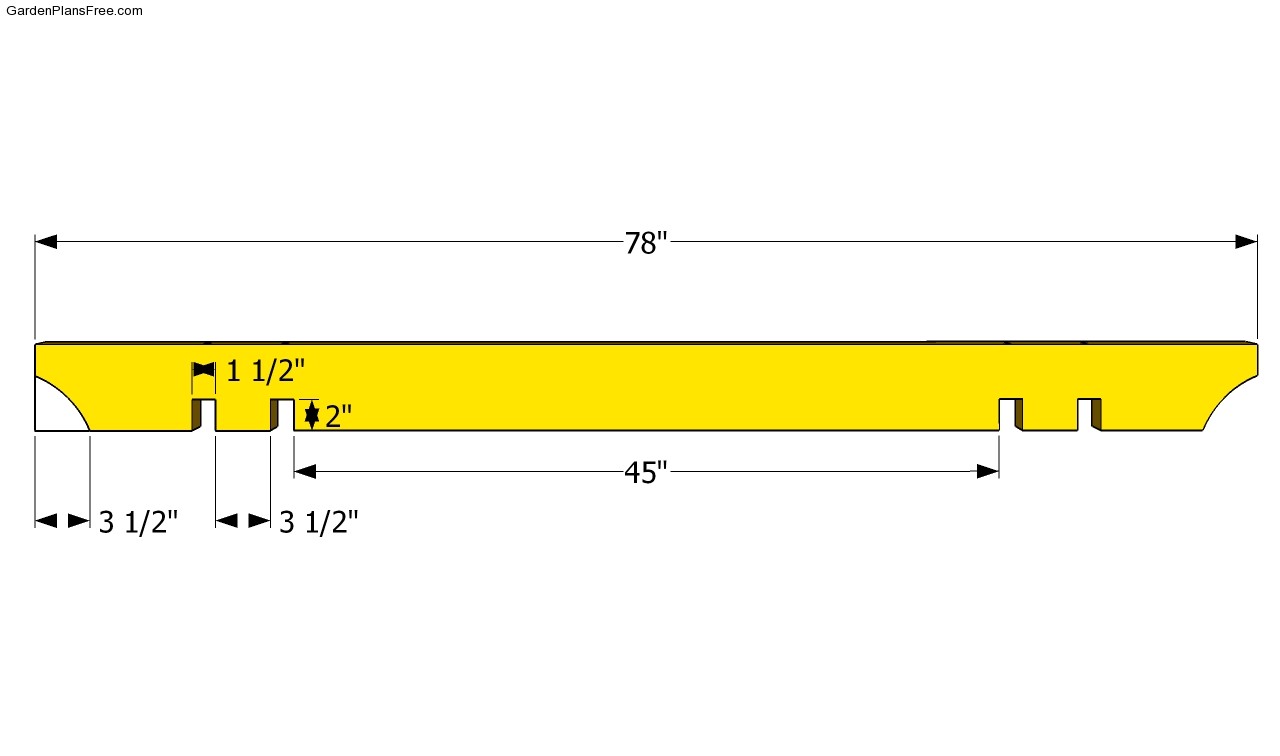
Crossbeam plans
As you can see in the image, you need to cut several notches in the crossbeams. In this way, the shade elements will fit properly over the support beams and make your gate look nice and neat.

Garden gate plans
Last but not least, you should take care of the final touches. Therefore, fill the holes with wood filler and let it dry out for several hours, before smoothing the surface with 120-grit sandpaper. Check if the door opens properly and adjust the hinges if necessary.
PRO TIP: Protect the wooden components from decay by applying several coats of paint. In addition, if you choose the right color, you will enhance the look of your garden.
This diy project was about garden gate plans. If you have enjoyed the free project, we recommend you to LIKE and SHARE it with your friends, by using the social media widgets.

1 comment
I am interested in your garden gate plan, but see no way to download or print the plan. If there is fee, I’m willing to pay, but it is NOT clear how to do so.