If you want to learn more about how to build a 16×16 pavilion you have to take a close look over the free plans in the article. This square outdoor pavilion has a simple structure and it is super easy to build, if you have some tools and know the basic woodworking techniques. You will need at least one more person to assist you and to help you with stepping the posts. More garden projects HERE.
If you want to get the job done in a professional manner, we recommend you to plan everything with attention, as to prevent costly mistakes and to build a professional garden bench. Invest in high quality materials, such as cedar, pine or redwood, as the structure will be exposed to all kinds of weather. Apply a few coats of paint over the components, to enhance their appearance and to protect them from bad weather.
16×16 Pavilion – Free DIY Plans
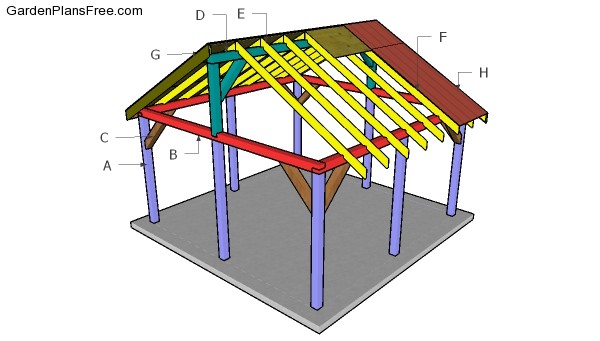
Building a 16×16 pavilion
Materials
- 1 – 8 pieces of 6×6 lumber –10′ long POSTS
- 2 – 4 pieces of 6×6 lumber – 192″ long PLATES
- 3 – 8 pieces of 6×6 lumber – 39 1/4″ long BRACES
- 4 – 2 pieces of 6×6 lumber – 51″ long, 1 piece – 192″ long RIDGE BEAM
- 5 – 18 pieces of 2×6 lumber – 130 3/4″ long RAFTERS
- 6 – 6 pieces of 1/2″ plywood – 48″x96″ long, 4 pieces – 48″x48″ long, 4 pieces – 34 3/4″x96″ long ROOF
- 7 – 4 pieces of 1×8 lumber – 135″ long, 2 pieces – 192″ long TRIMS
- 8 – 400 sq ft of roofing sheets ROOFING
- 8 pieces of 6×6 lumber – 10′
- 5 pieces of 6×6 lumber – 16′
- 6 pieces of 6×6 lumber – 8′
- 18 pieces of 2×6 lumber – 16′
- 10 pieces of 1/2″ plywood – 4’x8′
- 400 sq ft of roofing sheets
- 2 1/2″ screws
- 1 5/8″ screws
- 16 pieces of 8″ screws
- 40 pieces of 5 1/2″ screws
- 2 pieces of post to beam connectors
- 2 pieces T string tie bracket
- wood glue, stain/paint (for base)
Tools
- Hammer, Tape measure, Carpentry square
- Miter saw, Drill machinery, Screwdriver, Sander, Router
- Safety Gloves, Safety Glasses, Respiratory Mask
Time
- One day
STEP 1:
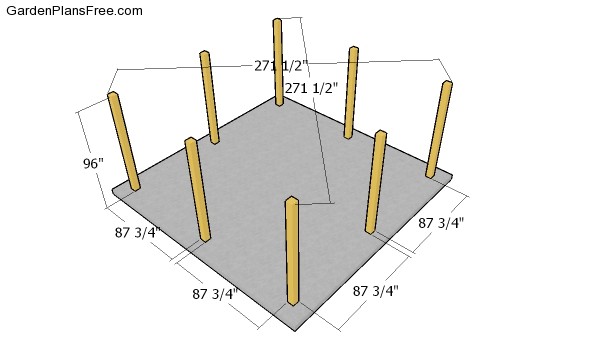
Fitting the 6×6 posts
The first step of the project is to layout the posts for the large pavilion. Use batter boards and string to determine the location for the posts. Apply the 3-4-5 rule to all corners and measure the diagonals. Make adjustments until the diagonals are equal.
STEP 2:
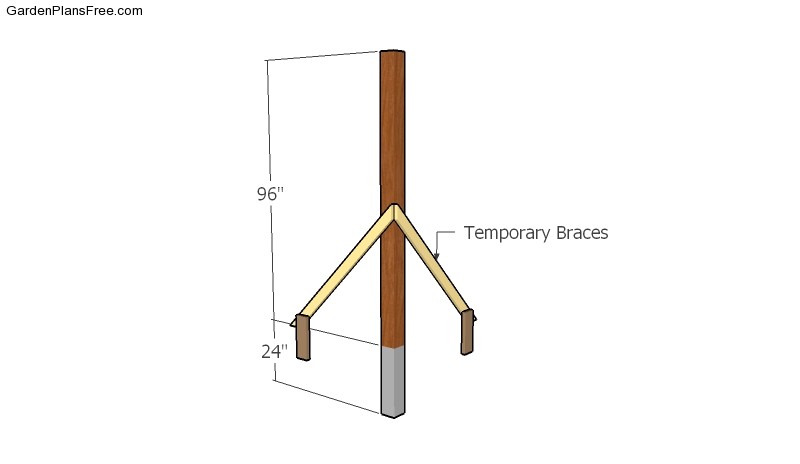
Fitting the posts
Drill 2-3 ft deep holes, 16″ in diameter. You can set the posts in concrete, or you can go with post anchors. Just read the local codes and take the best decision for your local conditions. Plumb the posts with a spirit level and lock them into place with temporarily with braces. Once the concrete dries out, you can remove the braces and continue the project. Check if the top of the posts are level one with another. Use a circular saw to cut the top of the 6×6 posts, if needed.
STEP 3:
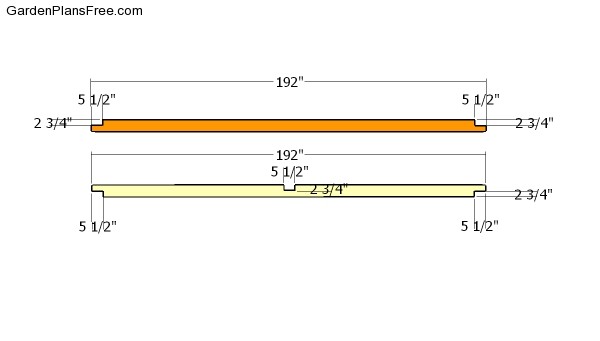
Plates
Use 6×6 lumber for the plates. Make the notches to the beams, as shown in the diagram. Make parallel cuts inside the notches and then clean them out with a hammer and a chisel.
STEP 4:
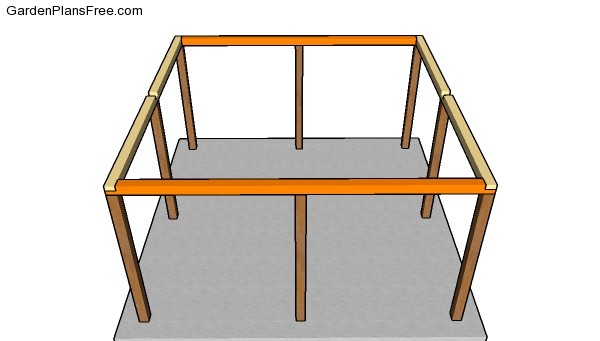
Fitting the top plates
Fill the plates to the top of the posts. Align the edges with, drill pilot holes and insert 8″ screws to lock them into place tightly. Use at least 2 screws for each joint.
STEP 5:
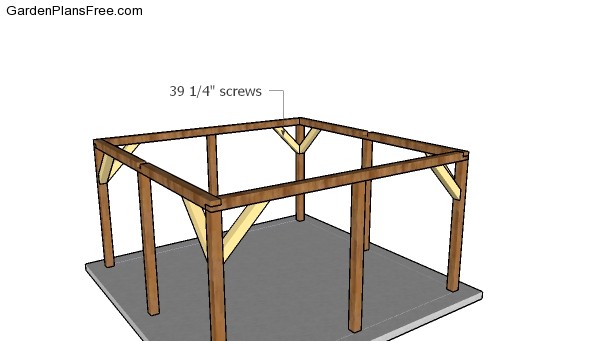
Fitting the braces
Use 6×6 lumber for the diagonal braces. Make 45 degree cuts at both ends. Fit the braces to the frame of the pavilion, drill pilot holes and insert 5 1/2″ screws. Use 2″ screws for each joint.
STEP 6:
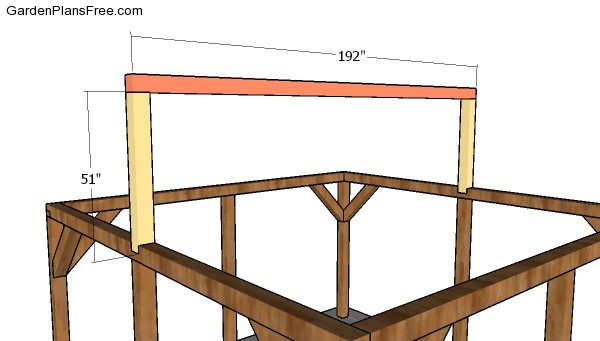
Fitting the top ridge
Fit the ridge supports to the front and back of the pavilion. Plumb the posts with a spirit level. Use T brackets and 2 1/2″ structural screws to lock the support into place tightly. Fit the ridge beam to the supports and lock them together with post to beam connectors.
STEP 7:
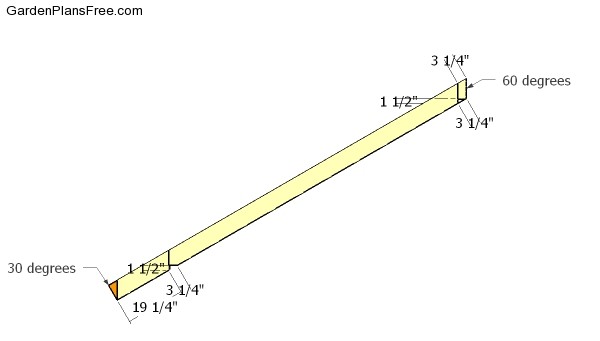
Rafters
Use 2×6 lumber for the rafters. Make 30 degree cuts at both ends of the beams. Make the notches, as show in the diagram, so you can fit them to the frame properly.
STEP 8:
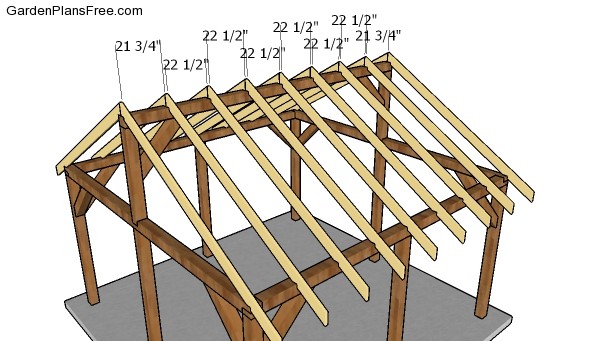
Fitting the rafters
Fit the rafters every 24″ on center. Use rafter ties and 1 1/2″ structural screws to lock them into place tightly.
STEP 9:
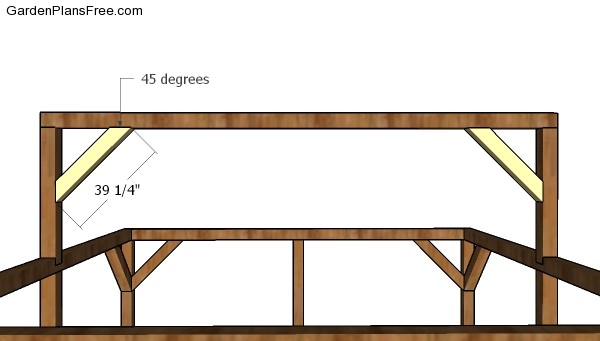
Ridge beam braces
Use 6×6 lumber for the braces. Make 45 degree cuts at both ends of the braces and secure them into place with 5 1/2″ screws.
STEP 10:
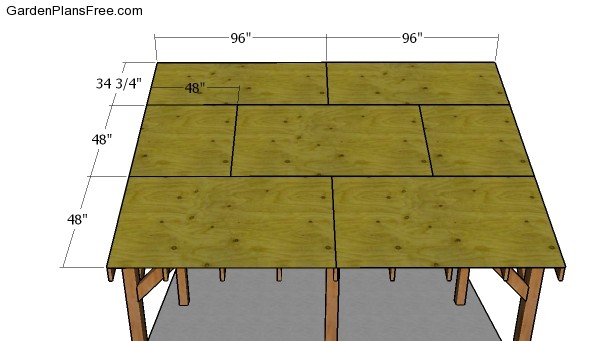
Fitting the roof sheets
Fit the 1/2″ plywood sheets to the top of the pavilion. Align the edges flush and insert 1 5/8″ screws, every 8″ along the framing.
STEP 11:
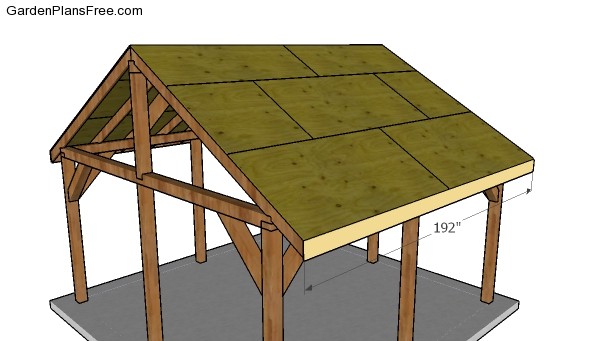
Side roof trims
Use 1×8 lumber for the side roof trims. Use 2″ nails to secure the trims into place tightly.
STEP 12:
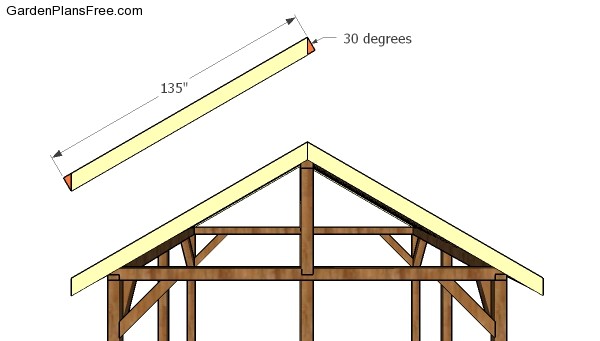
Front and back roof trims
Cut the front and back roof trims for the pavilion, as shown in the diagram. Use 2″ nails to secure the trims into place.
STEP 13:
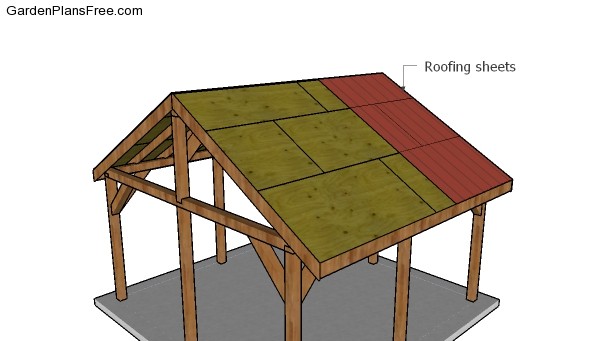
Fitting the roofing sheets
Fit asphalt shingles or metal sheets to the pavilion.
STEP 14:
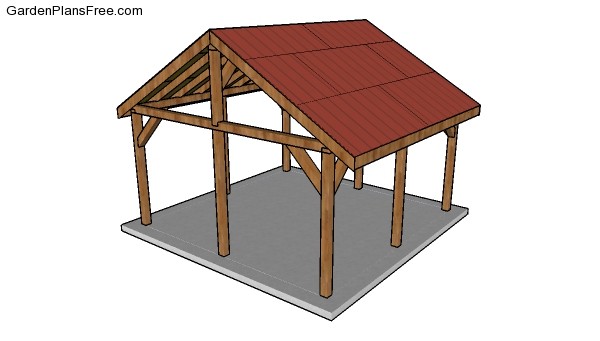
16×16 Outdoor Pavilion Plans
Take care of the finishing touches. Fill the holes with wood putty and smooth the surface with 120-220 grit sandpaper. Apply a few coat of stain over the wood components. Check out my other plans for a 16×20 gable pavilion.
STEP 15:
I recommend you to check if the components are locked into place properly and structure is rigid enough for your garden. Make sure there are no protruding screws or sharp edges. Fill the holes with wood putty and then smooth the surface with sandpaper. Fill the planter with soil and then plant the vegetables. Drill a few holes through the bottom, for drainage.
PRO TIP: Apply several coats of paint or stain over the components, in order to protect them from decay. Check out the rest of the project to learn more about building garden projects.
This diy project was about 16×16 pavilion plans. If you have enjoyed the free project, I recommend you to share it with your friends, by using the social media widgets.

