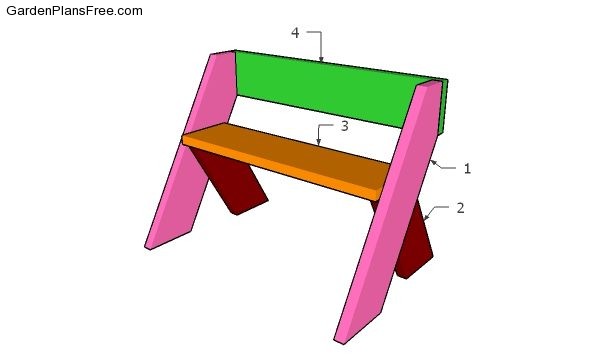
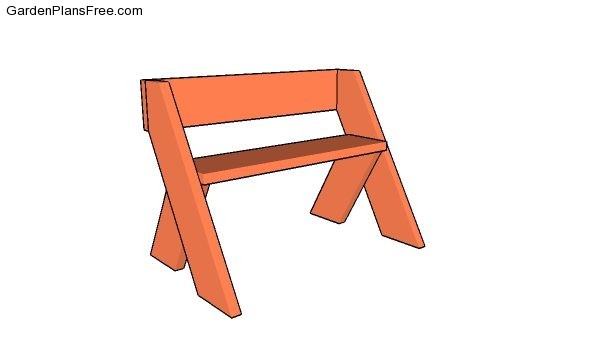
If you want to learn more about leopold bench plans you have to take a close look over the free plans in the article. This is a super simple garden project that anyone can build in one afternoon using just a saw and a drill. If you don’t believe me, please take a look over my instructions and then decide if it’s 100 percent real or not. This 3′ wide bench is sturdy and very simple, but it carries that distinctive design that will make it stand out. You can make a few teaks to my plans so they suit your needs. More furniture projects HERE.
If you want to get the job done in a professional manner, we recommend you to plan everything with attention, as to prevent costly mistakes and to build a professional garden bench. Invest in high quality materials, such as cedar, pine or redwood, as the bench will be exposed to all kinds of weather. Apply a few coats of paint over the components, to enhance their appearance and to protect them from bad weather.
Leopold Bench Plans – Free Online – PDF Download
Building a leopold bench
Materials
- 1 – 2 pieces of 2×8 lumber – 33″ long FRONT LEGS
- 2 – 2 pieces of 2×8 lumber – 18″ long BACK LEGS
- 3 – 2 pieces of 2×10 lumber – 33″ long BEAMS
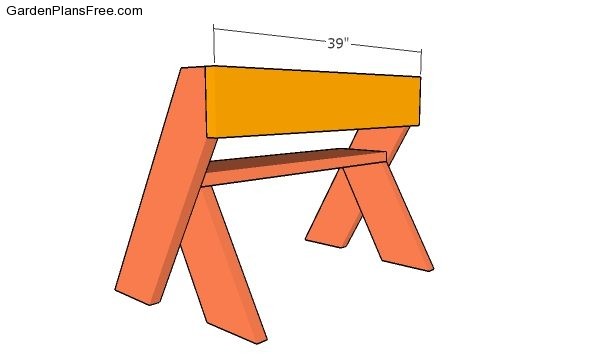
- 4 – 1 piece of 2×8 lumber – 39″ long BRACES
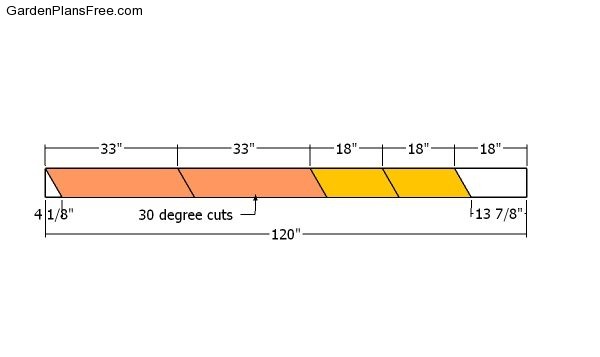
- 1 piece of 2×8 lumber – 10′
- 1 piece of 2×8 lumber – 4′
- 1 piece of 2×10 lumber – 4′
- 2 1/2″ screws
- wood glue, stain/paint
Tools
- Hammer, Tape measure, Carpentry square
- Miter saw, Drill machinery, Screwdriver, Sander, Router
- Safety Gloves, Safety Glasses, Respiratory Mask
Time
- One day
STEP 1: Building the legs for the bench
Building the legs
The first step of the project is to cut the legs for the leopold bench. As you can see in the diagram, you need one 10′ long 2×8 board. Use a circular or a miter saw to make the 30 degree cuts. Smooth the edges with sandpaper after making the cuts.
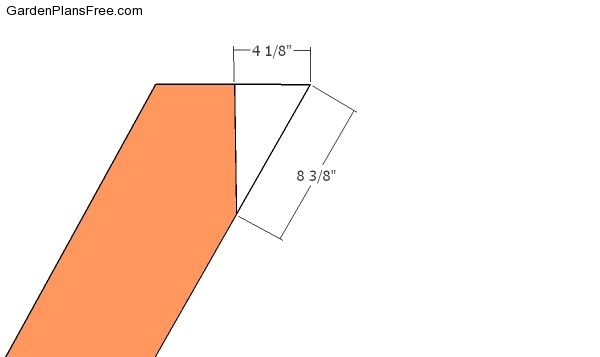
Making the cut to the back leg
Next, you need to make another cut at one end of the 33″ long pieces, so you can attach the backrest slat properly. Mark the cut lines on the board and then get the job done with a circular saw. Smooth the edge with sandpaper.
STEP 2: Assembling the leopold bench
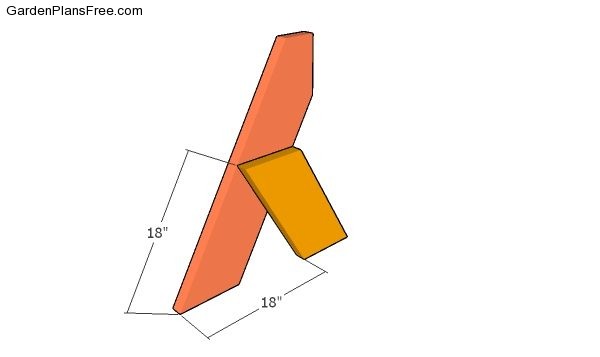
Attaching the back leg
Lay the front legs on a level surface, preferably against a wall or at least a straight edge. Attach the back legs, as shown in the plans. Drill pilot holes through the back legs and insert at least 4 screws into the front legs. Use 2 1/2″ deck screws.

Fitting the seat slat
After you build the 2 sides of the leopold bench you need to attach the 2×10 seat slat. Plumb the sides with a spirit level and then attach the seat with 2 1/2″ deck screws, after drilling pilot holes.
Fitting the backrest
Use 2×8 lumber for the backrest. Cut the backrest at 39″ and then attach it to the leopold bench with 2 1/2″ deck screws. Drill pilot holes to prevent the wood from splitting.
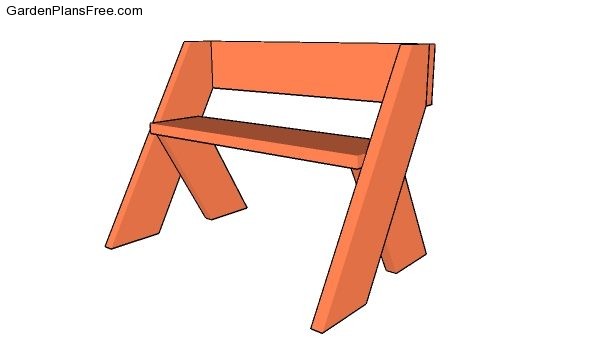
Leopold Bench Plans
Last but not least, you need to take care of the finishing touches. Fill the holes with wood putty and then smooth the surface with 120-220 grit sandpaper. Apply a few coats of paint or stain over the components to protect the garden leopold bench from the elements.
How to build a leopold bench
This small 3′ wide garden bench is a super basic project so if you don’t know how to start building, this would be a great option. In addition, you really need to check my plans for the matching leopold plant stand! You can take a look over my other furniture tutorials HERE.

This diy project was about leopold bench plans. If you have enjoyed the free project, we recommend you to share it with your friends, by using the social media widgets.
2 comments
Kindly send me plan for building a leopold bench. Thanks
Sempre quis fazer esse banco, mais não sei traduzir as medidas do inglês pro português